


[ad_1]
Steps
Part 1
Part 1 of 3:
Getting Started
-
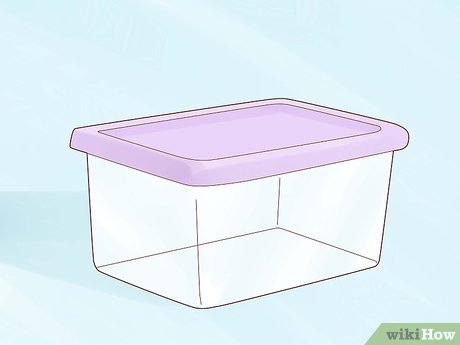
1Buy several large containers or tanks. You will need a container or tank to keep your crickets in. It’s easiest to have at least two containers, one for breeding adults and one for maturing young crickets. Decide how many crickets you want to raise and purchase a container(s) of suitable size.[1]
- You’ll want to make sure that your container or tank is big enough for your cricket colony. One big mistake many people make when raising crickets is not buying a big enough container. When crickets breed in a very confined space, they actually eat one another so that there are fewer crickets to compete for resources. This isn’t something you want. Make sure to buy a big enough tank!
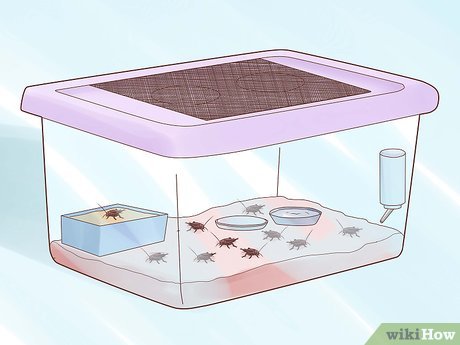
- Purchase a clear tote bin with a secure lid to keep the crickets in. High-sided plastic storage boxes are a common choice. A 14 gallon (53 L) (53 L) container can hold a colony of over 500 crickets with sufficient cardboard or egg crates to climb on. Smooth-surfaced tote bins will reduce the number of escapees.[2]
-
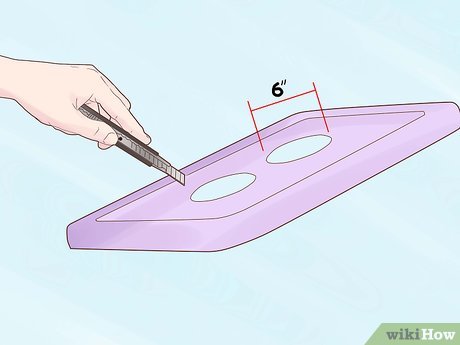 2Make your containers breathable. Cut one or two 6″ holes in lid of the tote bin for ventilation. Cover the top with a metal mosquito screen to prevent escapes, as crickets can chew through plastic screen.[3]
Try a hot glue gun to secure the screen. You can experiment with variable vents if you want additional control over the heat. -
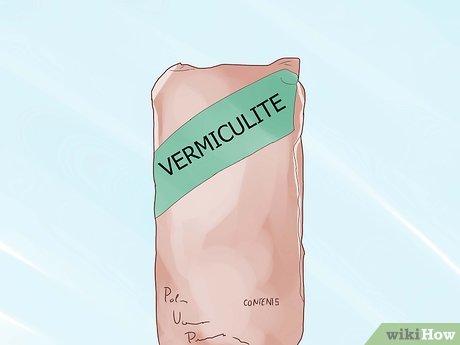 3Layer the floor of the container with vermiculite. Place 1-3″ of vermiculite in the bottom of the tote bin. This will give the crickets something to walk on that will keep the container dry to prevent bacteria and reduce odors. Especially with denser colonies, this will need to be replaced every 1-6 months, so get some extra.
 -
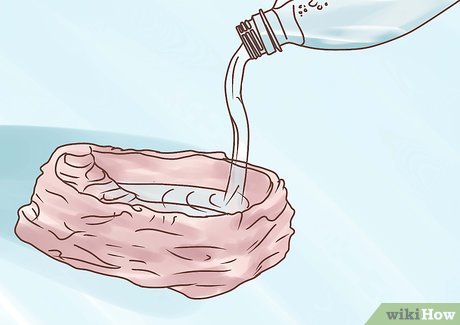
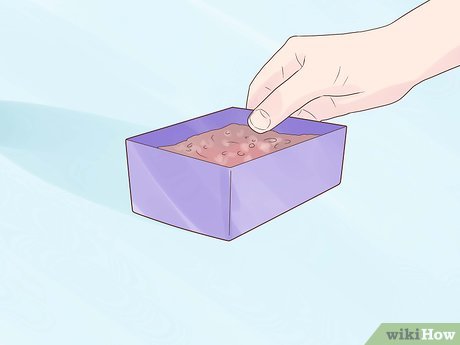 4Place a disposable plastic container filled with very damp loose topsoil in the tote bin. The females need this to lay their eggs in. Try to make it just slightly higher than the vermiculite so the crickets can get in the container. Make sure your topsoil is fertilizer- and pesticide-free.[4]
- You can put screen on the surface of the soil to prevent crickets from digging or eating the eggs. Females can deposit eggs through screen using their egg laying spike (ovipositor).[5]
- You can put screen on the surface of the soil to prevent crickets from digging or eating the eggs. Females can deposit eggs through screen using their egg laying spike (ovipositor).[5]
-
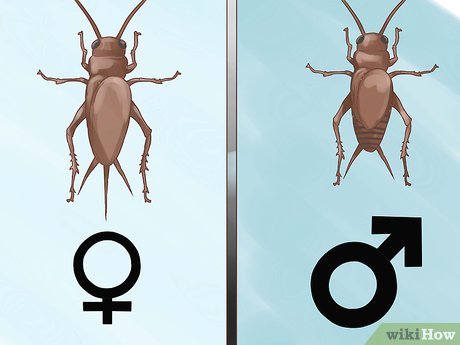 5Buy 50 or more crickets. Make sure you have enough crickets to feed your pet with 30-50 extra to breed. It’s important to have a mix of male and female crickets but preferably, more females than males.
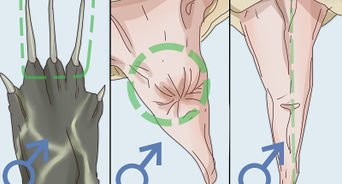
- Female crickets have three long extrusions on their behind with the main one (called ovipositor) that it uses to deposit the eggs in the ground. Female crickets will also grow fully developed wings.
- Male crickets have two extrusions.[6]
They have short, under-developed wings that they use to produce the familiar cricket call we hear at night.
Part 2
Part 2 of 3:
Starting the Breeding Process
-
 1Assemble your colony and let them feed.[7]
Place all your crickets in your completed cricket container. Place a shallow dish of commercial cricket food or substitute (crushed premium dry cat food works well) in the container away from the soil.- You can treat the colony to fruit, potato slices, greens, and other vegetable matter to supplement their diet. Be sure to remove unfinished fresh foods before they mold or rot.
- Other, more bizarre foods may include tropical fish flakes, pond fish pellets, rabbit food (alfalfa pellets), or pretty much anything with high protein content.
- Try to mix the feeding up to keep your crickets happy. The health of your crickets will translate directly to the health of your pet(s). Try to supplement dry foods with fruits and vegetable scraps, as well as greens such as lettuce. This will ensure that your crickets are truly ready to be a nutritious snack for your pet(s).[8]
-
 2Make sure to give your crickets adequate water. Crickets need near constant supplies of water to stay alive and well. Watch as your crickets swarm to water whenever you mist the container. Here are some creative ways cricket keepers keep their quarry nice and hydrated:
- Try placing an inverted bottle reptile water dispenser with a sponge in the reservoir into your container. The sponge should help prevent any flooding or drowning in the tote bin.
- Cut one long side of a cardboard toilet roll and unfurl it to get a rectangle. Wrap this cardboard with very absorbent paper, such as paper towel, and hoist it up vertically in a corner so that it forms a kind of fort.
- A dish of water gel (also sold as soil substitute, e.g. “polyacrylamide”) or unflavored jello kept in a corner also makes a great watering hole.
-
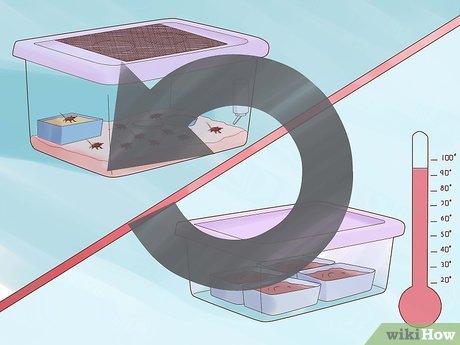
 3Heat your crickets. Crickets absolutely need to be kept warm to promote breeding and incubation for their eggs. Heat can be provided by various methods such as a reptile heater, a heat pad, or a light bulb. Placing a space heater in a walk-in closet will heat the entire closet, providing heat for your crickets and incubating their eggs.[9]
- When mating to breed, males only chirp between 55–100 °F (13–38 °C). Crickets do best when kept on the warmer side of 80–90 °F (27–32 °C).
-
 4Give your crickets time to breed. If you’ve given them enough food, water, and heat, and your crickets are generally happy, they should breed profusely. Give them about two weeks to breed and lay the eggs in the soil. The crickets will burrow down about an inch below the topsoil in order to lay their eggs.[10]
After two weeks, the topsoil will be filled with little oblong eggs about half the size of a rice grain. Remove this topsoil and place it in a nesting container to incubate the eggs.- While waiting for your crickets to lay eggs, be sure to keep the topsoil damp. Eggs that are completed dried out will die and be useless to you. Fill a mister with filtered water and periodically spray the topsoil to make sure the heat doesn’t dry it out completely.
Part 3
Part 3 of 3:
Finishing the Breeding Process
-
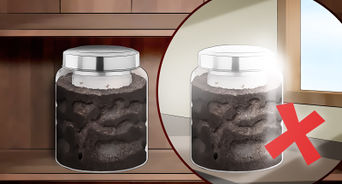
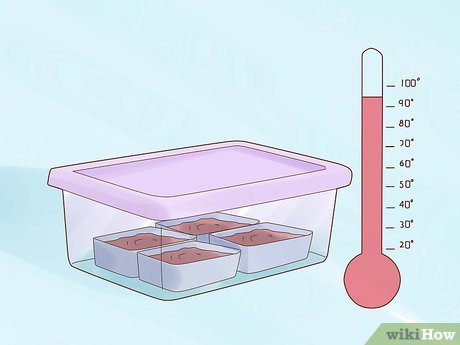 1Incubate the eggs. The crickets need heat to incubate the eggs until they hatch. Place the disposable container in a larger container that can be sealed tightly and place it where the temperature is 85–90 °F (29–32 °C). After about two weeks (longer at lower temps), the eggs will start hatching and pinhead crickets the size of a grain of sand will emerge by the hundreds daily for about two weeks.[11]
-
 2Collect the pinhead crickets and place them in a rearing container. This container should be stocked with food and water to allow the baby pinheads to grow until they are an appropriate size to put back into the main container — usually about 7 – 10 more days.
- Remember to moisten the soil in your rearing container every so often to make sure that the crickets have enough water.
- Consider also placing the rearing container on top of a heating pad set to 80–90 °F (27–32 °C).
-
 3Repeat. Following the above steps with your new crickets will produce hundreds upon thousands of crickets, which will be plenty to feed your pet and perhaps even all your friends’ pets. Pretty soon, you will be a full fledged cricket farmer! If your crickets die, pay special attention to these things:
- Not enough space. Crickets need plenty of space to habitat and breed. If your crickets become too crowded, they will begin to feed on themselves in order to remove competitors from the ecosystem.
- Not enough/too much water. Crickets need more water than you may think — misting the soil and filling their water reservoirs every couple days is extremely important. At the same time, do not drown your crickets in water. Regular misting and refilling is enough.
- Not enough heat. Crickets like hot temperatures to live and breed in. Try to keep your container between 80 and 90 degrees Fahrenheit for optimum temperature.
Video
Tips
-
If you’re breeding crickets for pets that need lots of calcium, feed your crickets foods that are high in calcium, such as spinach or cheese. This also works with anything else if you’re concerned about vitamin deficiency (e.g., give them oranges for vitamin C). Whatever you feed your crickets will be fed to your pet.⧼thumbs_response⧽
-
Cricket eggs take about 7-13 days to hatch. The optimal temperature for this is at around 85 degrees.⧼thumbs_response⧽
-
A strip of clear packing tape around the inside of the tote will prevent escapes because it is too slippery for the crickets to climb.⧼thumbs_response⧽

Warnings
-
Watch for pests that invade your crickets such as mold, mites, flies, and bacteria. Take proper precautions to prevent and eliminate such pests to keep a healthy supply.⧼thumbs_response⧽
-
50 breeding crickets should yield 2000+ pin head crickets over their breeding cycle. You might end up with more crickets than you know what to do with.⧼thumbs_response⧽
-
Male crickets can make a lot of noise when they chirp. You might want to consider keeping them where you won’t hear them.⧼thumbs_response⧽
-
If you own a cat this shouldn’t be a problem. Cats love to chase and/or eat crickets! This should not hurt the cat unless they eat too many; then it may be hard on their digestive system.⧼thumbs_response⧽
-
When their eggs hatch, pin head crickets are about the size of a grain of sand. Make sure they can’t escape their enclosure. (They shouldn’t be able to climb glass or clear plastic)⧼thumbs_response⧽
-
Only use topsoil that is fertilizer and pesticide free. This prevents your crickets, eggs, and pets from being poisoned.⧼thumbs_response⧽
-
Eventually a few crickets will get loose. If you don’t enjoy the idea of having crickets running wild in your house, set up traps.⧼thumbs_response⧽
-
Don’t keep it too humid. Keep a water dish for drinking, but try to keep humidity low. This will reduce cricket mortality, mold, mites, and flies.⧼thumbs_response⧽
You Might Also Like


[ad_2]
Source link : https://www.wikihow.com/Raise-Your-Own-Crickets

