


[ad_1]
Steps
Method 1
Method 1 of 3:
Hand Sewing a Patch
-

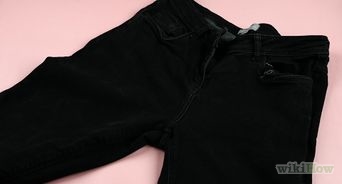
1Wash, dry, and iron your uniform before you begin. If it’s a new uniform, make sure to wash and dry once before sewing on the patch, otherwise, the fabric will bunch unevenly under the patch after the first wash and dry cycle.- Many uniforms are made out of cotton. Cotton will usually shrink somewhat after the first wash. If you sew a patch onto your uniform before it has been washed then the fabric under the patch will shrink and pull your patch, bunching it.
- It is also a good idea to iron the area where the patch is to be placed before starting to sew. Ironing the area will remove any wrinkles. If you sew your patch over wrinkles then your uniform will be permanently wrinkled.
-
 2Get a sewing needle and thread. Choose a thread that is either the color of the uniform or the color of the edge of the patch.
- If you can’t find a thread that’s the same color as either, look for a darker color that’s as close as possible.
- Darker rather than lighter thread will blend better and not show up as blatantly. You can also get a clear thread to make it less visible.
-
 3Position the patch in the correct placement. Some patches such as those on military uniforms need to be placed in a specific area.
- For example, if you need to sew on an American flag patch you need to place it on the shoulder/bicep area of the sleeve. The flag also needs to be placed so it’s facing the right direction. The American flag should always be positioned so that when the wearer is moving forward, it gives the flag the effect of waving in the wind, moving forward. [1]
- Check with your superiors to make sure you are placing patches in the correct places.
- For example, if you need to sew on an American flag patch you need to place it on the shoulder/bicep area of the sleeve. The flag also needs to be placed so it’s facing the right direction. The American flag should always be positioned so that when the wearer is moving forward, it gives the flag the effect of waving in the wind, moving forward. [1]
-
 4Put on the uniform with the patch held by a safety pin. This is to check if it is positioned correctly. it can help to have someone else confirm this with you.
- Be careful when wearing your uniform with pins holding the patch. Carefully put the uniform on so the pins don’t poke you.
- The reason you may want to check how it fits is that when wearing your uniform your body will fill out the garment. This could affect how the patch looks.
-
5Secure your patch in place for sewing. Use a safety pin or straight pin to hold the patch in place. Or, alternatively, use adhesive fabric tape to iron the patch on.
- Even if you don’t have an iron-on patch, you might want to get some adhesive ironing tape. The adhesive tape is usually better than pins because it sticks the patch in place while you sew. You won’t have to worry about sewing around pins and poking yourself.
- Cut and place the tape. Place the patch on the tape and iron.
- If you don’t iron the patch, you’ll have to pin the patch in place.
-
 6Cut a piece of thread. If you’re not very familiar with sewing, you may want to start with a piece of thread no longer than 18 inches (45cm). Longer pieces tend to get tangled and are harder to work with than shorter ones.
- Alternatively, you can try not cutting the thread and leaving it on the spool. This will help prevent the thread from getting tangled as well.
- Additionally, you won’t have to worry about running out of thread and re-threading your needle.
-
7Thread the needle and tie a knot at the end of the thread. Threading the needle can be difficult. If you have a needle threading tool, use it to save time.
- If you don’t have a threading tool, it can help to twist and wet the thread in your mouth. The saliva will serve as a temporary adhesive to hold the tiny strands of thread together. This allows you to better thread the eye of the needle.
-
8Begin threading the needle through your fabric and the patch. Start on the inside of your garment and poke the needle out, coming up through the patch.
- You’ll want to start on the inside of your fabric, so the knot you create to hold the thread in place isn’t showing on the outside. Start inside and poke the needle out.
- If the patch is circular, try an overcast stitch so that it has a guide when it is sewn. This will help you sew it with more precision.
-
9Sew with a straight stitch pattern. Run the needle back through the uniform about 1/4” (6mm) from where you brought it out.
- For patches, a straight stitch is not only the easiest but the quickest way to sew the patch on. You don’t need a complicated stitching pattern, especially if you ironed on your patch.
- A straight stitch will also be the least visible.
-
10Continue stitching the patch. Continue your straight stitch until you’ve gone all the way around your patch. You should end where you started.
- When hand sewing a patch onto a uniform it’s important to take your time and do your best to make sure that your weaves and the length of your stitches are as even to one another as possible. Keeping an even pattern will make your patch look much better.
-
11Knot your thread. When you have sewn all the way around the edge of the patch, loop the thread and pull the needle through to tie off your knot.
- To complete sewing your patch, thread your needle through so that you create a small loop on the inside of your uniform. Bring the needle through the loop and pull the thread tight. This will create a tight knot.
-
 12Cut the ends of the thread. Cut any loose threads that are hanging beyond the knot.
- You should leave a little thread about 1/2” (1cm) long. Leaving just a bit ensures that you don’t accidentally cut the knots. Tuck the thread under the patch.
Method 2
Method 2 of 3:
Machine Sewing a Patch
-
 1Iron your garment. Before sewing, you will want to iron your uniform to smooth out any wrinkles.
- Ironing your garment before sewing will prevent you from sewing over any wrinkles and leaving permanent wrinkles in your clothes.
-
 2Place and arrange the patch where you want it. It’s smart to place your patch on your garment or uniform and make sure it’s in the correct spot before sewing.
- If you sew your patch onto your uniform and realize you have put it in the wrong place you’ll have to remove the patch and start all over again.
-
3Iron on your patch. Even if you don’t have an iron-on patch, you might want to get some adhesive ironing tape. [2]
- Cut and place the tape. Place the patch on the tape and iron.
- If you don’t iron the patch, you’ll have to pin the patch in place. Pinning your patch will create more work for you when using your machine.
-
4Place the garment on your sewing machine. Set up your machine so that your needle length is shorter for the patch. Set the machine to a straight stitch. And place your presser foot in the up position.[3]
- different sewing machines will have different features and capabilities. It’s best to refer to your manual to get the best results.
- Make sure that you are only sewing the patch onto one piece of fabric. If you have to sew your patch onto a sleeve this can be tricky. Pull back the other side of the sleeve without the patch so you don’t sew your sleeve shut.
-
5Thread your machine. Place the thread on the bobbin. Your manual will have instructions on how to correctly do this. In general, bring your thread through your bobbin which is on the spindle. With the spindle so that it winds the thread around the bobbin. Press the foot peddle to fill the bobbin.[4]
- Once the bobbin is filled you’ll have to place the bobbin in the correct location depending on your machine. Then run the thread through the proper parts of your machine to attach it to the needle. Each machine has a different process for this. Refer to your manual. [5]
- Make sure you have the correct color thread in place. You should either use thread that’s the color of the patch or clear thread.
- Once the bobbin is filled you’ll have to place the bobbin in the correct location depending on your machine. Then run the thread through the proper parts of your machine to attach it to the needle. Each machine has a different process for this. Refer to your manual. [5]
-
6Put the machine on a low-speed setting to start.
- Your sewing machine will most likely have different speed settings. The speed dictates how quickly the needle moves. You’ll want to keep it low so that you have good control when sewing.
-
7Start sewing. Press down on your foot pedal to engage the needle and slowly move your garment until you’ve completed sewing the patch.[6]
- To rotate the garment and patch, move both as one. Make sure that the foot of the sewing machine is up, but the needle is in place.
- When you need to rotate, you need to lift the foot up so that you can move the garment. But keep the needle in place so that you get a consistent pattern.
- Once you’ve made it all the way around your patch, seal the stitch.
- Take your scissors and cut away any loose threads. You should leave a little bit of thread about 1/2” (1cm) long. Leaving just a bit ensures that you don’t accidentally cut the knots.
Method 3
Method 3 of 3:
Sewing a Patch on a Sleeve
-
1Remove any patches that need to be replaced with a seam ripper. If you need to replace a patch because you’ve been promoted you’ll have to first take a seam ripper and pluck out the thread. Then remove the patch.
- Pop every stitch out around your patch.
- Remove any loose thread with the tweezer end of your seam ripper.
- Don’t use a razor as you may cut yourself or your garment.
-
 2Iron your garment. You’ll need to iron your sleeve or garment so that there are no wrinkles.
- Ironing can also help to smooth out any leftover marks and punctures from a previous patch.
- Ironing your garment before sewing will prevent you from sewing over any wrinkles and, therefore, leaving permanent wrinkles in your clothes.
-
 3Position the patch in the correct place. Make sure your patch is placed correctly before sewing or gluing the patch to the sleeve. If you are sewing a patch on a military uniform you will have instructions on the specific location of the patch.
- For example, a Navy striped patch must end 2 inches (51 mm) above the cuff on the sleeve. Refer to any instructions you were given to correctly place patches.
- You can either pin the patch on or use glue tape to iron your patch in place.
- Ironing the patch on isn’t a permanent solution. It is only to hold the patch in place while you sew. The lack of pins will allow you to sew the patch on without running into any pins.
- If you ironed the patch on, let it cool before sewing.
-
4Sew your patch onto your uniform. You can do this either using a sewing machine or hand stitching. [7]
- Use a thread that’s the appropriate color. Match the color of the patch’s edges or use clear thread.
- If using a machine, make sure you pull the part of the sleeve back that isn’t attached to your patch.
-
5Go slowly. Take your time so that you get it right and don’t have to start over.
- Depending on where your patch is, sewing may be more difficult. If the patch is higher on the arm, you can use your neck opening to separate the layers of fabric. If it’s lower near the cuff, you will have to pay attention to make sure you aren’t sewing through both sides of the sleeves.
- Set your machine on a slow setting. If you need to rotate your uniform and patch, raise the foot with the needle still in place. Rotate your garment, then lower the foot.
- If hand sewing, take your time so that you can create even spaces between each pass and sew in a straight line. Use a straight stitch on patches.
-
 6Seal your thread with a knot or on the machine. Once you’ve made it all the way around the patch, end the stitch with a hand knot or by back-tracking on the machine.
- Take your scissors and cut away any loose threads. You should leave a little thread about 1/2” (1cm) long. Leaving just a bit ensures that you don’t accidentally cut the knots.
Video
Tips
-
If the patch placement area is accessible by sewing machine, you can sew it on with a sewing machine. If your machine uses a top and bottom thread, the top thread should match the edge of the patch where you are sewing. The bottom thread should be chosen to match the back of the material.⧼thumbs_response⧽
-
If straight pins leave the patch too wavy for easy sewing, you can staple it temporarily in place and remove the staples after sewing. Fusible webbing can also be used to “tack” the patch in place temporarily until you can stitch it on a machine.⧼thumbs_response⧽
-
If it is hard to press the needle through the entire thickness of the patch and uniform, use a thimble to protect your fingers.⧼thumbs_response⧽

Warnings
-
If you rely only on ironing your patch it will, over time, raise up and separate from your garment. Depending what you do while wearing your uniform a patch can get caught on sharp edges and branches. Sewing reinforces its bond.⧼thumbs_response⧽
-
Many organizations are now producing patches that are made to be ironed on, so you may want to check for this feature before sewing the patch on by hand.⧼thumbs_response⧽
Things You’ll Need
-
Thread in color of uniform or edge of the patch
-
Scissors
-
Sewing needle
-
1 or 2 straight pins or safety pins
-
Optional: needle threader and/or thimble
-
Sewing machine if you have one
-
Adhesive tape
-
Iron
You Might Also Like
![]()


[ad_2]
Source link : https://www.wikihow.com/Sew-a-Patch-on-a-Uniform

