


[ad_1]
Steps
Part 1
Part 1 of 2:
Growing Your First Mushrooms
-
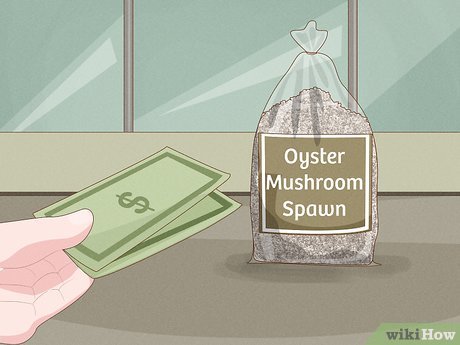
1Purchase oyster mushroom spawn. Oyster mushrooms are the easiest to grow, and a great choice for novices. To get started, buy them online, in a home gardening store, or in a homebrew supply store in the form of “spawn”: spores or root-like mycelium stored in sawdust, grain, or agar. You can buy the spawn alone or as part of a complete oyster mushroom kit.[1]
Any oyster mushroom variety will work, but blue grey oysters and pink oysters are especially easy and quick to grow.[2]
Growing outdoors? “Plug spawn” is a slow but even easier alternative. Just drill holes in the side of a newly fallen hardwood log (avoid “softwood” or pine because they will inhibit the growth of fungus), insert the plugs, and wait for damp weather.[3]
-
 2Make a pasteurized substrate. If your kit came with a large bag of straw, that’s a ready-to-go substrate, or material that provides nutrients and a place to grow. If you only have a small container of mushroom spawn, you’ll need to make your own substrate, and heat it so only beneficial microbes can grow. Here are two ways to make a substrate:Cardboard:[4]
Best for spawn in sawdust[5]
1. Cut corrugated cardboard into pieces of equal size, a few inches square.
2. Put the cardboard in a bucket and weigh it down with a heavy object.
3. Add boiling water to submerge the cardboard.
4. Cover with lid and let cool for eight hours.
5. Wash hands with antibacterial soap.
6. Squeeze out as much water as you can.Straw:[6]
Best for spawn in grain[7]
1. Choose a cereal straw such as wheat or rye.
2. Cut into 3–4 inch lengths (7.5–10cm) using a shredder or a weed whacker in a garbage can.
3. Tie in a pillowcase or nylon mesh laundry bag.
Submerge in pot of water on stovetop.
4. Heat at 160–170ºF (70–75ºC) for one hour.
5. Drain well and let cool to below 80ºF (27ºC).[8]
-
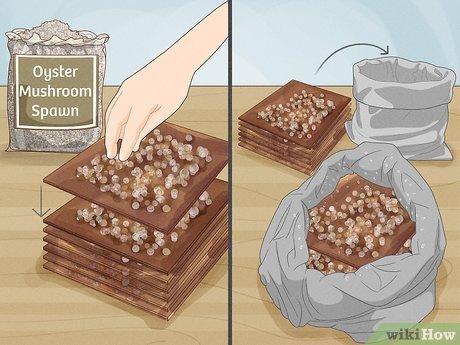 3Add the spawn to the substrate. This is called “inoculation.” To minimize competition from other spores, wash your hands first and inoculate as soon as the substrate is ready:
- Mushroom kit with included substrate: Sterilize a syringe and inject spawn into the grow bag through the small hole, or into the tray of substrate at several points.
-
Cardboard substrate: Stack the cardboard squares inside a food-grade plastic bag. Sprinkle a little spawn between each layer as you stack. (Break up the spawn by hand if it’s in a solid clump.)[9]
-
Homemade straw substrate: Wipe a table with 70% isopropyl alcohol. Spread the straw out on the table and break up the spawn over it, mixing thoroughly. Transfer to food-grade plastic bags until they are full but not compressed.[10]
- There’s no exact ratio of spawn to substrate, but you can start with a mix that is 2 or 3% spawn by weight. Adding more spawn helps the colony grow faster and resist contamination.[11]
-
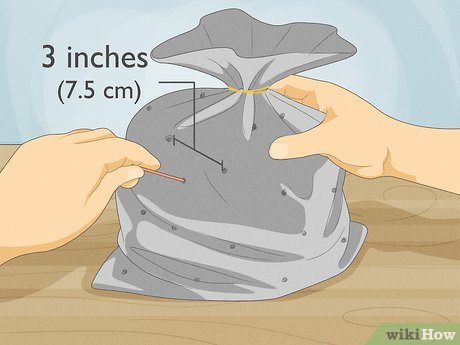 4Poke holes in the bag. Tie the top of the plastic bag closed. Punch holes into the sides of the bag every 3 inches or so (7.5 cm), plus a few more in the base to allow for water drainage. The mushrooms need ventilation to grow quickly and reliably, or carbon dioxide build-up will prevent fruiting.
- Most bags included in mushroom kits already have holes, or an air filter system that makes holes unnecessary.
-
 5Choose a location with a steady temperature. Now the spawn is ready to colonize the substrate with mycelium. Most strains do this best at temperatures between 60º and 75ºF (16–24ºC).[12]
Even small variations in temperature can decrease mushroom yield or encourage contamination, so try to find a room that stays at this temperature 24 hours a day.[13]
- Mycelium can grow at any light level except direct sunlight. Some growers find they get better results with low light on a daylight cycle (real or simulated). However, if you are using straw, too much light can cause grain to sprout and interfere with mushroom growth.
- The ideal temperature depends on the strain. If your spawn came with instructions for a growing environment, follow them.
-
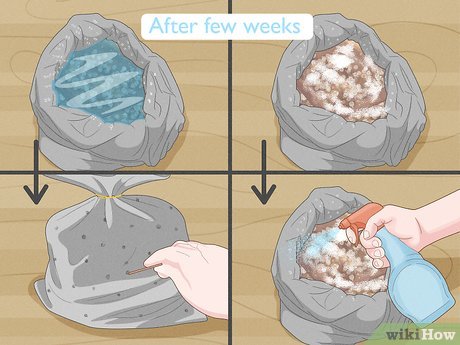 6Check on moisture levels over the next few weeks. It takes two to five weeks for the white, feathery “roots” called mycelium to spread throughout the substrate. During this time, all you need to do is check on the moisture level every few days. If the substrate feels dry to the touch, mist it through the holes in the bag. If you see standing water inside the bag, poke more drainage holes in the base.[14]
- Mycelium is white. If you see large patches of another color, mold has contaminated the bag.[15]
Throw the bag away and wipe the area down with isopropyl alcohol before trying again.
- Mycelium is white. If you see large patches of another color, mold has contaminated the bag.[15]
-
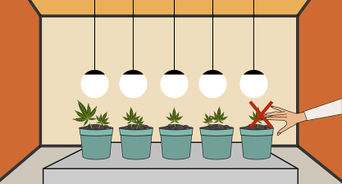
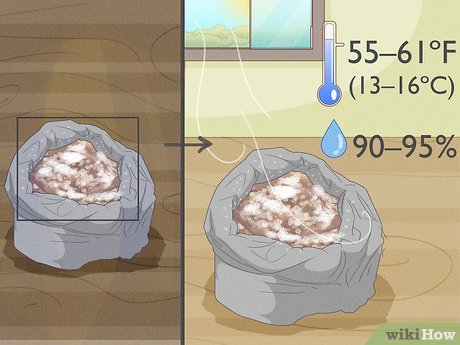 7Move the bag to a fruiting environment. Once the mycelium has formed a thick mat inside the bag, it is ready to fruit (produce mushrooms). The fungus has different needs for this stage, so move it to a new location and follow these instructions:
- Mushrooms will not fruit without light. Provide at least enough to read by during daylight hours.[16]
Use indirect daylight, a grow light that mimics daylight, or (less effective but cheaper) a cool white bulb.[17]
- The fungus needs fresh air to clear out carbon dioxide, which prevents fruiting or leads to small mushrooms. Open the top of the bag and ventilate the area with a light cross breeze.
- Lower the temperature, ideally to 55–61ºF (13–16ºC). Increase humidity to at least 80%, ideally to 90–95%, by running a humidifier or hanging plastic sheets around the grow bag. This part doesn’t have to be perfect, but other conditions can affect the yield, shape, and color of your mushrooms.
- Mushrooms will not fruit without light. Provide at least enough to read by during daylight hours.[16]
-
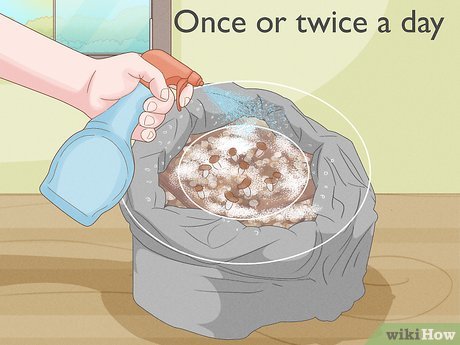 8Water lightly. Over- and under-watering are common problems at this stage. To prevent drying without soaking the mushrooms, lightly spray the inner walls of the bag once or twice a day.[18]
- If the growing mushrooms turn brown, or new mushrooms start to grow on an older mushroom’s surface, the substrate is probably too dry.
- If the caps of the mushrooms feel clammy or sticky, the substrate is probably too wet.
-
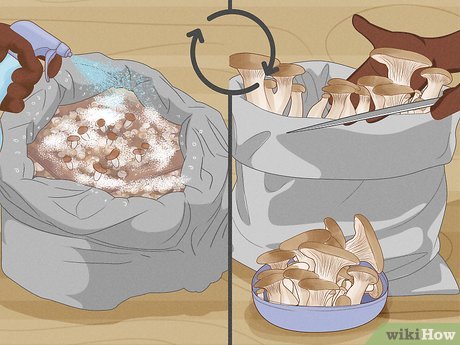
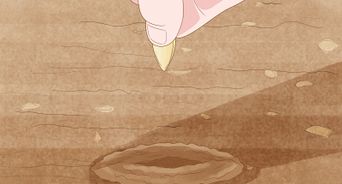
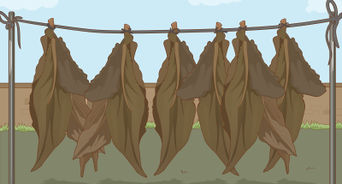
 9Pick the mushrooms as they grow to full size. Mushrooms start as tiny “pins,” then grow rapidly over the next few days if conditions are right. Once they have reached full size, press down on the substrate with one hand, then use the other to twist the stalk off at the base.[19]
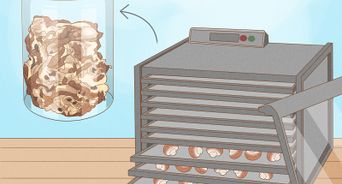
You may eat them immediately or dry them for later use.- If you’re not sure what a fully developed oyster mushroom looks like, wait until the edges of the first mushroom go wavy. This is slightly past optimal harvesting point, but still edible. Pick the other mushrooms just before they reach the size of the first.[20]
- Tiny, aborted mushrooms are common in some strains. Leave them in place without picking them.
- If you’re not sure what a fully developed oyster mushroom looks like, wait until the edges of the first mushroom go wavy. This is slightly past optimal harvesting point, but still edible. Pick the other mushrooms just before they reach the size of the first.[20]
-
 10Continue harvesting mushrooms. Most spawn is good for at least two fruitings, and some will continue growing for three or four months. Keep the substrate lightly moist and continue picking mushrooms until they stop appearing.
Part 2
Part 2 of 2:
Improving the Process
-
 1Experiment with other mushroom varieties. The basic process for growing oyster mushrooms works for most mushroom species, but you will need to make adjustments. When you buy spawn, check the instructions or ask the seller for the following information so you can adjust your approach:
- Preferred substrate (some species need a specially prepared compost)
- Ideal temperature during colonization
- Ideal temperature and humidity levels during fruiting (mushroom growth)
Lion’s mane, lingzhi, shiitake, enoki, and nameko mushrooms are all good choices for a second project, only a bit more difficult than oyster mushrooms.
-
 2Keep conditions clean. If mold or other contaminants take over your substrate, that batch of mushrooms will be unusable. Most mushroom species are not as resistant to contamination as oyster mushrooms are, so it pays to spend more effort keeping the area clean:
- Wash your hands with antibacterial soap before handling any part of the operation.
- Take special care to pasteurize your substrate. If stovetop heating becomes impractical, look into a steam room or chemical treatment.
- Treating a compost substrate is complex, and may require help from an experienced grower.[21]
-
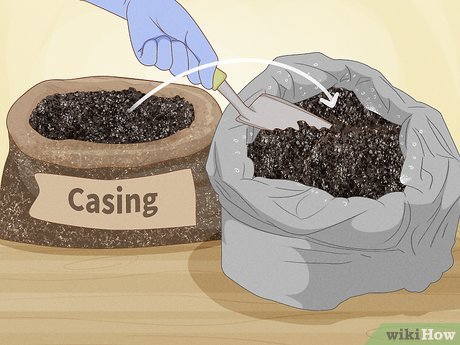 3Cover the substrate with a casing. “Casing” is a layer of sterile material on top of a tray of substrate, usually a mixture of peat moss and ground limestone. Keep the casing moist so water gradually leaches through to the substrate, without making the substrate soggy.
- Not all types of spawn need casing. Ask the seller or an experienced grower for advice.
- Do not ventilate the area until the tiny “pins” have appeared on the surface of the casing. Ventilating too early will trigger fruiting before the pins have broken through, growing mushrooms underneath the casing.
-
 4Take control over growing conditions. Tracking and controlling temperature and humidity will improve your mushroom harvests, and help you improve your setup with each attempt. If you get serious about a mushroom growing hobby, prepare a room with fans or an air duct for ventilation, plus a heating system and/or air conditioner to control temperature. Record temperature and humidity changes using a thermometer and hygrometer.[22]
- Temperature can vary significantly between the ceiling and floor of a room. If you’re growing on multiple shelves, put a thermometer at each level.[23]
- Strong drafts can be fatal to some mushroom types. Protect the spawn from direct wind.
- Temperature can vary significantly between the ceiling and floor of a room. If you’re growing on multiple shelves, put a thermometer at each level.[23]
-
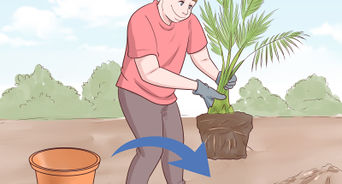
 5Get rid of substrate after a harvest. If you plan on growing more mushrooms in the same room, pasteurize your substrate again to get rid of mold and bacteria that might contaminate the room. With a compost substrate, this can take 8–24 hours of steaming at around 150ºF (70ºC). Although the substrate is low in nutrients for mushrooms, you can use it as garden compost or mulch for newly planted lawns.[24]
- Spent substrate has a high concentration of salt, which some plants are sensitive to. Leaving it outdoors to “weather” for six months should remove this problem.
-
 6Make your own mushroom spawn. Instead of buying spawn each time, you could grow your own from spores. This is a difficult and complicated task, but there are many free resources that can guide you. (Try contacting a mycological association in your area). One way to create a spawn culture is to make a spore print. Transfer the spores to a petri dish of agar using an inoculation loop, as described here (though you do not need to draw a T pattern). Repeat with several petri dishes, since some may fail to germinate.[25]
- A mostly sterile environment is a necessity for making spawn. Before you begin, remove all rugs and curtains that could trap dust. Clean all surfaces with mild disinfectant, including the ceiling. Cover all openings with plastic sheeting, and make an “antechamber” at the entrance with a second layer of plastic.[26]
- A mostly sterile environment is a necessity for making spawn. Before you begin, remove all rugs and curtains that could trap dust. Clean all surfaces with mild disinfectant, including the ceiling. Cover all openings with plastic sheeting, and make an “antechamber” at the entrance with a second layer of plastic.[26]
Tips
-
Mushroom spawn deteriorates over time. Put it in substrate as soon as possible, and refrigerate it if you can’t use it immediately.[27]
⧼thumbs_response⧽

Warnings
-
It is illegal in most countries to cultivate, transport, possess, or consume psilocybin mushrooms (magic mushrooms). Breaking any of these laws could lead to major jail time.⧼thumbs_response⧽
-
Mushrooms produce airborne spores which can cause respiratory problems in sensitive or allergic people. Wear a respirator while near the growing mushrooms if you are concerned about this.⧼thumbs_response⧽
Things You’ll Need
For your first project:
-
Oyster mushroom spawn
-
Straw, cardboard, or other substrate mushrooms can grow in
-
Warm or room temperature location for first stage of growth
-
Humid, low light location for final stage of growth
-
Spray bottle of water
You Might Also Like


[ad_2]
Source link : https://www.wikihow.com/Grow-Mushrooms

