


[ad_1]
Steps
Part 1
Part 1 of 4:
Learning the Controls
-
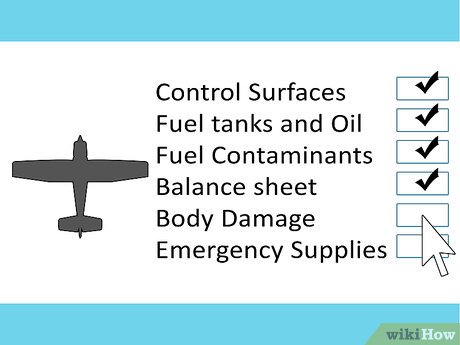
1Perform an inspection of the aircraft before getting in. Before taking off, it’s important to perform a walk-around examination called a “pre-flight.” This is a visual inspection of the aircraft to verify that the airplane components are in good working order. Your instructor should provide you with a highly useful operating checklist for the specific plane and this checklist will tell you exactly what to do in each phase of flight, even pre-flight.[1]
The basics of pre-flight:[2]
- Check control surfaces. Remove any control locks and make sure your ailerons, flaps, and rudder are moving freely and smoothly.
- Visually check your fuel tanks and oil. Make sure they’re filled to the specified levels. To check the fuel level, you’ll need a clean fuel measuring rod. To check oil, there’s a dipstick in the engine compartment.
- Check for fuel contaminants. This is done by draining a small amount of fuel into a special glass container tool, and looking for water or dirt in the fuel. Your instructor will show you how.
- Fill out a weight and balance sheet which helps ensure that you are not flying outside the capabilities of your airplane. Your instructor will show you how.
- Look for nicks, dings, and any other type of body damage. These small imperfections might inhibit your aircraft’s flying ability, especially if the prop is compromised. Always check props before an engine start. Use caution around airplane props. – If there are electrical issues with the plane, the prop could turn over unexpectedly, causing severe injury.
- Check emergency supplies. Although it is not pleasant to think about, prepare for the worst. – There is always the possibility of something going wrong with the aircraft. Make sure there is a supply of food, water, and first aid items. Also ensure that you have an operating radio, flashlight, and batteries. A weapon may be needed along with standard repair parts for the plane.
-
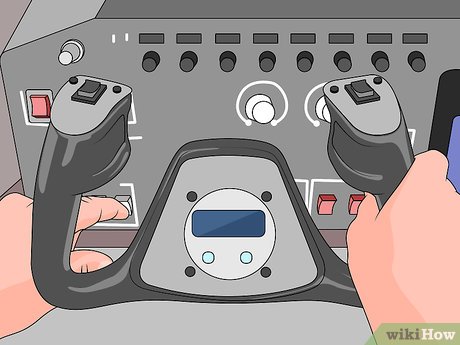
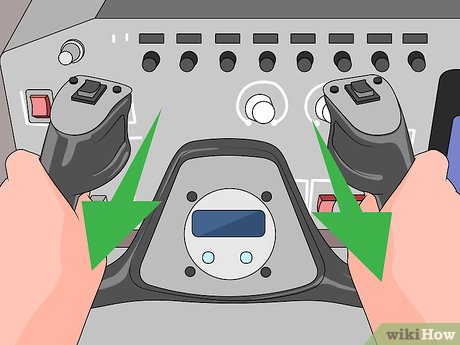
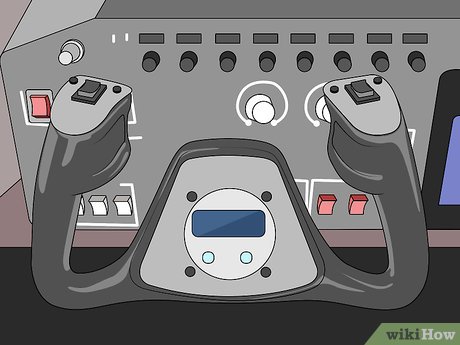 2Locate the flight control (column) in the cockpit. When you take your seat in the cockpit, all of the systems and gauges will look complicated, but they’ll look much simpler once you become familiar with what they do. In front of you will be a flight control that looks like a modified steering wheel.
- This control, more commonly called the yoke, works like a steering wheel in a car. It controls the pitch of the nose (up or down) and banking of the wings. Get a feel for the yoke. Push to go down, pull to go up, and use left and right to roll, unsurprisingly, left and right. Don’t use too much force when flying. – It doesn’t take much to control the plane.
-
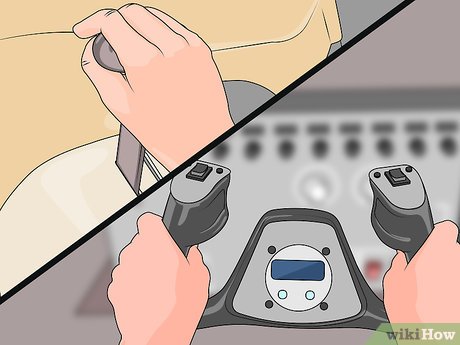
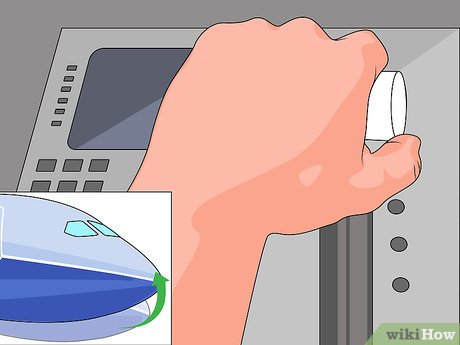
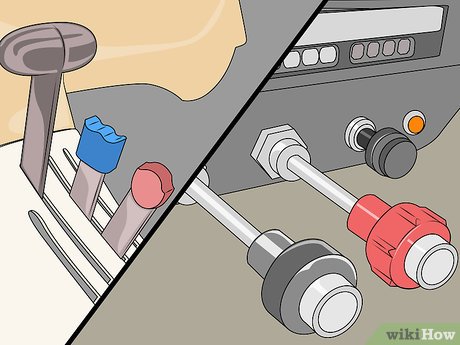 3Locate the throttle and fuel mixture controls. They are usually located between the two seats in the cockpit. The throttle is black,[3]
and the mixture knob is red. In General Aviation, they are usually just push/pull knobs.- Thrust is controlled by the throttle and the mixture knob adjusts the fuel-to-air ratio (lean or rich in gas).
-
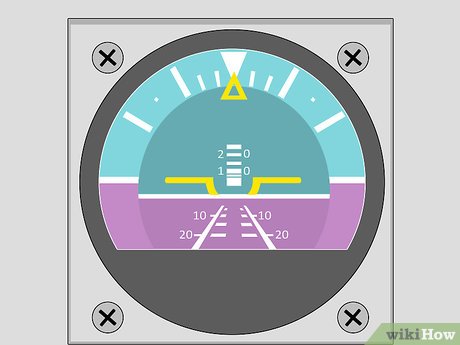
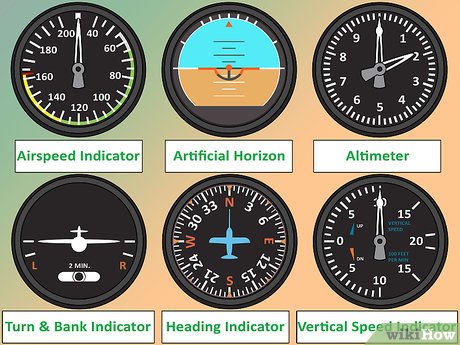 4Familiarize yourself with the flight instruments. On most aircraft, there are six primary flight instruments located along two horizontal rows. These indicators are often referred to as the six pack and show, among other things, altitude, attitude (orientation of the aircraft relative to Earth’s horizon), compass heading, and speed—both forward and up or down (rate of climb).[4]
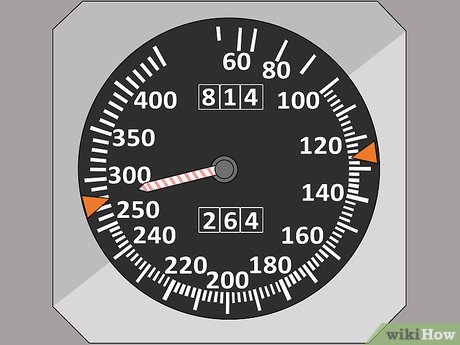
- Top left – The “Airspeed Indicator” shows aircraft airspeed, usually in knots.[5]
(A knot is one nautical mile per hour—about 1.15 MPH or 1.85km/h).[6]
- Top center – The “Artificial Horizon” shows the aircraft attitude, that is, whether the plane is climbing or descending and how it is banking – left or right.
- Top right – The “Altimeter” shows the height (altitude) of the aircraft, in feet MSL—feet above mean, or average, sea level.[7]
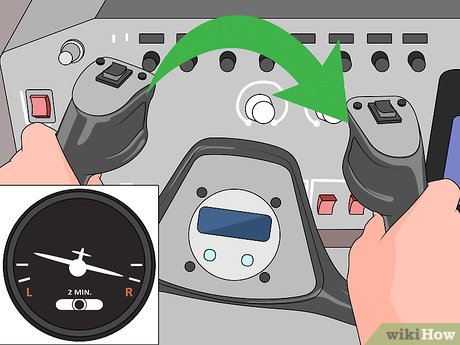
- Lower left – The “Turn and Bank Indicator” is a dual instrument which tells how fast you are changing the compass heading (rate of turn) and also whether you are in co-ordinated flight, This is also called the “Turn and Slip Indicator” or “Needle Ball.”
- Lower center is the “Heading Indicator” which shows your aircraft current compass heading. This instrument should be calibrated (usually every 15 minutes). To calibrate, adjust the instrument to agree with the compass. This is done on the ground or, if in flight, only in straight and level flight.
- Lower right is the “Vertical Speed Indicator” which tells how fast you are climbing or descending in feet per minute.[8]
Zero means that you are maintaining altitude and are neither climbing nor descending.
- Top left – The “Airspeed Indicator” shows aircraft airspeed, usually in knots.[5]
-
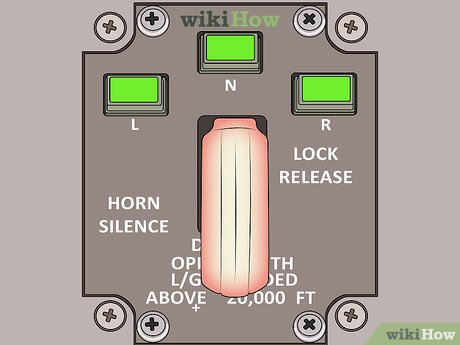 5Locate the landing gear controls. Many small planes have fixed gear, in which case you will not have a landing gear control knob. For airplanes that do have a landing gear control, the location varies, but it usually has a white rubber handle. You will be using this after you take off and before you land and taxi the plane. It may deploy any non-fixed landing gear—wheels, skis, skids, or floats beneath.
 -
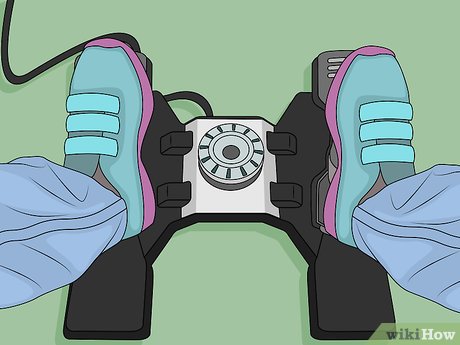 6Place your feet on the rudder pedals. These are a set of pedals at your feet used to control the rudder which is attached to the vertical stabilizer. When you want to make minor adjustments to go left or right on the ‘’vertical’’ axis, use the rudder pedals. Basically, the rudder controls the yawing aspect of turning the aircraft. Turning on the ground is also controlled by the rudder pedals and/or the brakes, not by the yoke.[9]
Part 2
Part 2 of 4:
Taking Off
-
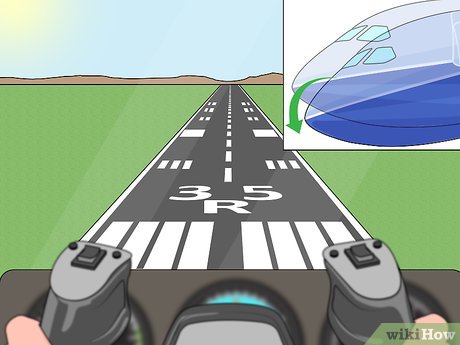
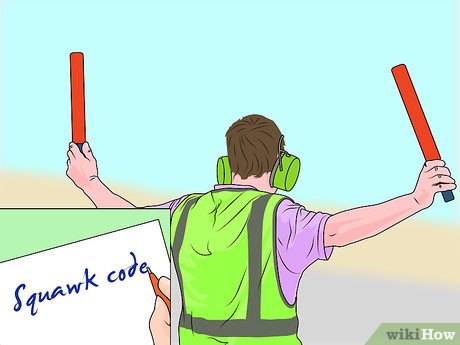 1Get permission to take off. If you are at a controlled airport you must contact Ground Control before taxiing. They will give you further information as well as a transponder code, commonly called a “squawk code.”[10]
Be sure to write this down, as this information must be repeated to Ground Control before you are given clearance for takeoff. Once given clearance, proceed to the runway as directed by Ground Control, making sure to never cross any runway unless you are cleared to do so. -
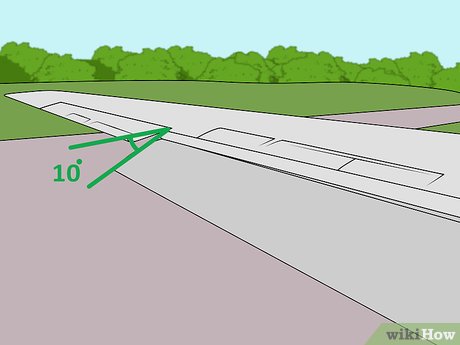 2Adjust the flaps to the proper angle for takeoff. Usually 10 degrees of flaps are used to help increase lift. Check your aircraft manual, though. – Some aircraft do not use flaps for takeoff.
 -
 3Perform an aircraft run-up procedure. Before you reach the runway, stop at the run-up area. You’ll have to perform the engine run-up procedure here. This helps insure that your aircraft is ready to fly safely.[11]
- Ask your instructor to show you this procedure.
-
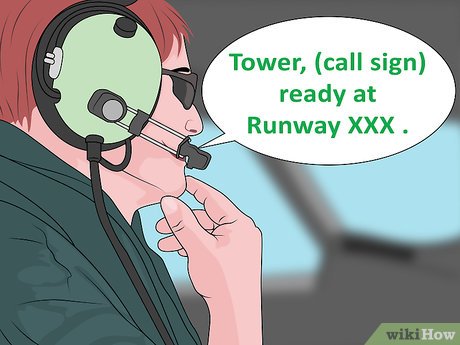 4Notify the tower that you’re ready for takeoff. After completing a successful run-up, notify the tower and wait to be cleared to continue to and/or enter the runway.[12]
-
 5Start the take-off run. Push the fuel mixture knob completely in and advance the throttle slowly. This will increase the engine RPMs (revolutions per minute), generating thrust and the airplane will start to move. Note, though, that the plane will want to go left when you do this, so add proper rudder to stay on the runway centerline.[13]
- If there’s a crosswind, you will need to turn the yoke, carefully, into the wind. As you pick up speed, slowly decrease this correction.
- You’ll need to control the yaw (twisting on a vertical axis) with the rudder pedals. If the plane starts doing twisting, use the foot pedals to control it.
-
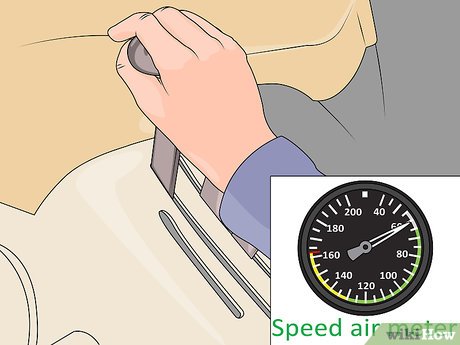 6Get up to speed. In order to take off into the air, the plane needs to achieve a certain speed to create enough lift. The throttle should be full on in most aircraft, though some will have a maximum setting to reduce over torquing. You will gradually build enough airspeed to become airborne (usually around 60 knots for small planes). The airspeed indicator will tell you when you have reached this speed.[14]
- When the plane gets enough lift, you’ll notice the nose lifting off the ground a bit. Pull gently back on the flight control, being sure to maintain the proper climb rate for the particular aircraft.
-
 7Pull back on the yoke at this point. This will cause the whole airplane to leave the runway and rise into the air.[15]
- Remember to maintain climb speed and apply proper rudder.
- When at a safe height above the ground and you have a positive rate of climb as indicated by the VSI (Vertical Speed Indicator), return the flaps and landing gear to neutral position. This will reduce drag and extend the safe flying time and distance.
Part 3
Part 3 of 4:
Managing Flight
-
 1Line up the artificial horizon, or attitude indicator. This will keep the plane level. If you fall below the artificial horizon, pull back to raise the nose of the airplane, lifting it. Again, be gentle. – It doesn’t need much.
- The best way to keep the plane at the right altitude is making sure you constantly scan the attitude indicator and the altimeter, as well as the rest of the six pack. Get in the habit of scanning so that you don’t fixate on any single instrument for an extended time.
-
 2Bank (turn) the plane. If you have a wheel in front of you (the yoke), turn it. If it’s a stick, move it to the left or right to turn. Stay in coordinated flight by using the needle ball (turn coordinator). This gauge depicts a little airplane with a level line and a black ball along it. Keep the black ball in the center by adjusting the rudder so your turns feel smooth (coordinated).
- A useful learning aid is think step on the ball to know which rudder pedal to step on when co-ordinating a turn.
- The ailerons “control” the bank angle and work in conjunction with the rudder. When turning, coordinate the rudder and ailerons by keeping the turn and bank instrument ball centered, remembering to keep an eye on your altitude and air speed by scanning the six pack.
- Note: When the yoke is turned to the left, the left aileron goes up, and the right goes down; when turning right, the right aileron goes up and the left aileron goes down. Do not worry too much about the mechanics of aerodynamics at this point, just try to become familiar with the basic concepts.
-
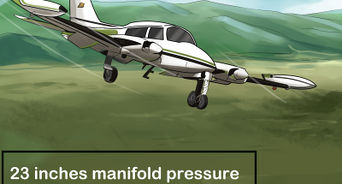
 3Manage the speed of the airplane. Every airplane has an engine power setting optimized for the cruise phase of flight. Once you’ve reached your desired altitude, this power should be set to around 75%. Trim the aircraft for straight and level flight. You will feel the controls become smoother as you trim the plane. You’ll also find on some aircraft that this power setting is in the torque free zone, where no rudder input is required to maintain straight line flight.
- At maximum power you may find that the nose drifts laterally due to the engine torque and requires an opposite rudder correction. Similarly, you may find that the opposite rudder input is required at flight idle power setting.
- To keep the plane steady, it’s necessary to maintain sufficient airflow and speed. Flying too slowly or at overly steep angles can cause the plane to lose airflow and stall. This is most dangerous during takeoff and landing, but it’s also important to keep the plane at the appropriate speed during flight.
- Just as you would wear out your car engine if you drove with your foot planted to the floor, you’ll do the same to the plane’s engine. Only increase power to maintain airspeed in a climb and reduce power to descend without accelerating.
-
 4Fly with a light touch on the controls. If (and when) you experience extreme turbulence, it is critical not to over-correct. Sudden, large changes in the control surface orientations can push the aircraft past its structural limits, causing damage to the plane and, potentially, compromising its ability to continue flying.
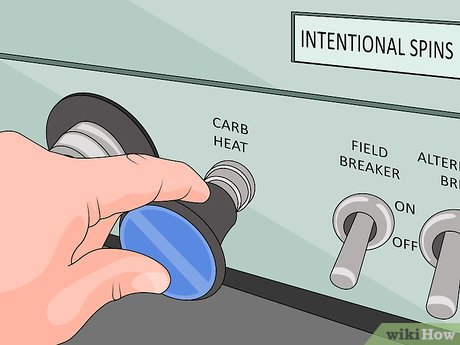
- Another issue is carburetor icing. There is a small knob labelled “carb heat”. Apply carb heat for short periods of time, about every ten minutes or so, especially at the high relative humidity levels that encourage icing.[16]
Note: This only applies for planes with a carburetor. - Don’t zone out. – You still need to be scanning for other aircraft and keeping an eye on the six pack.
- Another issue is carburetor icing. There is a small knob labelled “carb heat”. Apply carb heat for short periods of time, about every ten minutes or so, especially at the high relative humidity levels that encourage icing.[16]
-
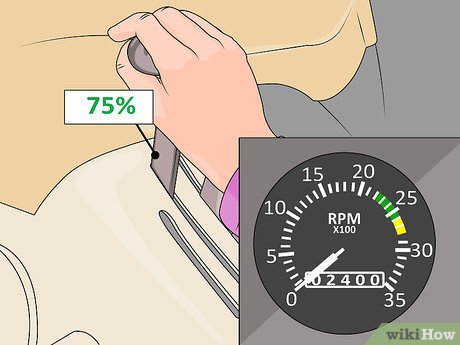 5Set the cruising engine speed. Once you get a constant cruising speed, you can set the controls and lock them, so the plane will remain at a constant power and you can focus on keeping it level. At this stage, reduce the power on the throttle to about 75% of where it was set. For a single engine Cessna, this should be somewhere around 2400 RPM.
- Next set the trim. The trim is a small surface on the edge of the elevator. It can be moved from within the cockpit. Setting it correctly will prevent the plane from climbing or descending while in cruise flight.[17]
- There are different kinds of trim systems. Some consist of a wheel, lever, or crank which pulls a cable or rod attached to a trim surface bell-crank. Another is a jackscrew and rod. And yet others are an electrical system (which is the easiest to use). The trim setting on each plane has a corresponding speed that the aircraft will seek and hold. It varies by weight, plane design, center of gravity, and carrying weight (cargo plus passengers).
- Next set the trim. The trim is a small surface on the edge of the elevator. It can be moved from within the cockpit. Setting it correctly will prevent the plane from climbing or descending while in cruise flight.[17]
Part 4
Part 4 of 4:
Landing the Plane
-
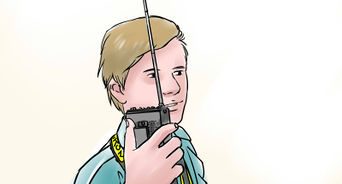
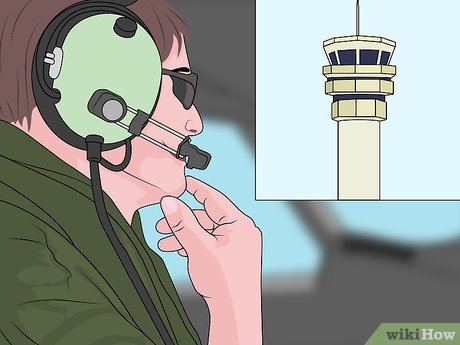 1Get clearance to land using the communication radio. An essential part of flight is staying in touch with ATC (Air Traffic Control), Approach Control, or Tower, during approach and landing procedures. You can find the correct frequencies on your sectional chart.
- When changing frequencies on the communication radio it is courteous to listen for the better part of a minute to make sure no stations are in the middle of an exchange. Only when you are sure there are no “conversations” going on should you make your initial broadcast. This helps to avoid the “stepped on” situation which occurs when multiple stations are broadcasting on the same frequency at the same time.
-
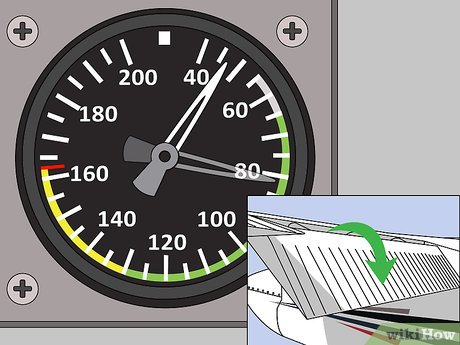 2Reduce the airspeed. To do this, reduce power and lower the flaps to the appropriate level. Do not deploy flaps at excessively high speeds (only when airspeed is within the white arch on the airspeed instrument). Stabilize the airspeed and rate of descent by applying back pressure on the control wheel. Knowing if you’re right just takes practice.[18]
- Pick your aiming point and begin your descent.
-
 3Get the right angle of descent and airspeed. This is controlled by a mixture of throttle and yoke. Once you’ve found a runway, you need to have the combination exactly right to land. When it comes to flying an airplane, this is the hardest part.
- A general rule is that the best approach speed is 1.3 multiplied by the stalling speed of the aircraft.[19]
This should be indicated on the ASI. However, always take into account wind speed, too.
- A general rule is that the best approach speed is 1.3 multiplied by the stalling speed of the aircraft.[19]
-
 4Lower the nose and watch the numbers on the runway. Those are there for a reason: They tell the pilot whether he or she is going to overshoot or land short. Lower the nose, keeping the numbers right on your horizon.
- If the numbers start to disappear under the aircraft nose, you are landing long.
- If the number distance themselves from the aircraft nose, you are landing short.
- As you get closer to the ground, you will experience the “ground-effect.” This will be explained by your instructor in detail, but basically the ground effect causes the plane to float a bit because of reduced drag near the ground.
-
 5Reduce the throttle to idle. Raise the nose slowly by pulling back on the yoke, until the two main wheels touch down. Continue holding the nose wheel off the ground; it will settle to the ground by itself.
 -
 6Come to a stop. Once the nose wheel has touched down, you can apply brakes to slow for exiting the runway. Exit as soon as possible on the off ramp specified by the tower. Never stop on a runway.
Tips
-
If you have a pilot friend, ask him to show you how the controls of his plane works. It’ll help you if you ever come into an emergency situation in an airplane.⧼thumbs_response⧽
-
Your permission to take off must be granted to enable the control tower to keep track of your progress.⧼thumbs_response⧽
-
You can learn a lot about flying an airplane and also get set up to acquire a pilot license without spending money:
- How to Start Free Online Pilot Training with FAA Safety.gov
- How to Start Free Pilot Training Online with AOPA.org
- Fly a Cessna
⧼thumbs_response⧽

Warnings
-
If you are in an emergency situation where the pilot is unable to fly and there is a licensed pilot on the aircraft, let that pilot fly. Don’t ever fly unlicensed unless absolutely necessary.⧼thumbs_response⧽
-
An unlicensed person should only take control of an aircraft in an emergency situation. Taking control in any other situation could lead to a fine or even a prison sentence.⧼thumbs_response⧽
You Might Also Like


-Step-15.jpg)

[ad_2]
Source link : https://www.wikihow.com/Fly-an-Airplane

