


[ad_1]
Things You Should Know
- Build your wood floor by layering wood joists on top of one another putting plywood on top. Secure everything using wood nails and a nail gun.
- Assemble your walls and roof on the floor before installing them as a single piece. Design your walls to angle in towards the roof to help water drain.
- Use tar paper or corrugated metal to cover your roof. Adding a bit of an overhang will really help keep your shed dry.
Steps
Part 1
Part 1 of 3:
Constructing the Base
-
1Determine how big you want the shed to be. We’re going to provide specific guidance on how to build a 10 by 20 ft (3.0 by 6.1 m) shed, but you can customize the dimensions to build a shed of any size. Figure out how much storage you need, how much room you have in your backyard, and mark off the area with spray paint or chalk.[1]
- Remember, you have to be able to walk into the shed! If you have 30 sq ft (2.8 m2) worth of stuff to store, add a little bit of extra space to your shed so you can stand inside.
- Use treated 2 by 4 in (5.1 by 10.2 cm) boards and joists for your frame. You’ll also need plywood sheets for the floor and roof, and some kind of exterior finish (vinyl siding, corrugated metal, or wood boards will all work).
- Cut your lumber to size as you work using a circular saw or jigsaw.
- If you don’t want to cut any lumber to size, sketch your schematics and dimensions out ahead of time. Then, go to the building supply store and ask them to cut your lumber to size.
-
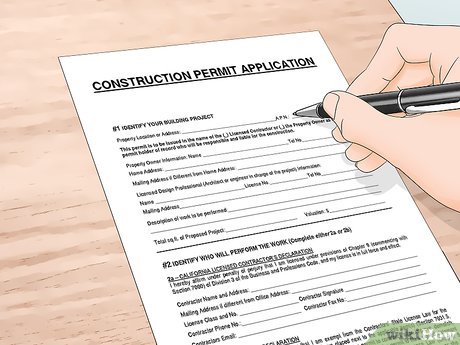
2Obtain any necessary building permits if you need them. It depends on where you live, but you normally don’t need a building permit if your shed isn’t under a certain square footage threshold.[2]
But again, it depends, so contact your local building department to confirm you’re good to go.[3]
- If you need any building permits, obtain them before you start building your shed. They shouldn’t be especially pricey—you aren’t building a garage or some kind of habitable space.
- If you don’t get a permit, you might have to tear down the entire shed and start over, even if you follow the other local building codes. You could also be fined, depending on local laws.
-
 3Level the ground and install deck piers along a grid to support the shed. Use a spade to remove dirt and a tamper to pack and level the ground. Then, lay deck piers down with a mallet. The deck piers will be the base for your flooring.
- You can make your shed whatever size you’d like. In our example design, the piers are spaced 6 feet (1.8 m) apart in one direction and 4 feet (1.2 m) apart in the other for a total grid area of 12 by 8 feet (3.7 by 2.4 m).
- You may prefer to build your shed on a concrete slab to protect it from water. This is also ideal if you live in an area that gets high winds or seismic activity. Level the concrete and lay concrete slabs before you start building the base of the shed.
-
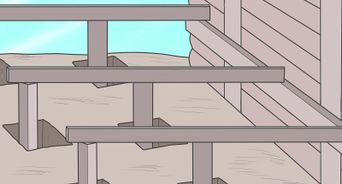
4Install support beams across the deck piers lengthwise. This will be the base for your floor joists, which are going to run in the opposite direction. The easiest way to attach the beams to the piers is with metal straps, which have built-in nail holes. Drive nails through the holes to secure the beams to the piers. Note, you must use treated lumber for your shed or else it will wear down over time.[4]
- In the example design, the beams are 12 ft (3.7 m) long 4 by 6 in (10 by 15 cm) wood beams.
-
5Attach a rim joist along the outer edge of each support beam. Each of these will need to be the same length as the beam underneath. This is going to form one side of the base joists. Use a nail gun to drive wood nails into each beam and attach them to the beams underneath.[5]
-
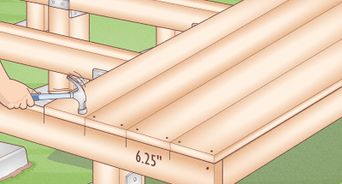
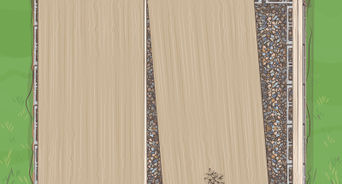
6Install a series of floor joists across the entire length of the floor. Lay your joists out by hand and attach them to the beams using your nail gun. As a rule of thumb, keep the joists separated by 14.5 in (37 cm) gaps (except the final 2 along the edge). This will allow standard plywood sheets to line up with the outermost edges of the joists.[6]
-
7Add pieces of blocking between each joist to keep them still. Joists will shift over time as the weather changes and you walk on the floor if you don’t add blocking. Set a wood block in between each joist in the middle of the floor.[7]
- Nail each backing piece to both of the joists it sits against. This will keep it from shifting from one side to the other.
-
8Nail plywood sheeting to the joists to form the floor. If you’d like extra-strength flooring, use H-clips in addition to nailing the sheets into place. These fit between two pieces of plywood and lock them together for additional structural strength. Lay the plywood sheets down and nail them into the joists below. Place at least one nail every 8–12 inches (20–30 cm) on the joists for best results.[8]
- H-clips are traditionally used for slanted roofs to keep the seams between plywood from separating over time. They’re likely unnecessary for a small shed floor, but they’re a good idea if your shed is on the bigger side.
- In the example design, two standard sheets of 4 by 8 ft (1.2 by 2.4 m) plywood sheets will cover most of the floor and you can saw a third sheet in half to cover the rest.
- Your shed floor may also be screwed down with 3-inch (7.6 cm) deck screws.
Part 2
Part 2 of 3:
Assembling the Walls
-
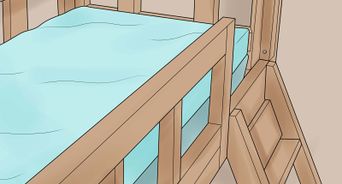
1Hang the back wall first to anchor the other walls. Place the top and bottom beams on the ground. Make them the same area as the floor. To keep your measurements simple, make the spacing between the vertical studs identical to the spacing between your floor joists. Assemble the wall on the ground and nail it into your frame.[9]
- Note that the back wall will be lower than the front wall so that the roof slopes and directs rain away from the door.
- Put some heavy, tall items around both sides of the back wall while you work on the other 3 walls. This will keep the wall from swaying in the wind or falling over.
-
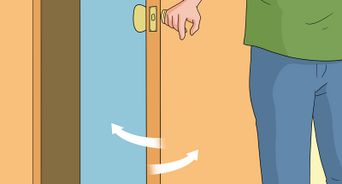
2Build and hang the front wall next. Make the front wall the exact same as the back wall except 6–12 inches (15–30 cm) taller so that rain drains off the roof. Also, skip 3-5 joists for your door frame so that you can hang a door in the shed when you’re done.[10]
- The easiest way to deal with the door part of this equation is to purchase a prefabricated door, measure it, and then just leave an opening that matches its dimensions.
- Prefabricated doors are deceptively easy to install. Just slide the frame into the opening in the wall and nail the joists and frame together.
- You don’t need a door if you live in a temperate area and you don’t mind chasing the occasional squirrel out of your shed!
-
3Hang the side walls last at a slight angle. Make the bottom plate of each side wall the same length as the distance between the bottom plates of the front and back wall (so that the side walls will fit between them). Place the wall studs 16 inches (41 cm) apart (from center to center, not from edge to edge). Most importantly, make the top plate slightly angled so that the roof slopes, which makes the height of each vertical stud slightly different.[11]
- Since this stud spacing doesn’t perfectly divide into the total length of the side walls in our example design, the two outermost studs make up for this discrepancy by being slightly closer to their neighbors.
- If you’re not sure how to calculate the necessary height of each vertical stud, make the two outermost vertical studs first, lay them the correct distance apart, cut a top plate that spans this distance, and then cut each remaining vertical stud individually.
-
4Assemble the four walls and attach them to one another. If possible, nail the wall structures to the underlying support from the bottom up. However, if this is not possible with the design you’ve chosen, simply nail them downwards through the plywood and joists. You can also toenail them into place by driving the nails downwards and at an angle.[12]
- Enlist some friends or family members to help you hold the walls up while you’re assembling everything.
Part 3
Part 3 of 3:
Adding the Roof & Finishing Touches
-
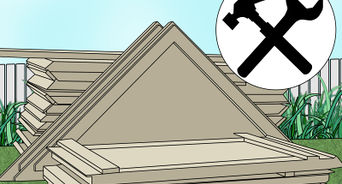
1Build rafters across the roof and separate them with blocking. Make sure the rafters overhang the walls of your shed for increased weather protection. Space the rafters the same way that you spaced your floor joists, since this will make your measurements easy. Once all rafters are in place, attach pieces of blocking between each pair of rafters along the top plates.[13]
-
2Nail plywood sheeting to the rafters to form the roof. If you added an overhang, make sure your plywood extends to the edge of the overhang. Measure the dimensions of your shed’s roof, including the overhang, and cut your plywood to the same dimensions so that it covers the whole roof.[14]
-
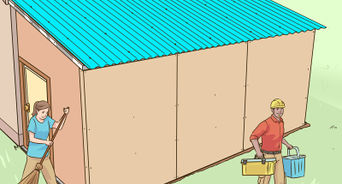
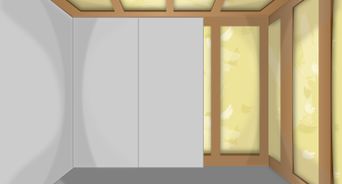
3Cover the walls to keep the studs safe and dry. Use siding, textured plywood, corrugated metal, or anything else that gives the shed a more finished look. Add some insulation if you want to protect the contents of the shed from any extreme cold.[15]
- Nail the siding, plywood, or metal directly into the joists.
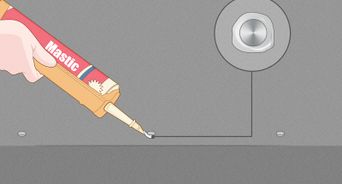
- Cover the seams of your wall with siding or all-weather caulk.
-
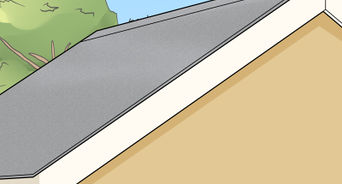
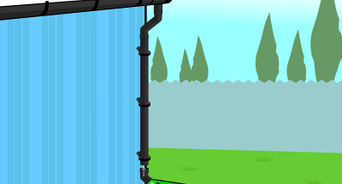
4Add tar paper to the roof to protect your shed. Start from the lower end of the roof slope and work your way upwards. Make sure each new level of paper overlaps the one below it to keep rain from seeping into the cracks. You can also use shingles or other roofing material if desired.[16]
- You can also lay sheets of corrugated metal on top instead of adding tar paper if you want a thicker protective layer.
- Feel free to paint your shed once you’ve built it. Prime and paint the building using any all-weather exterior paint.
- Want an even more attractive shed? Lay some asphalt shingles on your roof.
Video
Things You’ll Need
-
Deck piers
-
Wood nails
-
Mallet
-
Hammer
-
Nail gun
-
2 by 4 in (5.1 by 10.2 cm) wood joists
-
1⁄2 in (1.3 cm) plywood sheets
-
Tar paper or corrugated metal
You Might Also Like


[ad_2]
Source link : https://www.wikihow.com/Build-a-Shed

