


[ad_1]
Steps
Inserting a Single Thread Through a Needle
-

1Choose a needle that can accommodate your thread’s thickness. Once you’ve picked out the thread for your sewing project, look at several needles and hold the thread up to a needle’s eye. The eye shouldn’t be narrower than the thread or you’ll have a hard time threading the needle.[1]
- Look at the point of the needle too. You may want a needle with a sharp point so it can pierce fabric easily, for instance, or pick a needle with a blunt tip if you’re sewing knit fabric.
- Consider buying a pack of needles in many different sizes, so you can try a few until you find one that’s the right size.
Did You Know? The opening of the needle where you insert the thread is called the eye.
-
 2Unspool at least 1 foot (30 cm) of thread and trim the end for a clean cut. Unravel as much thread as you want to use for your project and cut it from the spool. Then, use your scissors to cut the very tip off of the end of the thread that you’ll be threading onto the needle. This will make a clean cut so fibers don’t stick out from the end of the thread.[2]
- Try licking the end of the thread to help the fibers stay together.
-
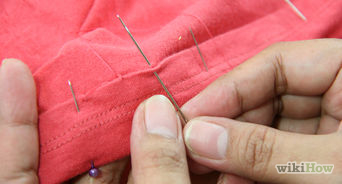
3Insert the end of the thread through the eye of the needle. Hold the needle between your thumb and forefinger while you hold the end of the thread with your other thumb and forefinger. Then, push the end of the thread through the eye.[3]
- Play around with threading the needle. For example, you might find that it’s easier for you to tightly hold the end of the thread while you push the eye of the needle onto the thread.
Variation: You can fold the end of the thread over to make a small loop. Then, push the tiny loop through the eye of the needle.
-
4Try using a needle threader if you’re using a very small needle. If you’re struggling to push the thread through the eye of the needle, especially if it’s small, buy a needle threader from a craft store. Hold the wide end of the threader and insert the bent, wire end through the needle’s eye. Then, push the thread through the larger eye of the threader before you pull the threader back through the needle’s eye.[4]
- Needle threaders work really well if you’re using a thread that keeps splitting as you try to thread the needle.
-
5Pull the thread through the needle to create a tail. Grasp the thread end that you pushed through the needle and pull at least 2 inches (5.1 cm) of it through the needle. This will create a tail that prevents the thread from slipping back out through the needle.[5]
- The size of the thread tail is a personal preference so pull out as you’re comfortable working with.
Double Threading a Needle
-
1Cut at least 2 feet (61 cm) of thread. You can use more than this depending on how much thread you need for your project. Keep in mind that you’ll be folding this in half, which is why you should start by pulling out about twice as much thread as you’ll need.[6]
- For example, if you’re darning a sock, you might pull out 3 feet (91 cm) of thread in order to work with a 1 1⁄2 feet (46 cm) double-strand of thread.
-
2Fold the thread in half and hold the ends together. Pinch both of the thread ends together between your thumb and forefinger. This will fold the thread in half evenly so it’s a double strand.[7]
Tip: You’ll have an easier time handling the thread and getting it through the needle if you’re working in a well-lit space. You can sit right next to a lamp to get the best lighting.
-
3Push both ends of the thread through the eye of a needle. Imagine you’re threading the needle as usual, but ensure that both ends of the thread go through the eye of the needle. Then, take both ends between your thumb and forefinger and pull the thread until the needle is about 4 inches (10 cm) from the loop end of the thread.[8]
-
4Pull the needle through the loop to make a tight knot. Insert the needle through the middle of the thread loop and keep pulling the needle so the loop travels to the base of the needle. Tug on the needle a little so the loop tightens into a small knot at the base of the needle near the eye. Then, you can tie a knot at the end of the thread.[9]
- Creating a small knot near the needle will prevent it from sliding around on the double-stranded thread while you’re sewing.
Securing a Knot
-
1Wrap the thread end around your middle finger. Use your thumb to hold the loose thread end in place against your middle finger. Then, wrap the thread over your middle finger in order to make a complete loop of thread around the finger.[10]
- If you used a double-strand of thread, keep them together and wrap both strands around your finger.
Tip: To create friction that makes it easier to tie the knot, lick your thumb and middle finger or dip it in a little water before you wrap the thread.
-
2Roll the thread 2 to 3 times to create additional layers for the knot. Keep the thread between your thumb and forefinger. Then, slowly roll your middle finger towards the base of your thumb.[11]
- The thread should feel thicker between your fingers because you’ve wound it around itself.
-
3Pinch the rolled thread between your fingers. Instead of letting the rolled thread slip off your fingers, keep your thumb and middle finger firmly pressed down on the thread.
-
4Pull the thread tightly to create the knot. Keep your fingers clamped down on the thread while you use your other hand to pull the length of thread in the opposite direction. This will form the end of the thread into a knot.[12]
Variation: If you’d like to make a neater knot, especially if you’re working with thick thread, you can insert the end of the thread through the loop that you wound around your finger. Loop it through another time and pull it to create a double overhand knot.
Video
Tips
-
To thread a sewing machine, read the manual that came with your specific model. Most sewing machines will have you pull the thread down from the top of the machine before inserting it through the front of the needle.⧼thumbs_response⧽

Things You’ll Need
-
Needle
-
Thread
-
Sharp scissors
-
Threader, optional
You Might Also Like


[ad_2]
Source link : https://www.wikihow.com/Thread-a-Needle-and-Tie-a-Knot

