[ad_1]
Since the early days of desktop publishing, photo editing, and graphic design, professionals, budding professionals, and hobbyists alike have had to deal with color shifts—seeing one color on a monitor but getting different results when the document, photograph, or artwork prints. Red fruit on a monitor, for instance, coming out orange, chartreuse, neon, or plastic-looking bright red.
Why? Well, the simplest answer is that monitors and printers see colors differently. In other words, they use different color models to produce the same hues. Monitors, for instance, combine red, green, and blue (RGB) to display the colors you see, while most printers combine cyan, magenta, yellow, and black (CMYK) to reproduce colors.
Although it’s important to note that many photo printers may start with the basic CMYK process color model, some, especially professional-grade photo printers, deploy as many as 12 ink colors. The more colors you tack on to your color model, the wider the range of colors (known as the color “gamut”) the device can reproduce, and the more difficult it becomes for monitors and printers to output matching colors.
This can be solved by calibrating your monitor to your printer. This way, when you go to print next, you will know that the color you see on the monitor will match the color on the paper.
Your Equipment Matters

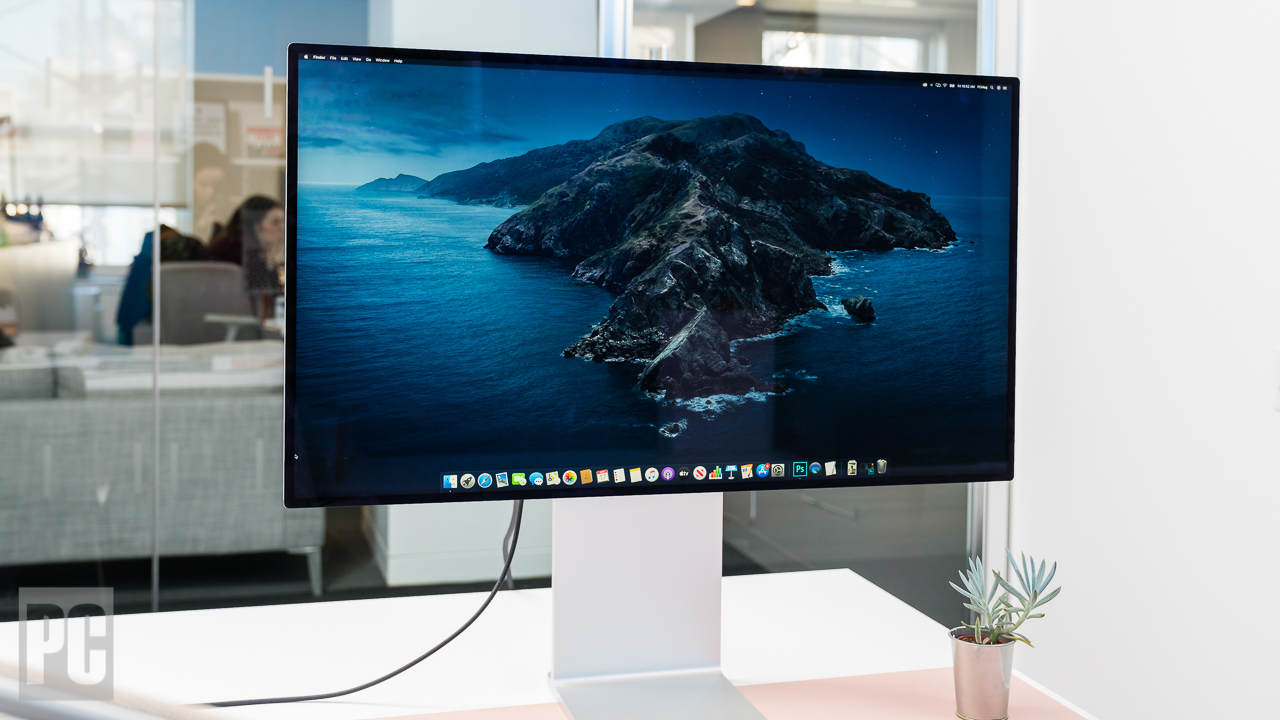
Apple’s Apple Pro Display XDR
(Credit: Zlata Ivleva)
Whether you’re a professional desktop publisher, photographer, graphic artist, or hobbyist, the quality of your equipment is highly important. If you’re a professional—and your living is dependent on the quality of your work—you should buy the best equipment you can afford.
Everyday displays that cost, say, $75 to $500 aren’t really designed for photo editing and design work. Their manufacturers assume that you’ll be doing more basic office tasks, such as running Microsoft Office programs, reading and writing emails, and following social media.
More high-end monitors typically have controls for adjusting display parameters, such as brightness, gamma, saturation, individual RGB levels, and so on. My 49-inch graphic design monitor, for instance, comes with many presets, including RGB, sRGB, and Adobe RGB, with the ability to edit, create, and save others, as well as the ability to adjust color levels, gamma, hue, saturation, gain, and much, much more.
Having all those controls allows me to do some rather intricate color tweaking. The multiple presets allow me to calibrate the monitor to several different work environments and variables, and easily switch between them as needed.
Hardware Calibration

Datacolor’s Spyder X
(Credit: Datacolor)
Generally, there are two ways to calibrate your monitor: With software or by using special calibration equipment. Monitor calibration kits and/or monitor-printer calibration kits have been around for some time now, and many work quite well. They can range in cost from just under $100 to more than $500. Without question, hardware calibration is the most accurate method.
However, each product handles the calibration process a little differently, so I can’t walk you through the hardware calibration routine here. Besides, calibration kits come with their own instructions. Suffice it to say, though, in my opinion, professionals should invest in a calibration device or colorimeter.
One of the greatest benefits of hardware calibration for each device in your workflow (the monitor, printer, scanner, and even your Apple TV) is that they allow you to create device-independent ICC (International Color Consortium) profiles.
With ICC profiles, each device creates color based on its own color spaces, and each color space uses specific values to reproduce colors. Since colors are created from values and percentages in the various devices’ ICC profiles, the idiosyncrasies of each individual device shouldn’t (theoretically) affect the way each one outputs colors.
ICC Profile Calibration

Note that calibration hardware isn’t the only way to get ICC profiles. When you install your printer and monitor drivers, often that includes installing manufacturer-generated ICC profiles.
In Windows 10 and Windows 11, where color management is built into the core of the OS, most applications reproduce colors based on the models in these profiles. Higher-end applications, such as Adobe Photoshop and Illustrator, however, get their instructions for displaying colors from Windows ICC profiles, unless you tell them to do otherwise.
It’s important, then, that you make sure that both your monitor and your printer are using the proper ICC profile. You can see and change these profiles from the Windows Color Management settings screen in the Control Panel. To get there, follow these steps:
-
Search for “Color Management” in Windows Search.
-
Select the Color Management entry.
-
Choose your monitor from the Device drop-down menu.
Note that if you did not install the drivers that came with your monitor, Windows may recognize and install its own profile for your display. Some inexpensive displays may not come with ICC profiles, and in turn, draw their calibration info from one of Windows’ several generic profiles. And remember that, as mentioned, a good number of monitors come calibrated for office settings; the monitor may require some additional tweaking to get colors to match more closely to what comes out of your printer.
Most modern printers come with ICC profiles, which programs like Photoshop, Illustrator, and InDesign load and read as soon as you select the printer in the dialog box when it’s time to print. You can also pick up ICC profiles from the hardware manufacturer’s website or by contacting the company directly. If you need to manually install a profile, follow these steps:
-
Right-click on the file (it will have a .icc file extension).
-
Click Install profile.
Profiling Your Paper
Another important part of the calibration process is choosing and using the right paper. First, don’t bother trying to calibrate to inexpensive everyday copy paper. No matter what you do, color-rich graphics and photos won’t look great. Also, different types of papers display colors dissimilarly.
Another advantage of calibration kits—some of them, anyway—is that they allow you to create profiles for different scenarios, including various paper types. Most paper mills have profiles available for their midrange and premium papers.
If, by the way, all this sounds too complicated (it’s not, really, and the web is loaded with information on working with ICC profiles) and more than you want to deal with, there are professionals out there who will help you calibrate your equipment.
Recommended by Our Editors


Preparing Your Environment

(Credit: HP)
No matter what calibration technique you use, for your monitor to display colors consistently, your work environment should be darkened, but not necessarily dark. The goal is twofold:
-
To make sure that the monitor isn’t picking up glare from any light sources (such as a window, an overhead light, or desktop lamp).
-
That your environment maintains the same ambient light throughout your work hours.
It’s also important that you keep your display as clean as possible. Yeah, I know that monitors don’t stay clean more than a day or two, which is how often you should clean your monitor. The slightest bit of dust or film on the screen changes the way colors display.
It’s also important to turn the monitor on and let it warm up for about 20 to 30 minutes to bring it to its normal operating temperature. (Be sure to turn off power management settings that might put it to sleep after short periods of inactivity). Next, set your monitor’s resolution to its native ppi, which is usually the highest setting.
Visual Calibration With Software

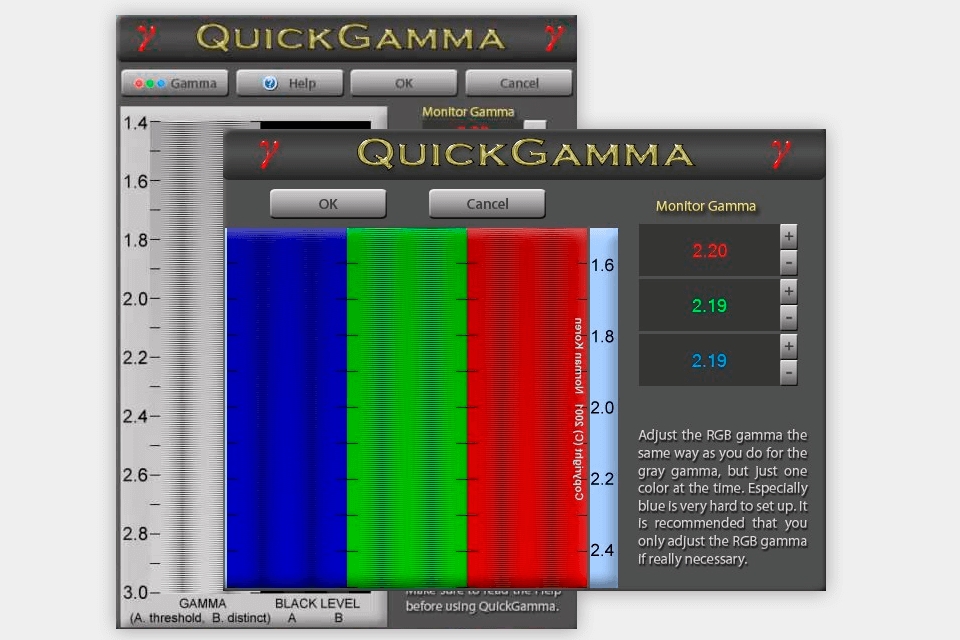
(Credit: QuickGamma)
Most people don’t know this, but Windows and macOS come with built-in monitor calibration features. Without question, the routines built into your computer’s operating system are the simplest and least expensive method to help decrease color shifts. But be warned; they aren’t the most accurate calibration method and can ruin your default color profile on more advanced displays. However, they should serve entry-level users just fine. You can follow these instructions to start the calibration process, and the OS will walk you through the relatively short process:
Windows 10 and Windows 11

(Credit: Microsoft)
-
Search for “Calibrate Display Color” in Windows Search.
-
Select the Calibrate Display Color entry to open Display Color Calibration
-
If your system has more than one monitor, move the Display Color Calibration application window to the display that you want to calibrate.
-
Click Next, then follow the instructions as they walk you through calibrating your monitor.
macOS

(Credit: Apple)
-
Open to System Preferences > Displays > Displays.
-
Select the Color tab in the Displays menu.
-
Click the Calibrate button to initiate the Display Calibrator Assistant.
-
The Display Calibrator Assistant will walk you through calibrating your monitor. An ICC profile will then be generated and associate with your display.
There are also many third-party tools that provide more extensive controls than the software built into your OS. Some of them help you create ICC monitor profiles based on the output from your printer and other peripherals. Some online calibration products work (or at least start) inside your browser, and are free.
Remember, no matter what solution you use, you will also need to familiarize yourself with your monitor’s controls, such as adjusting brightness and contrast, in order to get the best and most accurate results.
Which Calibration Routine Is Right for You?
I’ve already stated that if you’re a professional whose livelihood depends on the accuracy and quality of your work, you should choose one of the several colorimeter hardware options. Here’s another reason: When I tried to run the Windows’ calibrator on my higher-end, 30-inch graphics monitor, I was warned that the display already has a “wide-gamut” color profile, and that using Display Color Calibration on it would create a conventional gamut, which would be a poor fit for the display and result in distorted color appearance.
That doesn’t sound promising, does it? My point, though it may seem obvious, is if you’ve already spent the money on high-end equipment designed to help you succeed in your creative endeavors, spending a little more on calibration equipment to ensure the accurate displaying and printing of color seems wise. The OS calibration tools—especially the Windows one—are designed more for entry-level, midrange, and laptop displays, as are several of the third-party software solutions.
The good news is that adjusting your monitor’s settings won’t really hurt anything permanently; it’s easy to return what you change to its factory settings. Some other good news is that the makers of graphics and photography monitors, as well as desktop publishing pundits, recommend calibrating your monitor every two to four weeks, and in mission-critical environments, as often as weekly, or even daily.
[ad_2]
Source link : https://www.pcmag.com/how-to/how-to-color-calibrate-your-monitor-to-your-printer