


[ad_1]
Things You Should Know
- Start lacing your Vans by inserting both ends of the shoelace downward through the bottom pair of eyelets (lace holes).
- Thread your laces through the eyelets on either end of the shoe, alternating from left to right with each stitch.
- Use thick, white shoe laces for lacing. The Vans brand laces often look best, but any white sneaker laces will work.
- Once you’ve laced through all your eyelets, tie the remaining lace together and fold it into the tongue of your shoe.
Steps
Method 1
Method 1 of 4:
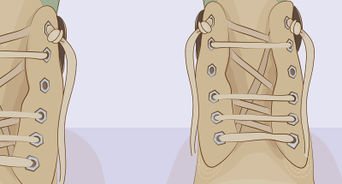
Bar-Lacing Vans
-
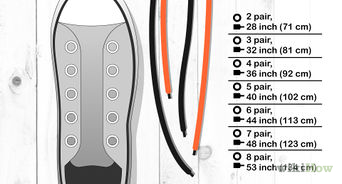
 1Count the number of eyelet pairs on your shoe. Check to see if your skate shoes have an even or odd number of eyelets (lace holes) on either side. Vans with an even number of eyelets can be straight-laced (or bar-laced). If your Vans have an odd number of eyelets, you may have to adjust your technique slightly.[1]
- Most Vans have about 7 or 8 eyelets. However, shoes can have as few as 4 and as many as 9.
-
2Insert each end of the shoelace downward through the bottom 2 eyelets. Keeping the left lace on the left side and the right lace on the right side, thread your shoelace through the bottom 2 eyelets. This will create a bar across the bottom with the laces going inwards.[2]
- Some Vans shoes come with the bottom part of the shoe already laced. If your shoes arrive out of the box like this, skip this step.
- Pull to ensure that both the left and right sides of your shoelace are equally long. If one side is longer than the other, re-thread the lace accordingly.
-
3Thread the right lace through the eyelet directly above it. Feed the right lace underneath the shoe’s eyelets so that it pops out of the second-to-bottom eyelet on the right side. This will hide the inner lacing and give this style its unique look.[3]
- Whether you go by your right or the shoe’s right doesn’t matter. The end result will be the same, as long as you stay consistent in your threading.
-
4Feed the left lace through the 3rd-bottom-eyelet. Take the left side of your bottom lace and thread it underneath the shoe’s eyelets so it pops up out of the 3rd-bottom eyelet on the left side. This will leave an empty eyelet on the left side between the original bar and the emerging lace.[4]
-
5Cross the right lace through the other hole in the 2nd-to-bottom eyelet. Take the right part of your lace and stretch it over to the left side of your shoe. Then, insert the lace downward through the empty hole in the 2nd-to-bottom eyelet. This will leave you with 2 bars in your lacing and both laces on the left side.[5]
-
6Cross the lace emerging from the 3rd-bottom eyelet to the right side. Take the lace from the threaded hole in the 3rd-bottom eyelet and feed it across your shoe. Insert the lace downwards through the empty hole in the 3rd eyelet. Now, you’ll have 3 bars in your lacing and each lace on a different side of the shoe.[6]
-
7Continue repeating this pattern. Feed the left lace underneath the shoe so that it pops up out of the 5th eyelet on the left side. Then, feed the right lace underneath the shoe so that it pops up out of the 4th eyelet on the right side. Cross each lace over to the corresponding eyelet on the other side to form new bars.
- Repeat as necessary, continuing to reverse sides after every 2 bars are completed.
- If your shoes have an odd number of eyelet pairs, skip lacing the last 2 eyelets (the eyelets closest furthest from your toes).[7]
- Avoid barring the top pair of eyelets so you have some lace left over to tie your shoes.
Method 2
Method 2 of 4:
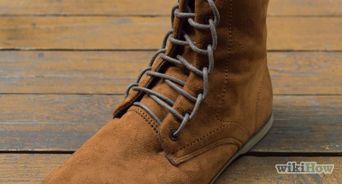
Cross-Lacing Vans
-
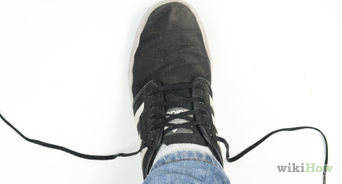
1Insert each end of the shoelace downward through the bottom eyelets. Push both ends of the shoelaces through the eyelets closest to the toe of the sneaker. The shoelace will form a bar across the bottom of the shoe with the laces going inwards. Pull the ends of the laces up over the bar and then downward toward the toe.[8]
- Tug to ensure that both sides of your shoelace are equal in length. If one side is longer than the other, pull the lace accordingly.
-
2Cross the right lace over to the left side of the shoe. Insert the right lace downward and diagonally through the 2nd-to-bottom eyelet on the opposite side of the shoe. Thread so that the right lace crosses the tongue of the shoe with the left lace emerging from between the bar and the cross-lace.Then, pull the crossed lace to the left (away from the shoe) to get it out of the way.[9]
- Whether you go by your right or the shoe’s right doesn’t matter. Just stay consistent and the end result will be the same.
-
3Cross the left lace over to the right side. Insert the left lace downward through the 2nd-to-bottom eyelet on the right, just as you did with the other side. You will now have a bar and 2 cross-laces in your lacing. Pull the newly-crossed lace to the right (away from the shoe) to get it out of the way.
- If you want a looser lacing style, tug on the tongue and/or sides of your Vans every so often to free up some tension in the cross-laces.[10]
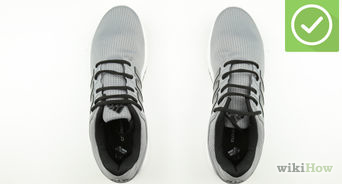
Sk8 Highs and other Vans high tops tend to look better with this looser, cross-laced stitching style.
- If you want a looser lacing style, tug on the tongue and/or sides of your Vans every so often to free up some tension in the cross-laces.[10]
-
4Continue lacing in this pattern. Start by crossing the lace on the right-hand side over to the left side and downward through the eyelet, making sure that the other lace emerges from between the two crossings. Pull the newly-crossed lace to the left to get it out of the way. Then, cross the left lace over to the right side. Repeat until the shoe is completely laced.[11]
- Lacing the shoes this way ensures that cross-laces going in one direction always dominate the cross-laces going in the other. When the time comes to lace your other shoe, reverse the process so that your laces mirror each other.
- Leave a few eyelets empty if you want more room for your foot to maneuver. Lace all your shoe’s eyelet if you want a more snug fit.
Method 3
Method 3 of 4:
Zipper-Lacing Vans
-
1Insert each end of the shoelace downward through the bottom eyelets. Zipper-lacing is a happy medium between cross-lacing and bar lacing. To begin a zipper-laced pattern, thread your shoelace downward through your Vans’ bottom pair of eyelets, with an equal amount of lace on the left and right side.
- Zipper lacing provides extra tightness in the shoe, because it locks at each pair of eyelets.[12]
This is especially helpful for Vans Old Skools and other, flatter Vans.
- Zipper lacing provides extra tightness in the shoe, because it locks at each pair of eyelets.[12]
-
2Tuck each side of the lace diagonally under the first bar. Grab the aglets (tips of the lace) and insert each side of the shoelace underneath the horizontal row in the bottom 2 eyelets. Thread the left side of the lace in the right direction and the right side of the lace in the left direction, creating a diagonal pattern.[13]
-
3Feed the right lace through the left eyelet directly above and vice versa. After you’ve tucked both laces underneath the first bar, insert both laces through the 2nd-to-bottom eyelets, exactly like you would for a cross-lacing pattern. Feed the left lace through the 2nd-to-bottom right eyelet and the right lace through the 2nd-to-bottom left eyelet.[14]
- Thread both laces from underneath the eyelets instead of downward.
-
4Tuck each lace underneath the cross-laced pattern directly below. Like you did for the first pair of eyelets, insert each lace diagonally under the row in the 2nd-to-bottom pair of eyelets. Feed the left lace toward the 3rd-bottom right eyelet and the right lace toward the 3rd-bottom-left eyelet.[15]
- Because of the zipper-like pattern, the stitching pattern in the 2nd-to-bottom eyelets will look more diagonal than bar-laced. Continue tucking under the diagonal rows in either direction.
-
5Feed the laces through the 3rd-bottom eyelets. After both laces have been tucked under the row directly below them, insert them through the eyelets 1 slot above them in their opposite direction: left lace goes through right eyelet and right lace goes through left eyelet.[16]
-
6Repeat this pattern until your shoe is laced all the way. Continue lacing your shoe through the remaining pairs of eyelets. Loop the laces under the row directly beneath them and feed them through the pair of eyelets directly above them diagonally.[17]
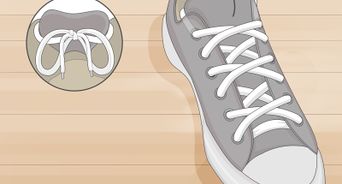
- It’s likely there won’t be much lace left to tie when you’ve finished looping a zipper-lace pattern. If this is the case, simply tuck what’s left of your laces under the tongue of your shoe. The pattern itself will be tight enough to keep your Vans from falling off.
Method 4
Method 4 of 4:
Lacing Basics
-
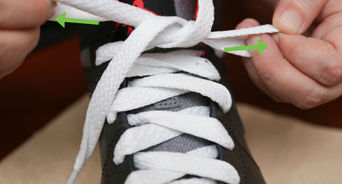
1Keep your shoelaces from twisting. The straight, flat-laced look is classic Vans so you want your laces to look crisp and new. Each time you pull your laces through the eyelets, slowly flatten them out to keep them from twisting up and looking uneven.[18]
- Don’t over-tighten your laces. This can cause them to bunch together and mess up the look.
- Feel your laces to ensure they’re firm when you take your Vans out of the box for the first time. If your laces are soft and floppy, you may have been given fake Vans and further inspection is required.
-
2Face your shoes towards you when lacing. It’s a lot easier to lace up your sneakers when they’re on the ground, with the toe facing you. To lace your shoes more clearly and easily, take them off beforehand and turn them in your direction.
-
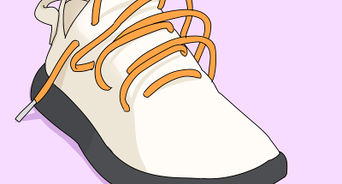
3Use thick white laces. Vans laces are usually the best laces for old skools, high tops, and other types of Vans. However, any variety of white sneaker lace will work. In general, skate laces are pretty puffy and white, whereas basketball and other sneaker laces are thinner and more cylindrical.
- Use any color of laces you like, but new white laces are the most commonly associated with Vans.
-
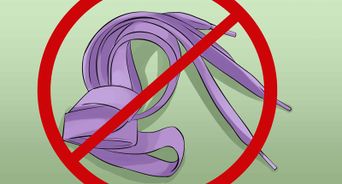
4Change your laces regularly. Having a fresh set of laces always looks cool. Switch out your laces every couple of weeks, especially if you’re skating regularly and breaking laces, or scuffing them up.
-
5Change up the way you lace your shoes. To get the most life out of your shoes, alternate between the styles you use when you lacing them. This way, they won’t wear from repeated lacings.
- If you bar-lace your shoes, cross-lace them every now and then to keep them looking new.
- If you cross-laces your Vans, change the direction of the crosses, so that the right side isn’t always over the left, or vice versa. This will help to keep the shoes from wearing unevenly.
Video
Tips
-
“Authentic” and “Era” Vans are cross-laced from the outside-in, because of the way they’re cut.[19]
With the flaps of the shoe so close together, an inside-out lacing would cause the first criss-cross of the laces to be hidden.⧼thumbs_response⧽
Submit a Tip
All tip submissions are carefully reviewed before being published
Thanks for submitting a tip for review!

You Might Also Like


[ad_2]
Source link : https://www.wikihow.com/Lace-Vans-Shoes

