


[ad_1]
Things You Should Know
- Assemble your potato gun using a 3 in (7.6 cm) wide PVC pipe (14 inches (36 cm) long) as the main chamber.
- Attach a 4 ft (1.2 m) long 1.5 in (3.8 cm) wide PVC pipe to the chamber using a coupler and reducer to form the barrel.
- Install a spark generator or BBQ ignition switch to the chamber to make the trigger.
- Potato guns are dangerous. Never fire a potato at a person and stay clear of the muzzle when you’re igniting the gun.
Steps
Part 1
Part 1 of 4:
Buying and Cutting the Pieces
-
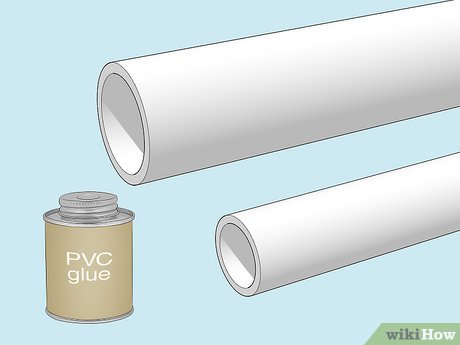
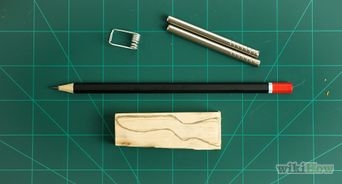
1Purchase the PVC pipes and glue you need for assembly. All the parts necessary for this project can be bought at your local hardware store if you don’t already have them at home. Some hardware stores may even cut the PVC pipe you’ll need for this project to length as a free service or for a minor fee.[1]
- You need a 3 in (7.6 cm) wide PVC pipe that’s 14 inches (36 cm) long and a 1.5 in (3.8 cm) PVC pipe that is 4 feet (1.2 m) long.

- Only use schedule 40-80 PVC pipe. Schedule refers to the thickness of the pipe’s walls. Pipe thinner than schedule 40 will be unsafe and could burst under high pressure.[2]

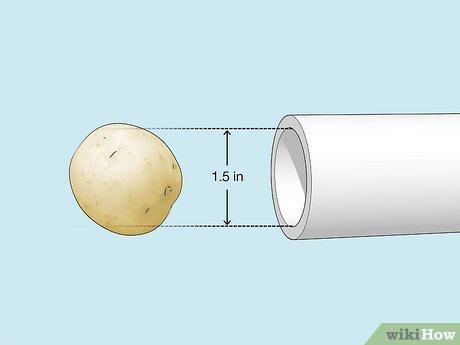
- This build will create a potato gun that fires 1.5 in (3.8 cm) baby potatoes. If you want to craft a huge potato cannon that fires russets and Yukon golds, go up at 1–1.5 in (2.5–3.8 cm) for each PVC pipe you use (i.e. use a 3 in (7.6 cm) barrel instead of a 1.5 in (3.8 cm) barrel).
- You need a 3 in (7.6 cm) wide PVC pipe that’s 14 inches (36 cm) long and a 1.5 in (3.8 cm) PVC pipe that is 4 feet (1.2 m) long.
-
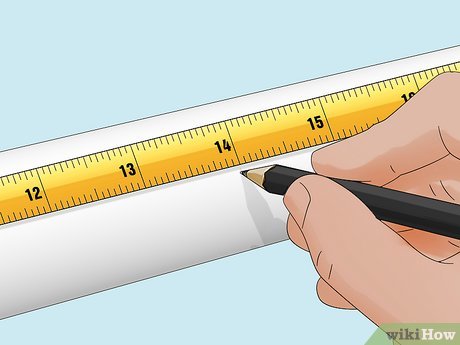 2Measure and mark your PVC pieces for cuts, if necessary. If you didn’t ask the hardware store to cut the PVC pipes for you, measure and mark the cuts yourself. Use a felt tipped marker to mark the PVC at the following lengths so they’re ready to be cut:[3]
- 3 in (7.6 cm) wide PVC marked at least 14 inches (36 cm) in length. This will be your ignition chamber.
- 1.5 in (3.8 cm) wide PVC marked at least 4 feet (1.2 m) in length. This is going to be the barrel.
-
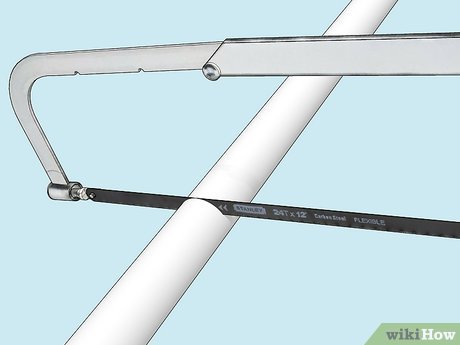 3Cut the PVC pipes along the marks you made using a hacksaw. Clamp the pipes down to a work bench or have someone hold the pipe on a flat surface as you saw. The cuts don’t need to be perfect. Use a hacksaw to trim your PVC to size. Once you’re finished, remove plastic burrs by rubbing the cut edges with a medium-grit sandpaper.[4]
- If you don’t have a hacksaw, you can use a PVC pipe cutter, handsaw, or miter saw.
- If you don’t have sandpaper, you can clean up the burrs at the cut edges using a utility knife.
-
 4Clean the PVC pipes with a rag. Grit or plastic shavings from cutting the PVC can negatively impact the seal of parts when fitted together. Take a clean rag and wipe all parts of the PVC clean. If there are a lot of shavings, use a vacuum cleaner.[5]
Part 2
Part 2 of 4:
Assembling the Launcher
-
 1Glue the adapter and plug into one end of the 3 in (7.6 cm) chamber. Spread PVC glue around the outside of your main chamber at one end using the applicator on the glue or cement lid. Twist a 3 in (7.6 cm) PVC female adapter over the area you glued. Then, screw a PVC plug into the adapter.[6]
- When you glue the PVC pieces together, hold them together firmly for at least 60 seconds so the glue bonds.

- Twist each glue joint a quarter-turn as you are pushing it together. This will encourage a better seal.

- Whenever you apply PVC glue or cement, use a clean towel to wipe away any excess glue.
- The section you’re assembling will be the very back of the launcher.
- When you glue the PVC pieces together, hold them together firmly for at least 60 seconds so the glue bonds.
-
 2Attach the coupler to the opposite end of the 3 in (7.6 cm) chamber. Apply PVC glue around the outer lip of the segment and the inner lip of the PVC coupler. Slide the coupler into place on the end of segment with nothing attached to it yet.[7]
- Just to clarify, this is the end that’s opposite to the end you just plugged up.
-
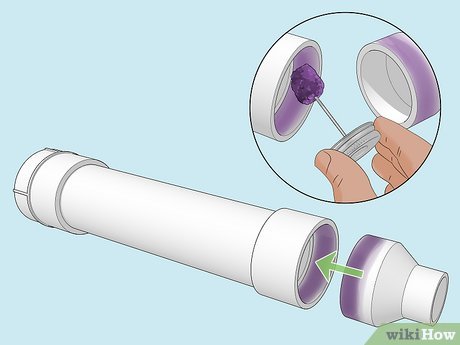 3Glue the 1.5 in (3.8 cm) reducer in the coupler. Apply more PVC cement to the inner lip of the coupler and the outer section of the reducer (only on the big portion). Slide the reducer into coupler until the collar of the reducer meets the end of the coupler.[8]
- You should feel the end of the reducer pressing against the coupler.
-
 4Slide the 1.5 in (3.8 cm) barrel into the reducer. Spread the PVC glue around the inner lip of the reducer and the outer lip thin barrel on one end. Slide the barrel into the reducer until it is roughly even with the base of the coupler.[9]
- This might look kind of silly since the barrel is 4 ft (1.2 m) long. You need a really long barrel to maximize the velocity of your spuds, though!
-
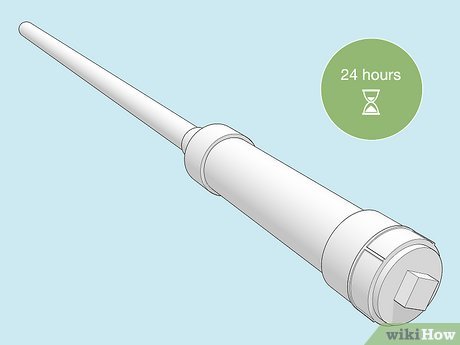 5Wait 24 hours for the PVC cement to harden and cure. If you use your potato launcher before the PVC glue has enough time to harden, the launcher may fall apart when you pull the ignition. Explosive force in the combustion chamber puts stress on the PVC, so the glue must be completely and totally dry.[10]
- You can keep working and add the spark generator or ignition in 2-3 hours, just don’t fire the gun right away.
Part 3
Part 3 of 4:
Adding a Spark Generator
-
 1Drill holes in the combustion chamber for your ignition. You can use a spark generator or a BBQ ignition switch for the ignition mechanism. Basically, these devices create an electrical arc when you press a button. Use a drill and pilot bits to drive holes into the back 1/3 of your 3 in (7.6 cm) chamber near the plug. The holes must be large enough to fit the sparking components of your generator, but not so big they slide around inside the chamber.[11]
- You can buy a spark generator or BBQ ignition online or at a local hardware store.
- Most generators may have two prongs, or a single double-pronged extension.
- Many generators require spark-emitting prongs to be within 2⁄5 inch (1.0 cm) of each other.
- Alternative: If you don’t want to mess around with an electrical switch, drill a hole in the chamber big enough for a long lighter. You can manually light each shot this way if you prefer.
-
 2Insert the spark generator and attach it with electrical tape. Carefully slide the spark-emitting portion of the generator or switch into the holes you’ve drilled. Use electrical tape to pin the cable in the opening so it hangs in the center of the chamber. Then, hook the leads from the spark generator up to the trigger (if necessary).[12]
- Do not use duct tape. Duct tape is conductive and may catch on fire. Only use electrical tape for this. You can use electrical putty instead of electrical tape if you prefer.
- Connect positive leads (+) to positive terminals on the generator and negative leads ( – ) to the negative terminals if they aren’t already pre-wired.
- Once the leads and terminals are attached, prevent accidental shocks by covering any bare wiring or components with electrical tape.
- Check your spark generator by unscrewing the PVC plug from the female adapter. While looking inside the combustion chamber, press the generator trigger several times. If you see a spark, it works.
-
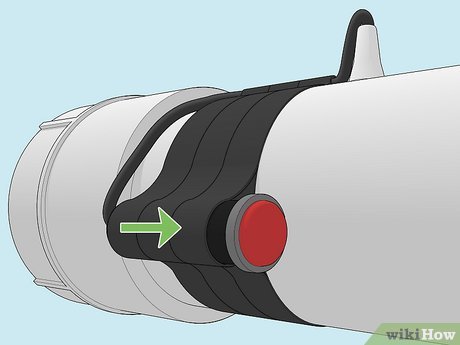 3Tape or glue the ignition switch to the outside of the chamber. You can place the switch itself wherever you’d like so long as it doesn’t pull on the wiring. Once you find a comfortable location for the trigger, tightly wrap it to the chamber with electrical tape or glue it in place.[13]
- Where you put the switch should be informed by how you plan on holding the potato gun. Most users either:
- Mount the gun on their dominant shoulder to make aiming easier.
- Hold the gun against their hip to minimize kickback.
- Take a knee and brace the gun against the ground or their knee.
- Where you put the switch should be informed by how you plan on holding the potato gun. Most users either:
Part 4
Part 4 of 4:
Firing the Launcher
-
 1Insert a spud and unscrew the plug in the chamber. Press a spud into the barrel end of the launcher so it fits snugly and push it down a few inches. You can also use a stick to push it further down. Then, unscrew the cap that’s plugging up the female adaptor at the back of the chamber.[14]
- If you keep dropping potatoes into the chamber, drive a small screw into the base of the barrel. This will keep potatoes from falling into the chamber.
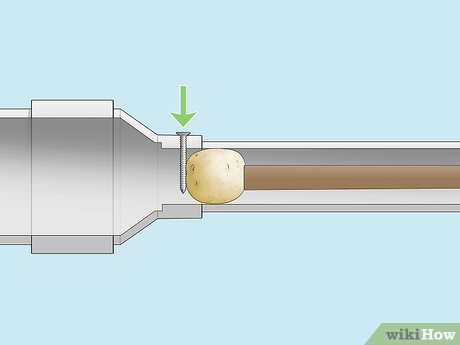
- If you keep dropping potatoes into the chamber, drive a small screw into the base of the barrel. This will keep potatoes from falling into the chamber.
-
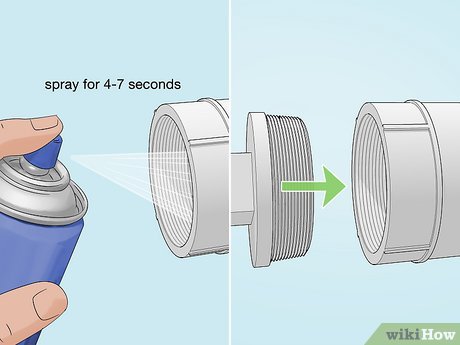 2Spray propellant into the combustion chamber and reseal the plug. Almost all hairspray will work as a propellant for your launcher. Spray the hairspray into the chamber for about 4-7 seconds and your launcher is “loaded” and ready to go. Screw the plug quickly and take aim.[15]
- Too much propellant is as bad as not enough. If there’s not enough oxygen, ignition will not occur. Use trial and error to determine how much propellant is right for you.
-
 3Aim away from people and click the trigger to fire. It may take a few clicks of the trigger before the spark ignites, but when it does the hairspray will ignite. This will force the potato out the barrel of the launcher. Now it’s time for target practice![16]
- Always operate your potato launcher with caution. Improper or reckless usage could cause harm or property damage.
- You can seriously maim or injure someone with your potato gun. It’s just as dangerous as a real weapon, so don’t treat it like a toy.[17]
Tips
Submit a Tip
All tip submissions are carefully reviewed before being published
Thanks for submitting a tip for review!
Warnings
-
It’s very important that you let the glue dry before firing your launcher. Most accidents with these guns happen because an anxious builder does not let the glue dry. Let it dry a full 24 hours before shooting.⧼thumbs_response⧽
-
Make sure you glue every single fitting. If you don’t, the gun will fly apart when you fire it and you risk serious injury.⧼thumbs_response⧽
-
Never look down the barrel of the cannon or pointing it at someone when it’s loaded.⧼thumbs_response⧽
Things You’ll Need
-
3 in (7.6 cm) wide PVC at least 14 inches (36 cm) long
-
1.5 in (3.8 cm) wide PVC 4 feet (120 cm) long
-
Hairspray
-
Sandpaper (medium grit) (optional)
You Might Also Like


![]()


[ad_2]
Source link : https://www.wikihow.com/Make-a-Potato-Gun

