


[ad_1]
Things You Should Know
- Prep your nails by removing old polish and soaking your nails in warm water. Push back your cuticles, then trim and file your nails before buffing them.
- Lay out your fake nails and apply them one by one with a dab of glue on each finger. Then, file the fake nails into your desired shape.
- Decorate the fake nails with nail polish, sparkle, or more elaborate paint designs. Try a French manicure or use a nail art pen to add in details.
Steps
Part 1
Part 1 of 3:
Getting Your Nails Ready
-

1Take off your old polish and/or nails. You’ll need to take off your old polish, even if it’s clear, in order to apply fake nails. Having old polish on your nails will make it harder for the fake nails to stick. They’ll end up falling off in a day or two unless you take this necessary step.[1]
- If you’re already wearing fake nails, either acrylics or gels, go ahead and remove them. You can use acetone or another method to do the job.
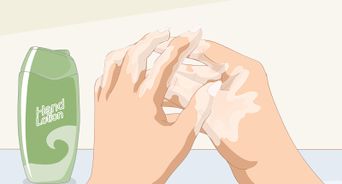
- Wash your hands after using acetone or another polish remover. The chemicals used in nail polish remover can dry out your nails.
-
 2Soak your nails. Giving yourself a quick manicure prep before applying fake nails will keep your nails healthy and ensure the fake nails stay on for as long as possible. Start by soaking them in warm water for about five minutes, until they’re nice and soft. Dry your hands and nails with a cloth.[2]
- You can add some body wash or hand soap to the water if you want, but don’t soak your hands in a solution that contains oil. While a good oil soak is a great way to moisturize your hands, having traces of oil on your nails before you apply fake nails will make it harder for them to stick.
-
3Trim and file your nails. Use a nail clipper or nail scissors to trim your nails so that they’re all even. Trim them short, but not to the quick; you want a bit of an edge to give the fake nails more to hold onto. Use a nail file to give your nails a good smooth edge.[3]
-
4Push back your cuticles. While your nail beds are still soft from the soak, use an orange stick or cuticle pusher to gently push back your cuticles. This way you can make sure you’re gluing the fake nails to your nails, not your skin.[4]
- Don’t trim your cuticles, just push them back. Your cuticles protect your nail beds from getting infected, and trimming them increases the risk that dirt or germs could accumulate there.[5]
- Don’t trim your cuticles, just push them back. Your cuticles protect your nail beds from getting infected, and trimming them increases the risk that dirt or germs could accumulate there.[5]
-
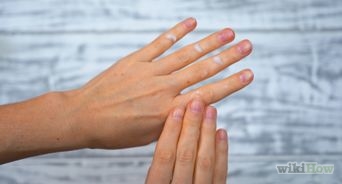
5Buff your nails. Use a nail buffer to buff your nails well. This will create a slightly rough surface, making it easier for the fake nails to adhere. Wipe off the dust when you’re finished.[6]

Part 2
Part 2 of 3:
Applying the Nails
-
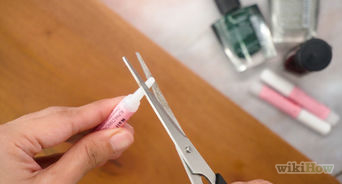
 1Lay out your fake nails. Open up the package and lay all the nails out in the order you will be placing them on your nails. The largest fake nails will go on your thumbs, and the smallest will go on your littlest fingers. Make sure the nails fit comfortably over your real nail, and use a file to shape the bottom edges if necessary.[7]
- The easiest fake nails to apply require a simple application using nail glue. Your kit should come with a nail for each finger and a little bottle of adhesive.
- If you have a kit for applying acrylics, the process is more complicated. See How to Apply Acrylics for instructions.
- If you have a kit for applying gels, see How to Apply Gel Nails.
- If you want to apply the fake nails without glue, see How to Apply Fake Nails without Glue.
-
2Apply the first nail. Swirl a dab of glue on your real nail, and another dab of glue on the part of the fake nail that will be attached to you (not the part that will be sticking up). Carefully place the fake nail directly over your real nail so that the bottom curve lines up perfectly with your cuticle. Press it down and hold for 10 seconds to let it set.[8]
- Make sure the nail is set firmly against your real nail, with no gaps.
- Don’t use too much glue. You don’t want it to squirt out the sides. A few dabs will be sufficient. If glue does squirt out, use a cotton swab to gently wipe it away.
- Be very careful not to put the nail on crooked. The glue dries fast.
- Start applying nails to your dominant hand first.
-
3Repeat with the remaining nails. One by one, glue each nail on using a dab of glue. Remember to press each nail for 10 seconds to make sure they are sealed tight against your real nails.
-
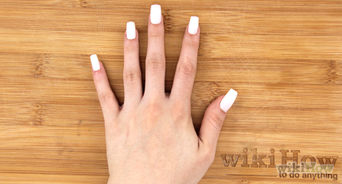
4File the nails into your desired shape. You can use a regular nail file to file them into the classic square or oval shape, or any shape you like. If you’re happy with the shape of the nails straight from the package, no need to file![9]
Part 3
Part 3 of 3:
Decorating the Nails
-
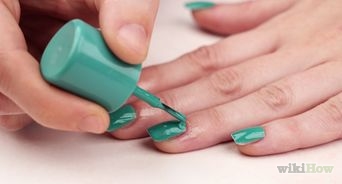
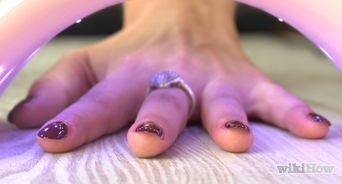
1Paint your nails. Some fake nails come with designs on them, but if yours are blank, you might want to add some extra flair. If you’re going for a classic look, there’s nothing like a few coats of pretty paint. In addition to a monotone style, consider the following designs:
- Ombre nails
- Flower nails
- Galaxy nails
- Ladybug nails
- Marbled nails
-
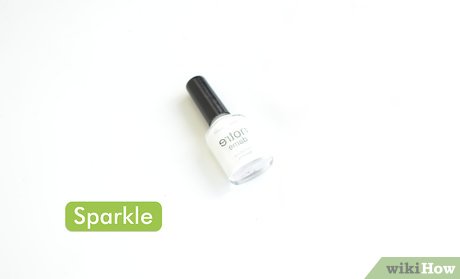 2Add some sparkle. You can add a coat of glitter polish to any color, but if you want your nails to really stand out, get a package of small rhinestones to glue on. You can create a dazzling look by applying several to each nail, or use them as tasteful accents that are part of a painted design.
 -
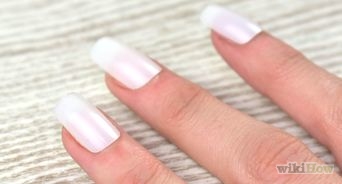
 3Do a French manicure. This is a natural, pretty style that looks great on fake nails. If you want your fake nails to have a realistic touch, a French manicure is the way to go. You can buy a French manicure kit or pick up your own pink, clear and white nail polish to do the job.
 -
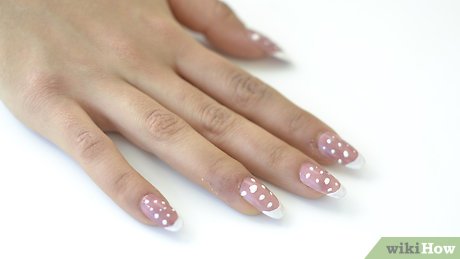 4Try a nail art pen. These come in all kind of colors and make it easy to create the designs you want without the messiness of a nail polish brush. Try a polka-dotted look, or do something more complicated, like a panda or strawberry.
Video
Tips
-
Be sure that the fake nails are wide enough for your nails where your real nails aren’t showing.⧼thumbs_response⧽
-
Make sure your real nails are clean and paint free.⧼thumbs_response⧽
-
Be sure not to have oil on your fingernails while applying or else the fake nails will fall off much more easily.⧼thumbs_response⧽

Warnings
-
The glue dries VERY quickly, so you must be ready right away.⧼thumbs_response⧽
Things You’ll Need
-
A set of fake nails
-
Nail glue
-
Nail file
-
Orange stick
-
Nail clippers
-
Nail buffer
-
Nail polish
You Might Also Like


[ad_2]
Source link : https://www.wikihow.com/Apply-Fake-Nails

