


[ad_1]
Things You Should Know
- Go to Insert > Illustrations > SmartArt > Process to create a timeline graphic.
- Or, create a new workbook and search for “timeline” in the template search bar.
- Add a timeline filter to a pivot table by going to PivotTable Analyze > Insert Timeline.
Steps
Method 1
Method 1 of 4:
Using SmartArt
-

1Click the Insert tab. This will open the Insert toolbar.[1]
- SmartArt is a built-in Excel feature that makes a graphic layout that you can add data to. It does not transform your existing data.
-
 2Click SmartArt. It’s in the Illustration tab of the Insert toolbar.
- If you don’t see this option click Illustrations in the toolbar first.
-
 3Click Process in the sidebar. This will filter the SmartArt options to display only timeline and process-related graphics.
 -
 4Select the Basic Timeline graphic and click OK. It’s a right-facing arrow with three circles. This is a good choice for linear timelines and overall milestones. Once you click OK, your timeline graphic will appear on your worksheet.
- If you’re having trouble finding this option, click each of the graphics to see their names.
- You can adapt other Process graphics to use as a timeline. To see the name and description of each graphic, click its icon in the selection menu.
-
 5Add text to your graphic. By default, the Basic Timeline graphic starts with three text locations. Click each instance of [Text] and replace it with your own.
- To add top-level bullet points, select a bullet point and press ↵ Enter. The timeline graphic will automatically create another circle graphic on the arrow.
- To create secondary bullet points, select a bullet point and press Tab ↹. This will allow you to add bullet points under the top-level titles.
-
 6Click the SmartArt Design tab to edit your timeline. There are a variety of options for making your timeline stand out! Here are a few things to try:
- Change the layout. Click different layouts in the “Layouts” section. This will keep the text you’ve already entered, so you can easily see different options.
- Change the style. Click various styles to find the one that works best for your presentation.
- Change the colors. Click Change Colors to see a drop down menu with different color palettes.
Method 2
Method 2 of 4:
Using a Template
-
 1Open Excel and click New. This is a button in the left sidebar next to a piece of paper icon. Using a template is easy, since many versions of Excel come with pre-built formats. You can also download user-created templates from the internet.
- If you prefer working in PowerPoint, you can create a roadmap with milestones in that app instead.
-
 2Type “timeline” in the search box and press ↵ Enter. The search box is under the “Blank workbook” button. It has the text “Search for online templates” next to a magnifying glass.
- In older versions of Excel, you’ll see a section called “Available Templates” instead of the “Search for online templates” search box.
- Some versions of Excel will show a New from Template button.
- If your timeline tracks the progress of a branching project with many tasks, consider looking for “Gantt chart” templates instead.
-
 3Click a template to select it. You’ll see a list of templates after searching for “timeline.” Clicking a template will open a window with more information about it.
 -
 4Click Create. This will open the template as a new Excel file. You’re ready to start editing the template!
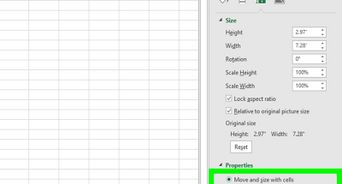
- Click objects to select them. You can move the object by clicking and dragging it. Click the Format tab to edit the shape’s color, outline, and text style.
- Double-click text in the template to change the text.
- Some templates will have help text when you click objects, providing more information about that section.
Method 3
Method 3 of 4:
Using a Pivot Table
-
 1Open the spreadsheet that has a pivot table. To automatically generate a timeline, your data must be organized into a pivot table. You also need the pivot table analyze menu, which was introduced in Excel 2013.[2]
- This method is great for filtering data by time and making a dynamic timeline. Pivot tables are a useful way to quickly see your information in new ways. There are plenty of interesting tricks in Excel!
-
 2Click anywhere inside the pivot table. This will display the “PivotTable Analyze” tab in the top ribbon.
 -
 3Click PivotTable Analyze. This will open a toolbar with options to manipulate the data in the table.
 -
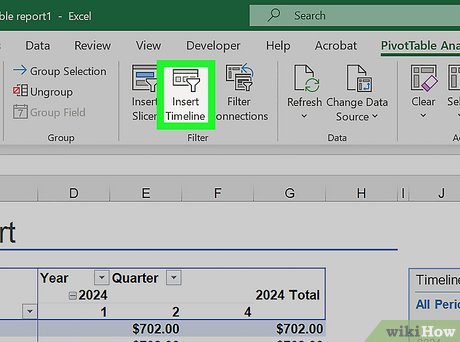 4Click Insert Timeline. A dialog box will pop up showing fields that correspond to a date format. Note that dates entered as text will not be recognized.
 -
 5Select the applicable field and click OK. A new box that allows you to navigate through your timeline will appear.
 -
 6Click the down arrow next to the date type. This will open a drop-down menu allowing you to change the filter’s scale to years, quarters, months, or days.
 -
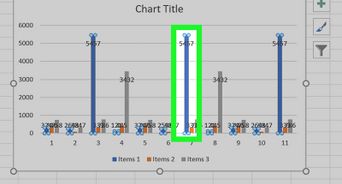
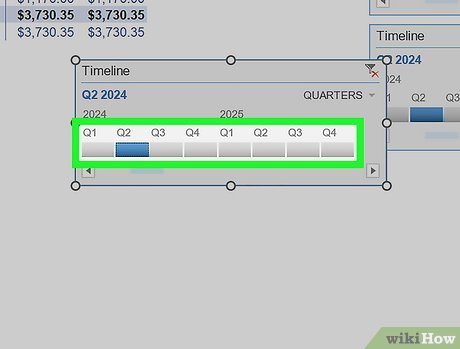 7Click a time section to filter by that selection. For example, if you set the date type to months and click the NOV section, your pivot table will show only data from November of the selected year.
- You can expand your selection by clicking and dragging the gray handles that appear next to the selection.
Method 4
Method 4 of 4:
Using a Basic Spreadsheet (Any Version)
-
 1Type the milestones of your timeline in one column. You can name the column header something like “activity” or “deliverable.”
- This method uses the cells of the spreadsheet to create and format your own timeline. This is a good method if you’re just sharing this information with your team, rather than presenting it.
-
 2Fill in the start and end dates for each milestone. This can just be an estimate if you don’t have the exact dates yet. After this, you’re done with the basic format! You can edit the font, colors, and borders as needed. You could even add a line graph if you have data you want to include next to the timeline.
- Create a start and end column next to the milestone titles column.
- Type in the start and end dates for each milestone on your timeline.
- You can also create a notes column to include information about each milestone.
Video
Tips
-
You can also use PowerPoint to make timelines. It has more graphics options, allowing you to customize your graphic with more detail.⧼thumbs_response⧽
-
If you’re looking for more Excel tips, check out how to use VLOOKUP and our IF function tutorial.⧼thumbs_response⧽
Submit a Tip
All tip submissions are carefully reviewed before being published
Thanks for submitting a tip for review!

You Might Also Like


[ad_2]
Source link : https://www.wikihow.com/Create-a-Timeline-in-Excel

