


[ad_1]
Things You Should Know
- File and buff your nails before applying your base coat.
- Apply 1-2 layers of gel nail polish; cure each layer under a UV or LED lamp.
- Seal your gel nail polish with a layer of clear top coat to protect the color.
- Remove the polish whenever you want by soaking cotton balls in acetone and wrapping them around each nail with tin foil.
Steps
Part 1
Part 1 of 4:
Prepping & Applying the Base Coat
-

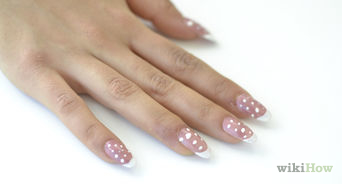
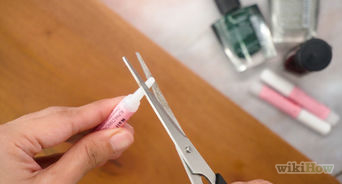
1File your nails to craft your preferred nail shape. To get the ultimate look from your at-home gel nails, start with the ultimate blank nail. Take the time to cut, file, and shape your nails. Before you cut them, decide what shape you want. You can create round, square, pointy, almond, or oval nails, depending on your preference.[1]
- Unlike acrylic nails, which can be shaped during/after application, you can’t shape gel nails once you’ve painted your nails, so the shape of your nails matters a lot here.
- You can totally skip all of the prep work and go right to applying the base coat, but you might as well do it right if you’re going to take the time to apply fancy gel nail polish!
-
 2Clean up your cuticles with a cuticle stick and acetone. Once you have the basic shape to your nail, use a cuticle stick to push back any dead skin off of your nail plate. Then, remove any remaining oil or debris from your nail and clean your fingers using an acetone-dipped cotton ball.[2]
- The acetone will also dehydrate your nails, which will make it easier for your gel nail polish to adhere to the nail.
-
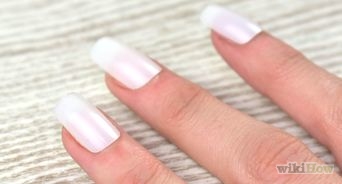
3Apply a super thin base coat to your dry nails. Grab your favorite base coat and get comfy. For gel nail polish, you only need a thin base coat layer. Slowly apply your base coat using the applicator on the cap. Work in smooth vertical strips and wipe off any base coat you get on your surrounding skin.[3]
- You can dry the base coat under an LED lamp for 1-2 minutes or let your nails air dry for 10 minutes. Totally up to you depending on how much of a rush you’re in.
- Some gel nail polishes will come with a specific primer to use instead of a base coat. If your gel polish has a primer, use that instead of the base coat.


Part 2
Part 2 of 4:
Adding the Gel Nail Polish
-
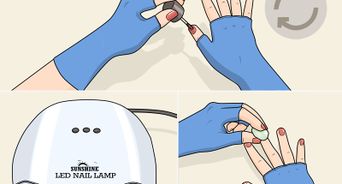
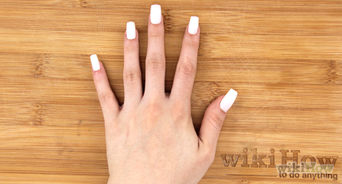
1Apply a thin layer of your gel polish. Once your base layer has dried completely, apply your first layer of the colorful gel nail polish. It will probably look streaky, but that is normal for the first layer. Use the applicator from the bottle to spread the color over each nail. Paint all the way through the tip of your nail as well as over the surface. This will keep the gel from curling back off your nail.[4]
-
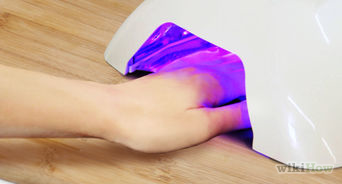
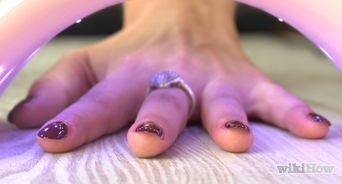
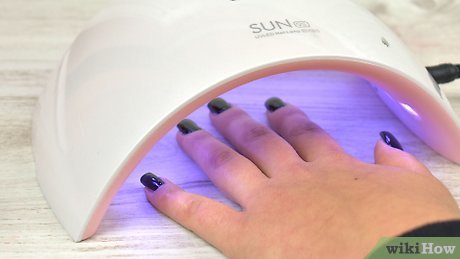 2Cure the first layer of your gel nail polish under a UV or LED lamp. Follow the curing instructions that came with your gel nail polish. Typically, you’ll cure them under an LED lamp for 30 seconds, or a UV lamp for 2 minutes.[5]
- Curing allows the polish to harden in a uniform way. If you don’t cure your nails under the lamp, the gel polish may dry unevenly.
- Gel nail polish stays wet until it’s cured under light. You cannot apply gel nail polish without a UV or LED lamp.
-
3Repeat this process for a second lay of gel nail polish. Use the applicator to apply the second layer of gel polish. This will look more opaque and colorful on top of the first layer. Paint your nails in vertical strips and move all the way through the tip of each nail. Cure your nails under the LED or UV the same way you cured the first layer.[6]
- You can add a third coat if you really want to. It’s usually unnecessary, though.
Part 3
Part 3 of 4:
Finishing with the Top Coat
-
1Apply your top coat to protect the gel nail polish. Coat your nails completely in your top coat like you’re adding a third layer of your gel nail polish. Paint over the tip, like you did with your color gel. Once again, cure the gel polish under a UV light for 2 minutes, or LED lamp for 30 seconds.[7]
- You can totally use regular top coat products to protect your gel nails, although there are special gel top coats out there a lot of people like as well.
-
2Remove the tack with a little bit of isopropyl alcohol, if necessary. Some gel methods leave a tacky, sticky layer on and around your nails after curing the top gel. If this happens to you, simply dip a cotton ball in isopropyl alcohol and gently blot the top of each nail.[8]
-
3Buff your nails smooth and clean up any mistakes. Take a nail buffer and smooth out the top layer of clear coat by gently rubbing the softest side of the buffer back and forth. This will smooth out any imperfections or excess top coat buildup. Finish by wiping away any gel polish or top coat you got on your cuticles with a acetone-soaked cotton ball and you’re done![9]
- Finish off your gel manicure by rubbing a cuticle oil into the skin around the base of each nail.
Part 4
Part 4 of 4:
Removing Gel Nail Polish
-
 1Go to a professional for the safest gel polish removal. Gel nail polish is exceptionally hard and sturdy compared to other nail polishes and treatments. As a result, you may end up damaging your nail if you don’t get a professional to remove them. The next time you go to get a pedicure, manicure, or salon treatment, ask them to remove your gel polish for you.[10]
- This isn’t to say that you can’t take the gel polish off yourself—just that you’re running an additional risk of damaging your nails.
-
 2File off the top layer with a 180-grit nail file. To remove your gel nails, start by wearing away the top layer of the gel and the top coat. Gently drag your file back and forth along each nail until it’s no longer shiny. Go slow and take your time so that you don’t damage your cuticle or nail.[11]
- Avoid picking the polish off your nails. That can remove layers of your nail in the process, leaving them brittle and dry.[12]
- Avoid picking the polish off your nails. That can remove layers of your nail in the process, leaving them brittle and dry.[12]
-
 3Set an acetone-soaked cotton ball on top of each nail. The gel won’t come off if you don’t use 100% acetone. Soak 10 pieces of cotton balls in acetone. While they soak, wash and dry your hands.[13]
- Acetone is a little harsh, so be careful when you’re working with it. Also, keep in mind that the acetone is very drying to your nails, so they may be sensitive or brittle when you’re done.[14]
- Acetone is a little harsh, so be careful when you’re working with it. Also, keep in mind that the acetone is very drying to your nails, so they may be sensitive or brittle when you’re done.[14]
-
4Wrap tin foil around the cotton ball on each of your fingertips. Take each cotton ball and place it on top of each nail. Tightly wrap the nail and the tip of your finger with a strip of tin foil. Do this for all of your nails.[15]
- You probably want to do this one hand at a time. It’s pretty tough to use foil-covered fingers to wrap the second hand.
-
5Wait 20-40 minutes and remove the gel layers. Don’t try pulling the foil back to check if it’s working—just wait and trust the process. After 20-40 minutes, remove the tin foil wrapping one nail at a time. The gel will have started to peel back. Use a cuticle stick to push the gel off your nail.[16]
- If there is gel stuck that you can’t remove with the cuticle stick, re-wrap your nails with another acetone-soaked cotton ball and foil. Let sit for another 10-15 minutes and try again.
-
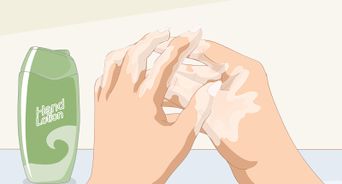
 6Wash your hands and apply cuticle oil to your skin. The acetone will do a number on your skin, so restore your cuticles with cuticle oil. Massage the cuticle oil into the skin around the base of your nail and let them air dry.[17]
- If your nails look rough, apply cuticle oil to the surface of your nail and buff them using a nail buffer.
Video
You Might Also Like


[ad_2]
Source link : https://www.wikihow.com/Apply-Gel-Nails

