


[ad_1]
Steps
Method 1
Method 1 of 3:
Using a Blank Endorsement
-
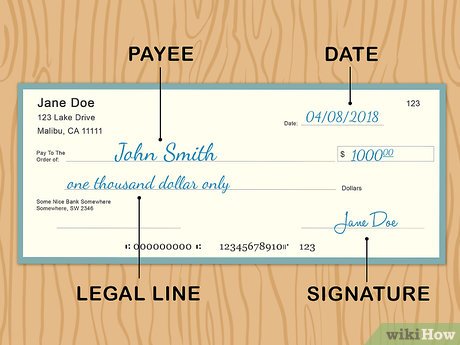
1Verify that the information on the check is correct. Before you endorse the check, make sure it’s one that your bank will accept, and that all the information on the front is correct. If the person who gave you the check spelled your name wrong or made a mistake, you may want to give it back to them and have them write you another check.[2]
- While some banks will accept a check that has been changed as long as the person who wrote the check initials the change, many banks are suspicious of this. It’s better to have the person write you another check.
- A valid check has a line at the bottom with the routing number and account number. If that line isn’t present, the bank will not be able to process the check.
-
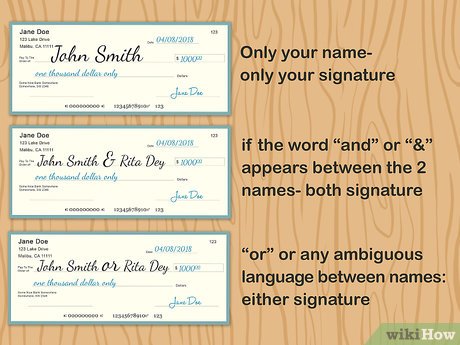 2Determine who must endorse the check. If only your name is listed on the payee line of the check, your signature is all that is needed to cash or deposit the check. If someone’s else name is also listed, they only have to sign the check if the word “and” or the symbol “&” appears between the 2 names.[3]
- The default rule is that a check with 2 or more names can be cashed or deposited individually by any of the people listed on the check. If the check says “or,” or includes ambiguous language or symbols (such as a dash or a slash), either of the people named can cash or deposit the check.
- If the check is written to you “℅” (meaning “care of”) someone else, only your signature is needed. They generally cannot cash or deposit the check without your signature. However, if you have a joint bank account, they may be able to deposit the check in that account on your behalf without your signature.
-
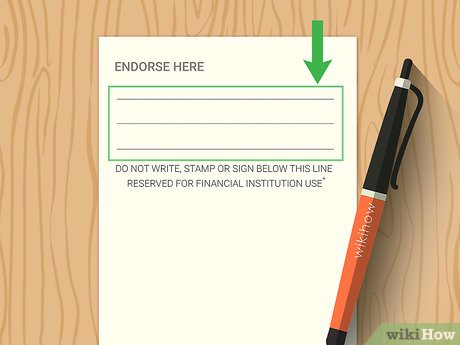 3Find the gray lines on the back of the check. If you flip over the check, you’ll see 3 to 5 gray lines. These typically appear on the upper short side of the check. You’ll also see a solid line with instructions not to write below the line.[4]
- The bank needs the remaining blank space under the endorsement area to document the processing of the check. Make sure your signature doesn’t extend into that space, or the bank may refuse the check.
-
 4Sign your name on one of the gray lines. To endorse a check, you typically only have to sign your name in pen using blue or black ink. If your name on the check differs from your name on your government-issued photo ID, or on your bank account, you may want to print the correct spelling of your name under your signature.[5]
- If you’re signing a business check, include the business’s name on the line above your name. You may also want to add your job title to show you are authorized to cash or deposit the check in the name of the company.
-
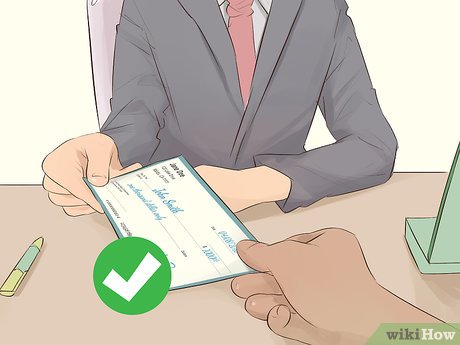
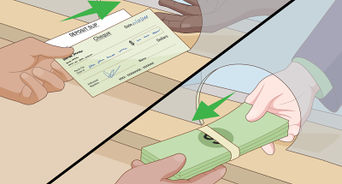
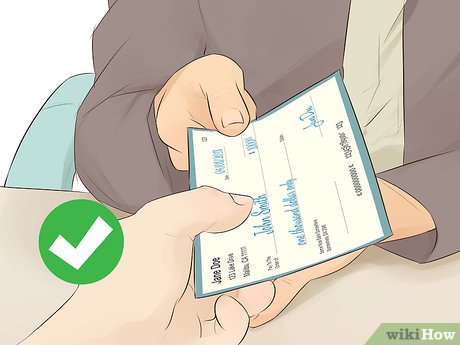 5Cash or deposit the check immediately. Once you’ve signed the check, it becomes a “bearer instrument,” meaning anyone who finds it can cash it. If you’re traveling to the bank, don’t sign your check until you get there.
- If you go to a bank to cash the check and you don’t have an account with that bank, you typically must show a government-issued photo ID. You may also have to provide a thumbprint for identification services.
- Check cashing services will charge you a fee to cash the check. Banks typically charge a fee as well, unless you have an account with that bank.
- If you don’t have a bank account, you may want to take this opportunity to open one, using the check is your initial balance. Otherwise, you can get the check cashed at a check-cashing service available at discount or grocery stores. You can also go to the bank that issued the check. That bank will have its name and logo printed on the front of the check.
Method 2
Method 2 of 3:
Adding Restrictions to Your Endorsement
-
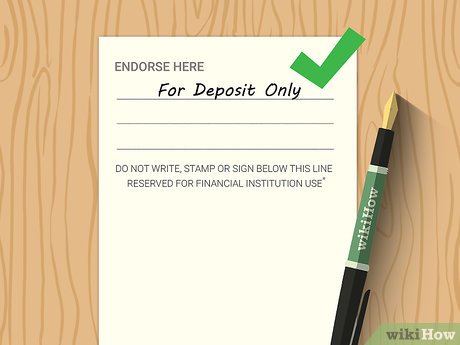 1Write “For Deposit Only” on the top endorsement line. This restrictive endorsement ensures that the check’s funds can only be deposited in a bank account in your name. If someone finds your check, they won’t be able to do anything with it.[6]
- This endorsement is effective if you’re mailing your check to the bank for deposit, or if you’re giving it to someone else to deposit on your behalf.
-
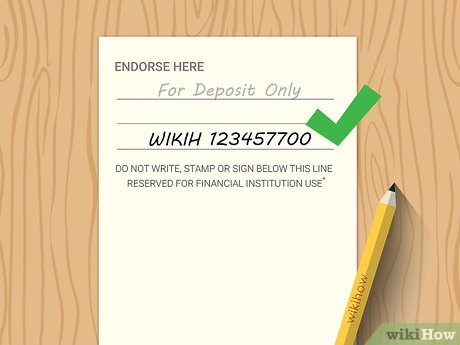 2Include your bank account number. Some banks require you to include the account number where you want the check’s funds deposited. Even if it’s not required, it might be a good idea if you have more than one bank account at the same bank.
- For example, if you have a checking account and a savings account, you would typically want to include the account number for the account you want to use.
- While you’ll also include this information on the deposit slip, it helps to also put it on the check in case the two get separated. Additionally, checks deposited using an ATM or a mobile app may not have deposit slips.
- Because it’s a security risk, if you’re traveling to the bank to deposit the check in person, wait until you get there to write your account number on the check.
-
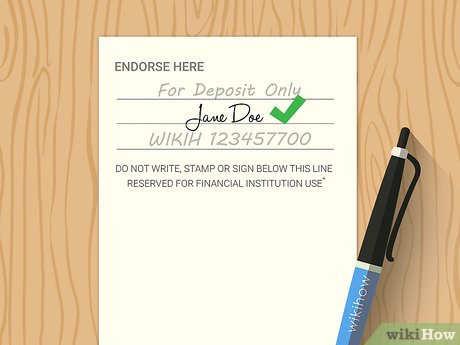 3Sign the check below your restrictions. Once you’ve included the deposit restriction, sign the check as you normally would, using a pen with blue or black ink. Signing below the restrictions gives them effect – if you sign above the restrictions, they aren’t considered valid.
- You can place your account number below your name. The account number just tells the bank where to deposit the funds from the check. Some banks prefer that you put your account number under your name.
-
 4Deposit the check at your bank. Once you’ve completed a restrictive endorsement, you can deposit it at any time. There’s no worry of someone else taking the check, because a bank won’t process it for anyone other than you.
- If you give the check to someone else to deposit for you, put the check in a sealed envelope only to be opened by the teller. Make sure the person taking the check to the bank for you is someone you trust.
- When using a mobile banking app to deposit your check, some banks require this restrictive endorsement. Without it, someone could take the check to another bank and attempt to cash it.[7]
Method 3
Method 3 of 3:
Signing the Check over to Someone Else
-
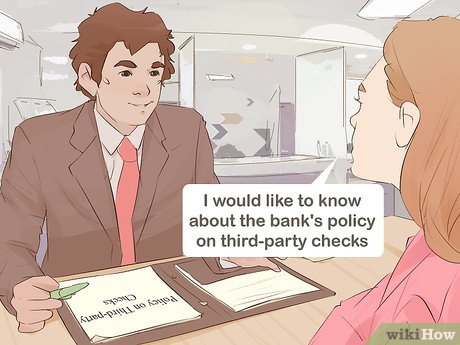 1Find out the bank’s policy on third-party checks. Banks don’t have to accept checks signed over to someone else (called “third-party checks”), and many banks refuse them. Before you sign your check over to someone else, call the bank where the person is going to take the check and make sure they accept checks endorsed this way.[8]
- Talk to the person you’re going to sign the check over to and find out what bank or check cashing service they plan to use to cash or deposit the check.
- Generally, the person will have better luck getting a third-party check accepted if they go to a bank where they have an account and present the check for deposit. You may also have to go with them to validate your signature.
-
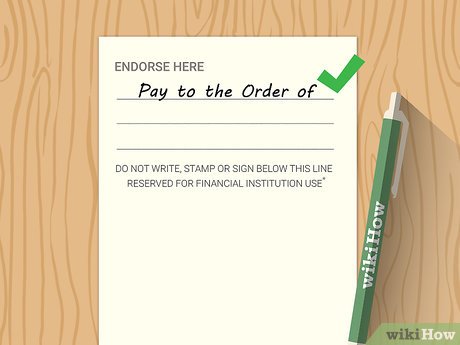 2Write “Pay to the Order of” on the top endorsement line. Using a pen with blue or black ink, clearly print the words at the very top of the endorsement area. Make sure you leave enough room for both you and the other person to sign in the endorsement area.
- When you do this, you’re effectively turning your check into a brand new check for another person. They person you sign your check over to will have to sign it as well.
-
 3Print the name of the person you want to have the check. Either next to or below the words “Pay to the Order of,” carefully print the name of the person you want to sign your check over to. The name should be legible and written in blue or black ink.
- Make sure you’ve spelled their name correctly, and that it matches their name as it appears on their government-issued photo ID or on their bank account.
-
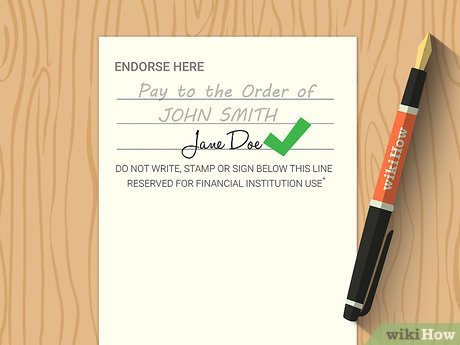 4Sign the check underneath the printed name. Since you were the check’s original payee, you still have to sign it. As with restrictive endorsements, endorse underneath your transfer instructions to give those instructions legal effect.
- Make sure you leave enough room for the other person to sign the check after you. If possible, leave room for any restrictive endorsements or other information they may want to add.
-
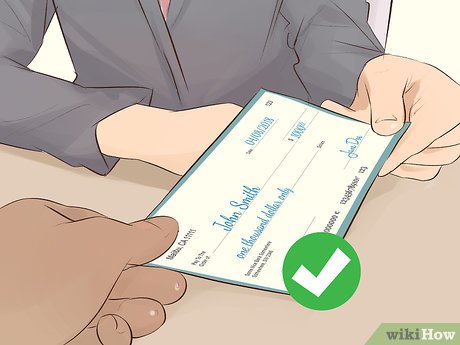 5Give the person the check. At this point, the processing of the check becomes the responsibility of the person you’ve signed it over to. However, some banks are cautious about third-party checks and may want to get confirmation from you before they accept the check.[9]
- Some banks may be willing to call you and get your confirmation that you intended to transfer the check to the other person. You may also have to go to the bank with the person, especially if the check is for a large amount.
Video
Tips
-
Depending on the amount of the check, your bank may place a temporary hold on all or part of the funds before releasing them to your bank account.⧼thumbs_response⧽

Warnings
-
If you receive a check with a later date on it (a “post-dated” check), you do not have to wait until that date to cash or deposit the check. However, if you cash or deposit it early and the bank accepts it, the check may bounce.⧼thumbs_response⧽
-
This article discusses how to endorse a check under US law regarding negotiable instruments. If you live in another country, your law may be different. Consult a banker about how to properly endorse a check.⧼thumbs_response⧽
You Might Also Like


![]()


[ad_2]
Source link : https://www.wikihow.com/Endorse-a-Check

