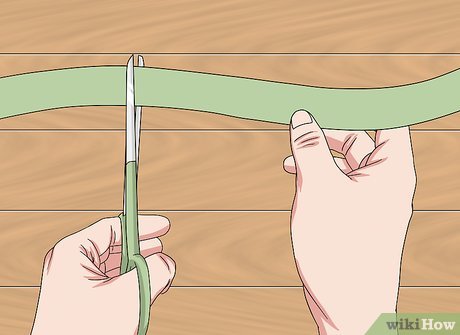
Cut a length of ribbon. How long the ribbon is depends on how big you want the bow to be. The wider the ribbon is, the more ribbon you will need to cut. This method will create something that looks like the standard bow you’d use to tie shoe laces with.[1] X Research source
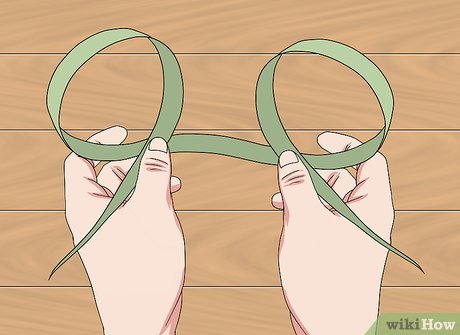
Make two loops in your ribbon. Find the center of your length of ribbon first, then make a loop to each side of that point. Make sure that both loops are pointing upward.[2] X Research source
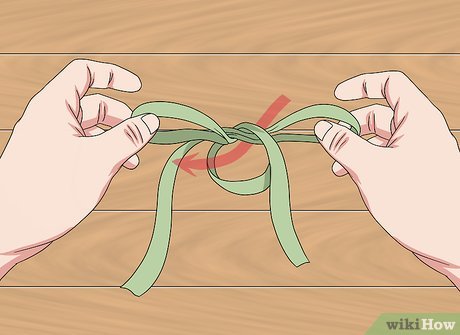
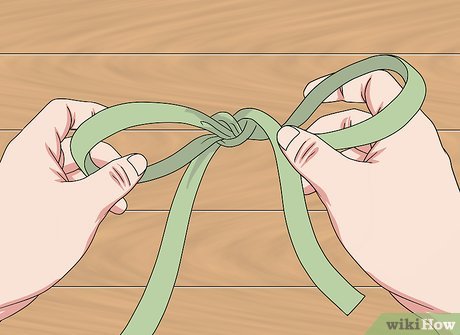
Cross the loops over and under each other. Gently tug on the loops to tighten the knot. This is just like when you are tying your shoes.[3] X Research source
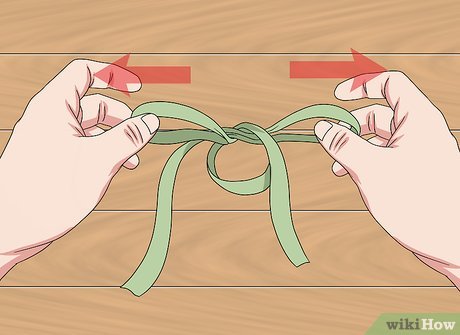
Gently adjust the length of the tails and the loops. Pull the loops or tails one at a time until you get the length you want them to be. Stop when the loops are the right length for you, then tug on them both at the same time to tighten the knot. Don’t worry if the tails are too long.[4] X Research source
Straighten the knot, if needed. If you have a very wide ribbon, the knot in the middle may be wrinkled. Slip your forefingers under each side of the knot on the front of the ribbon. Straighten out the side edges of the knot.[5] X Research source
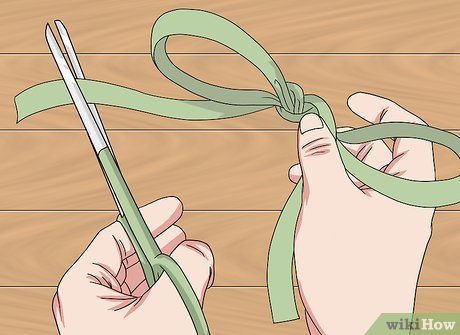
Shape the ribbons and trim the tails. Use your fingers to fluff up the loops to you liking. The wires inside the ribbons will help the loops keep their shape. If you need to, use a pair of scissors to trim the ribbon tails down.[6] X Research source
You can cut the tail ends at angles or into notches.
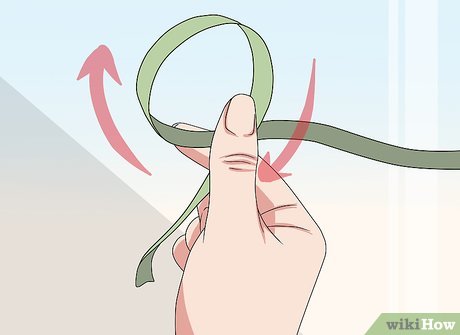
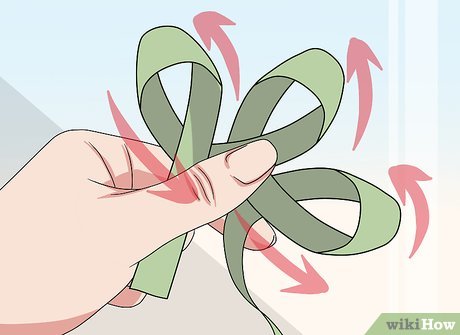
Roll the end of your ribbon into a small loop. Turn the ribbon so that the wrong side is facing you. Roll the end of the ribbon onto itself to form a tube. Hold the tube in place with your thumb and forefinger. This will make the center loop of your ribbon.[7] X Research source
Keep your thumb inside the tube, and your forefinger behind the overlapping ribbon.
This method will make a looped bow, like the kind used on floral arrangements and wreaths.
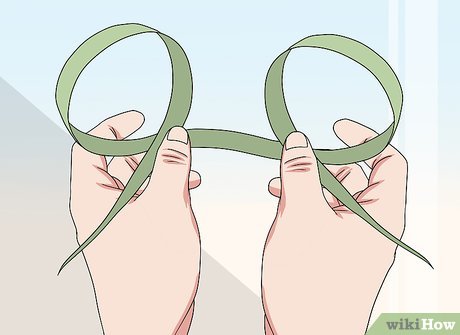
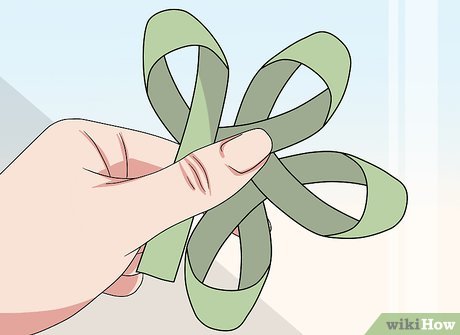
Twist the ribbon and make another loop. Give the ribbon a small twist so that the right side is showing. Pull it under the tubed ribbon to form a small loop. Slip it under your forefinger to hold it in place.[8] X Research source
Twist the ribbon again and make another loop. Give the ribbon a twist so that the right side is visible again. Make another loop on the other side of the central loop. Make sure that it is the same side as you second loop.[9] X Research source
Continue working back and forth, making loops. Give the ribbon a twist each time so that the right side is always visible. Make the loops a little bigger on each row. You can have as many rows/loops as you want.[10] X Research source
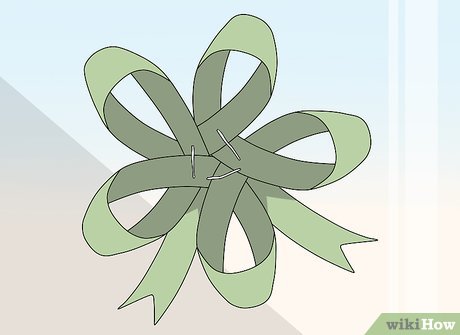
Wrap a wire around the middle of the bow. Thread a piece of thin wire through the first central loop that you made. Wrap it under the bow and back through that first loop. Tug on it to tighten it, then wrap it a few more times. Twist the wire shut, then trim off any excess.[11] X Research source
The thin wire that florists use will work the best here. You could also use a pipe cleaner that matches your ribbon’s color.
Consider adding some ribbon tails. These types of bows usually don’t have tails, but you can add some if you want to. Cut off a piece of ribbon that is twice the length you want the tails to be. Fold it in half, then secure it to the back of your bow with more wire.[12] X Research source
Give the ribbon tails a nicer touch by cutting them at angles or into notches.
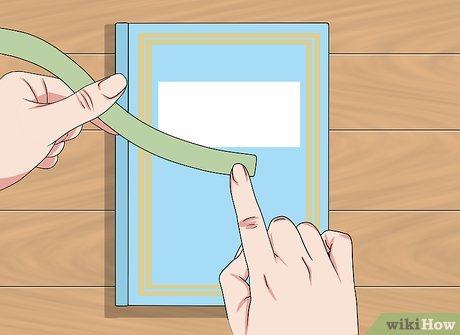
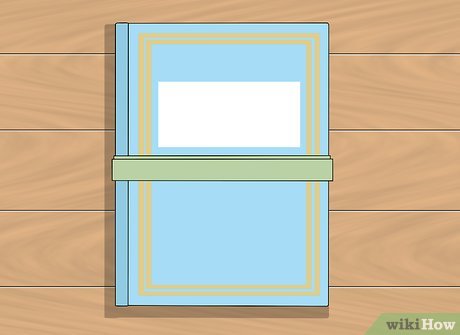
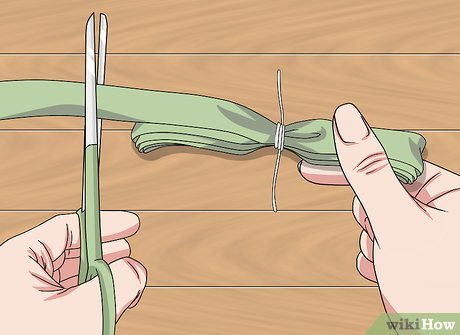
Place the end of a ribbon on the center of a book’s cover. Choose a book that is the same width as the bow you want to make. Place the end of a wide, wired ribbon on the middle of the book’s cove. Move the end of the ribbon towards the spine by about ½ to 1 inch (1.27 to 2.54 centimeters).
You can also use a CD or DVD case, or even a scrap of cardboard.
Wrap the ribbon 5 to 9 times around the book. Keep the ribbon in the same place as you wrap it around the book. This will make your bow look neater in the end. Avoid wrapping the ribbon too tightly, or it will be difficult to slide the bundle off in a later step.
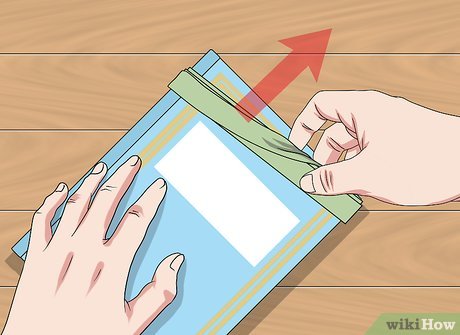
Trim off the excess ribbon, just past the mid-point of the cover. You want both ends of the ribbon to be overlapping by ½ to 1 inch (1.27 to 2.54 centimeters). This will help prevent the ribbon from falling apart when you go to tie it together.
Slide the wrapped bundle off of the book. Try to keep the loops in place so that they are nice and even. Do not lose the middle of your bundle where the ends overlap.
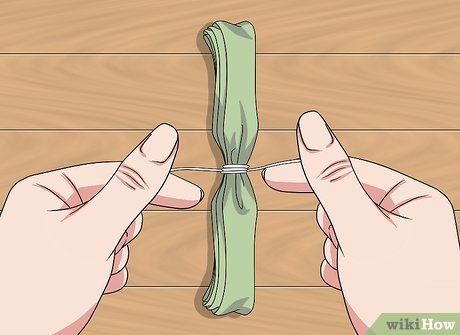
Wrap a thin wire around the middle of your bundle. Pinch the middle of your bundle first, then wrap a piece of thin wire around the middle. Wrap it tightly so that it creases the ribbon and holds everything together. Don’t trim off the excess wire yet.
The thin wire that florists use would work great for this. Another option would be one of those twist ties used on trash bags.
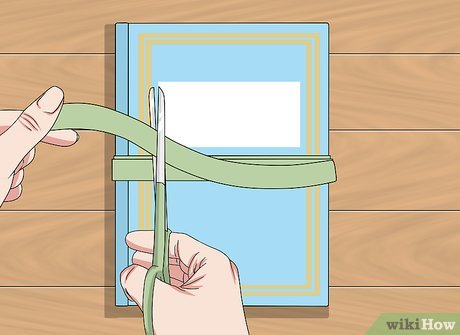
Cut ribbon for the tails of your bow. The ribbon needs to be two and a half times the length you want the ribbons to be. For example, if you want the tails to be 12 inches (30.48 centimeters) long, you want to cut 30 inches (76.2 centimeters) of ribbon.
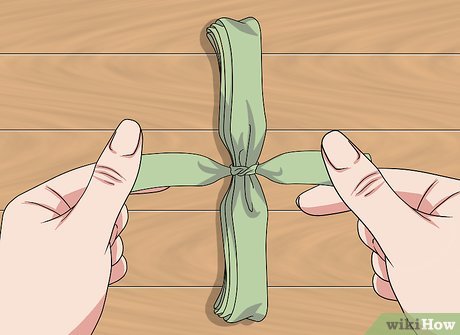
Tie a loose knot in the middle of the tail ribbon. Make sure that the knot is loose so that it doesn’t wrinkle on the front part. It’s okay if it wrinkles on the back where the ribbons cross over one another.
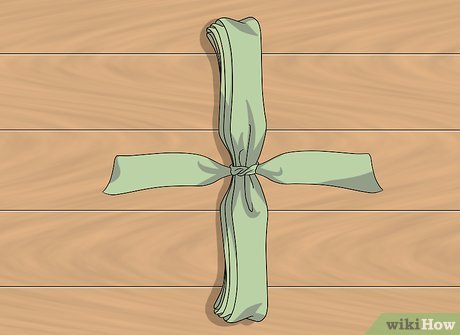
Wrap the tail ribbon around the middle of the bow. Place the knotted part of the tail ribbon over the center of your bow. Make sure that the smooth part of the knot is facing out, not the crossed part. Wrap the tail ends over to the back of your bow.
Use the excess wire to tie the tail ribbons in place. Hold the tails of the ribbon behind your bow. Pinch them tightly, then wrap the excess wire around them to keep them in place. Trim off any excess wire.
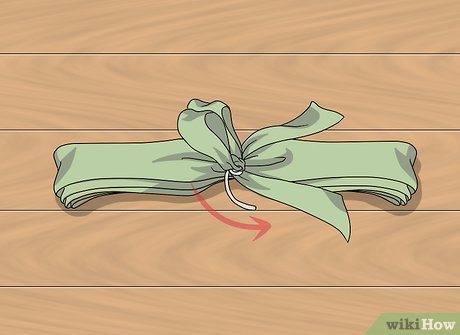
Fluff and shape the ribbon. Move the loops around to your liking. Use your fingers to make them appear fuller. If the tails of the ribbon are too long, you can trim them down using a sharp pair of scissors.
Cut the ends of the ribbon into notches or angles for a nicer touch.
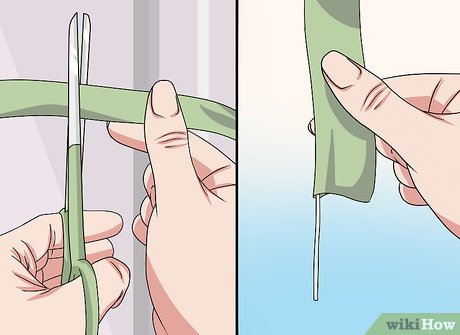
Cut your ribbon to the desired length and pull out one of the wires. Cut the ribbon first, then scrunch down one of the ends until a wire pops out. Grab the wire and pull it out. Leave the other wire inside the ribbon.[13] X Research source
Discard the wire you pulled out or save it for another project.
For 1 to 2-inch (2.54 to 5.08-centimeter) wide ribbon, plan on using 1 yard (91.44 centimeters) of ribbon. If your ribbon is thinner, you could try using less.
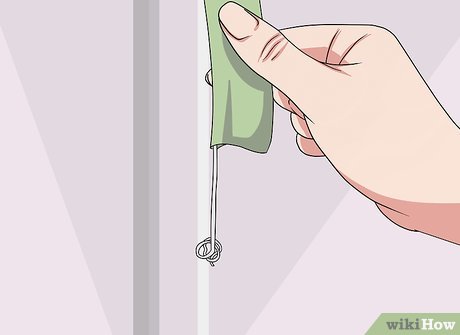
Knot one end of the other wire that’s still inside the ribbon. Scrunch down one of the ends of the ribbon until the wire pops out. Gently tug out the wire, then tie it into a looped knot. This will help prevent the ribbon from sliding off in the next step.[14] X Research source
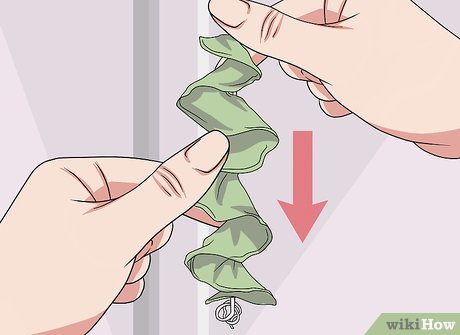
Gather the ribbon on the wire. Go to the other end of the ribbon. Scrunch it down until the wire pops out. Grab the wire, and gather the ribbon down it, towards the knotted end. Keep gathering the ribbon until it is all scrunched down above the knotted end.[15] X Research source
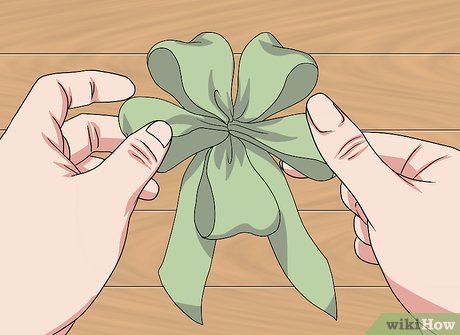
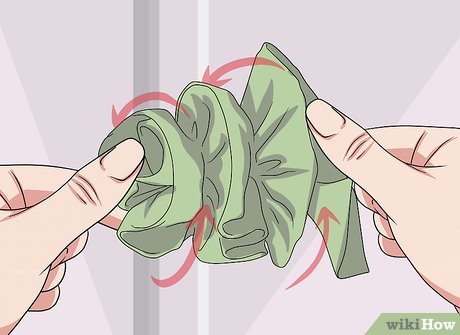
Curl the ribbon into a spiral. Starting from the end with the long piece of wire, roll the ribbon into a cone-shaped spiral. The scrunched, wired side of the ribbon will make the bottom/center of the flower. The other side of the ribbon will make the petals.[16] X Research source
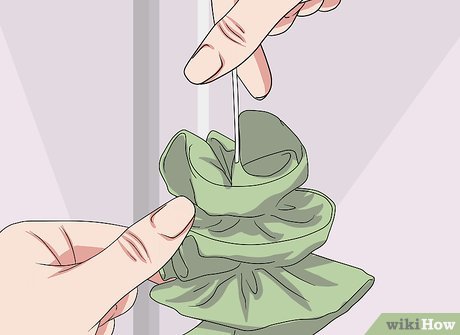
Poke the wire down through the middle of the flower. Hold the flower in one hand so that it doesn’t unravel. Use your other hand to take the long piece of wire, and push it back down through the center of the flower. This will help hold the flower together and flatten it.[17] X Research source
Thread the wire through the bottom edge of the flower. Poke the wire through the bottom edge of the flower until it comes out the side. Give it a gentle tug, then thread it back through the flower.[18] X Research source
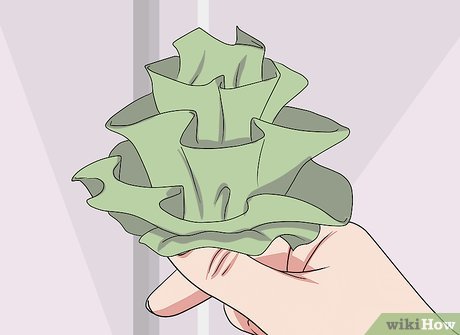
Tie the wire, if needed, then cut it. If the flower is still loose, tie the long tie to the knotted end of the wire. Cut the wire down using a sharp pair of scissors or wire cutters.[19] X Research source
Video
By using this service, some information may be shared with YouTube.


