


[ad_1]
Steps
Part 1
Part 1 of 3:
Creating Your Flowers
-
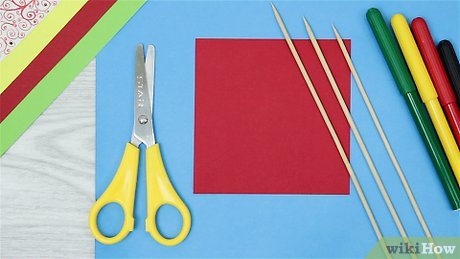
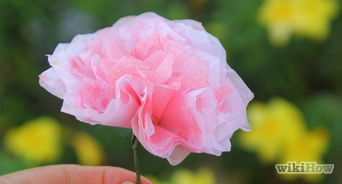
1Gather your supplies. You will need paper, stems, glue, scissors, markers and/or crayons to make your flower bouquet.- Different coloured construction paper is arguably the most aesthetic option for paper flowers, but printer paper will suffice as well.
- Stems: For most cases, floral wire is the best. But flower stems can be made from just about anything, from strips of popsicle sticks to standup wiring to sticks of wood from the backyard.
- Glue and scissors. You’ll need tools to format and fix up the materials you’ll be working with.
- Markers and pencil crayons, for decorating the flowers and vase once they’ve been done up.
-
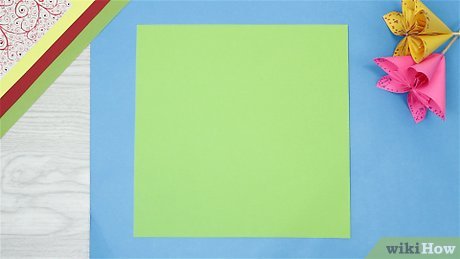
 2Cut paper into squares. In order to make proper flowers using paper, you’ll first need to make squares of them. Keep these squares as large as you can; you’ll need as much material as possible to make the various folds work. Make 3-5 squares for each flower you’re planning on adding inside your bouquet. Each square will make a petal for your flower. As you might already imagine, the process for making each of these flowers can be quite time-consuming, so it’s important to plan ahead and set enough time aside to make enough of them to fill your bouquet.[1]
- One helpful trick is to pull a corner of a sheet of printer paper over to the other diagonal side of the paper as far as it can comfortably go. Cut whatever strip of paper that is not covered by the diagonal fold, and you’ll have a square sheet of paper.
- If the paper you’re using has different colours or a pattern on only one side of the sheet, place the side you want to use facing down; this will be the side people see the most of in the finished product.
-
3Fold a diagonal crease in the paper. Now that your square is ready, give it a clean fold down the middle diagonally, leaving a firm crease in the center. It’s important to take your time at first if you’re new to origami and other forms of paper crafts. By the time you get through a few petals, you’ll find the following steps go by much faster.
-
4Fold up the edges towards the middle. Next, it’s time to fold up the center edges to reach the top corner. Pull them upwards and fold over. By the end of this step, your paper should look like a small square or diamond, with two triangular halves folded over a diamond base. Take care to make the folds as precise as you can. Sloppy folds will make it harder or even impossible to get a good finished product.[2]
-
5Fold the open edges in half. For your next fold, take the open edges at the centre of your diamond and fold them outward to meet the outer edges of their respective triangles. If done correctly, they should make the shape of half a kite. From there, open up the kite fold over the diamond base to make a full kite shape.[3]
- At this point, you should have two kite shapes, one on either side of your diamond background. The tops of the kits should be sticking out from the diamond.
-
6Bring the edge folds together and glue them. Turn your petal in around on itself to make a small cone. Add a pea-sized dab of glue in between the folds to make it stick. Let it sit for about a minute before you work with it any more. Handling a petal that hasn’t had the time to let its glue set will risk coming undone when you try to attach it to the flower’s stem.[4]
- You can start working on your next petal while you’re waiting for the current petal to dry.
-
7Glue petals to flower stem. Once you have the petals folded up, it’s time to peg it to a stem. Find the center of the flower’s back, add some glue, and set the stem against the glued area. The petal should be pointing face upward relative to the rest of the flower’s stem. It should be sufficiently glued within a minute. Make sure the petal has been placed properly before you let the glue set completely.[5]
- Hot glue is preferable to regular stick glue, as it will give you more precision.[6]
- Hot glue is preferable to regular stick glue, as it will give you more precision.[6]
-
8Repeat 3-5 times for each flower. Running through these steps once will result in one petal. You should have 3-5 petals for each flower you make. Depending on the size of your bouquet, you may have to make 5-20 flowers before you have enough to stock your vase to satisfaction, so it could end up being a pretty time-consuming project if you’re feeling ambitious. Don’t worry– this may sound like a lot of time and hard work, but they’ll go by much faster once you get the smooth hang of it.[7]
Part 2
Part 2 of 3:
Making the Vase
-
 1Choose the right type of paper. Using a proper sort of paper is important when doing any origami craft. Go to an arts store and some thick rice paper; it creases well and doesn’t tear easily. While construction paper always works in a pinch, if you’re doing the origami method of vase-making, rice paper is preferred for its thickness and authenticity.
- Unlike the admittedly time-consuming flower petals, you’ll ideally only need to make one vase before your bouquet is ready. With that in mind, it’s important to try to make the vase as slick and polished as it can be. Giving yourself the extra time to make sure you’re doing it right will be far less stressful than realizing you’ve made an error later down the road.
-
2Fold the creases for the waterbomb. A waterbomb base is the foundation from which you’ll be making your vase. To start, make creases up, down, and both ways diagonally through the middle of the paper. Once you have finished this, there should be a visual impression of four distinct lines running through the center from one end of the square to the other. Take care to make these creases as defined as you can, pressing down and running your finger along them to make sure they settle in the paper. Weaker creases won’t open up the way you’ll want them to.
-
3Open up your waterbomb. Once you have your creases, push the paper up from opposing ends inwards. Hold the center down as you push it up. The pressure should cause the waterbomb’s creases to open up into a creased triangle. Continue exerting pressure and allow the waterbomb to stand up. Smooth out any crumpled edges manually if you happen to see something wrong. At the end of all of this, you should have a working waterbomb foundation to build your vase with.[8]
-
4Flesh out the vase with folds. With the waterbomb complete, you should have something that looks like an obtuse triangle. To start up with the vase proper, take both of the far corners of your triangular base and fold them upwards to its opposing side as far as it will comfortably go. Fold the right side over to the left side; do the same for the left side. This should create the appearance of a bottomless cup. Once you’ve creased firmly, unfold it.[9]
- With this step completed, you should have the look of two paper kite shapes on either side of your vase framework. These will ultimately become the corners of the three-dimensional result.
-
5Make the squash folds. A squash fold is a common origami fold with spread, flattened edges, completed by pressing down on them once the initial fold has been made. Make squash folds on the left and right side of your vase in progress, then flip over the paper and do it for the opposing side. With these squash folds in place, you’ll have a basic framework from which to open up your vase.[10]
- There are lots of videos available online detailing how to go about a proper squash fold. If you’re not experienced in origami, you should watch a few of these to get a better hang of them.
-
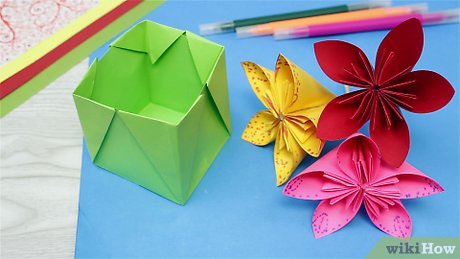
6Open up the vase and fold the creases. With squash folds giving your origami vase a solid perimeter, you can now open it up. Push gently from the inside out, making sure not to dislodge any of the folds you’ve already made. When that is done, hide the overlapping creases by folding them on the inside of your vase. With that, you should have a relatively functional vase with which to decorate and fill with as many paper flowers as you wish.[11]
Part 3
Part 3 of 3:
Decorating the Bouquet
-
 1Decide what look you’re going for. Now here comes the fun part. With the pieces all prepared, it’s time to decorate the bouquet and give it some extra visual spunk. First, you’ll want to decide what overall look you’re going for. If you’re trying to decide what style you want the bouquet to have, it’s good form to approach the flowers and vase as one and the same. It’s a common mistake to design flowers and the vase independently, but that doesn’t give any promise the two designs will complement one another.[12]
- Consider the circumstance you’ll be presenting this bouquet as well. A Halloween decoration may veer towards spooky oranges and blacks, while a Valentine’s gift might conventionally lean on conventional reds, whites and pinks.[13]
- Consider the circumstance you’ll be presenting this bouquet as well. A Halloween decoration may veer towards spooky oranges and blacks, while a Valentine’s gift might conventionally lean on conventional reds, whites and pinks.[13]
-
2Wrap construction paper around the vase. By wrapping construction paper around the vase and taping it, you’ll give yourself a canvas to decorate however you choose. The colour of construction paper you choose will have a major impact on the look of the vase, and you might even consider using strips of multiple colours of paper for a bolder look.
- It’s another possibility to do without construction paper wrappings at all, as some people find aesthetic value in the intricate folds of origami. One way or another, the amount of decoration is entirely up to you, and there may be cases where no added decor is even necessary.
-
3Draw a design around the vase. Vases have the most space for artistic expression in a flower bouquet, and you should make use of it. Take some markers, pencil crayons or even watercolours and a paintbrush and take some creative license with the look of it. A geometric pattern (like a cross stitch or lined pattern) is simple and useful, but full-blown drawings could leave a great impression if you’ve got an artist’s touch.[14]
- It’ll feel more special if you make an effort to associate the decoration with the occasion the flowers are being presented. If they’re for a wedding for example, a drawing of the bride and groom, a ring, or even a multi-tiered wedding cake could be the thing the vase needs to be truly unique and leave a real impression.
-
4Accent your flower petals. Drawing intricate designs or shaded textures on the petals is a good way to bring extra life to the bouquet flowers. In the majority of cases, adding shading with some pencil crayons is a simple way to significantly improve their look.
-
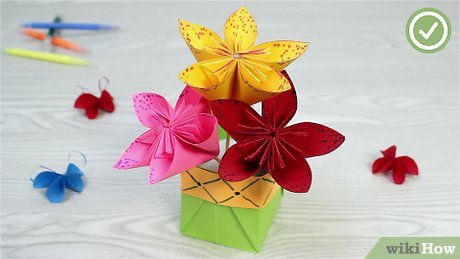 5Arrange your flowers in the vase. The basic set up and location of each flower in the vase can be a creative statement unto itself. How you go about it will depend on the number of flowers you’ve decided to include. Evenly distributing them across the front and back is usually a safe bet, although you may want to spruce it up depending on what looks best for your own vase.[15]
Tips
-
Once you get the hang of it, you should try experimenting with different aspects. If there’s a certain amount of petals you would like to fit into a flower, go for it. Also don’t be afraid to mix and match different types of stems together. You’re not trying to make these flowers look realistic; you’re trying to make them look good! The details of how you go about it are all up to you.⧼thumbs_response⧽
-
There are countless paper flower designs out there. You can choose another design other than the one listed here if you so desire, or even invent a fresh pattern of your own!⧼thumbs_response⧽
Submit a Tip
All tip submissions are carefully reviewed before being published
Thanks for submitting a tip for review!

Warnings
-
Especially when it comes to the use of glue and the petal folding, being cautious and taking your time will save a lot of hassle for future steps.⧼thumbs_response⧽
You Might Also Like


[ad_2]
Source link : https://www.wikihow.com/Make-a-Paper-Flower-Bouquet

