


[ad_1]
Steps
Method 1
Method 1 of 3:
Making a Pouch Envelope
-

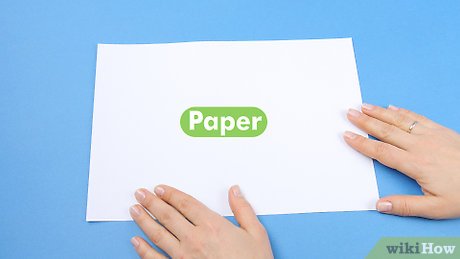
Get a paper that’s about twice as large as your desired envelope size. If in doubt, a standard size of 8.5 by 11 inches will do fine; you can fold and cut it in half before beginning if you want a small envelope.
-
 Fold the paper over evenly.[1]
You should get a rectangle half the size of your original piece. -
Tape together the open left and right sides. Use tape to securely close the two open edges of the rectangle, leaving the top open.[2]
The top is where you will insert your letter. -
Fold down the top to make a flap. Make a small flap by folding down the open edge of the rectangle. [3]
This will keep the letter from falling out of the envelope. A flap that is about 1/2 of an inch will work. -
Insert the letter or card. Bend back the flap, and insert your letter, card, or other contents. Fold the flap down again after this is done.
-
Glue the flap to keep your message enclosed. Place a thin line of glue along the inner edge of the flap, then press the flap down. This will keep the envelope closed until the recipient opens it. You can also secure the flap with decorative tape or a sticker.
Method 2
Method 2 of 3:
Making a Taped Envelope
-
 Lay a rectangular piece of paper down lengthwise (landscape-style).[4]
You can experiment with paper sizes, but if in doubt, a standard-sized (8.5 x 11 inches) will do. -
Fold the paper in half lengthwise. Match up the edges of the paper to ensure the fold is straight, and press down on the folded edge with your fingers to make a crease. Then, you can unfold the piece of paper, and it will have a crease in the middle.
-
Fold the top right corner along the center crease. When the edge of the top right corner is touching the center crease in a straight line, fold the corner down. This will make a triangle shape with the top right corner.
-
Fold the top left corner along the center crease. Fold the top left corner down as you did the right corner. Remember to smooth out the paper with your fingers to make a straight fold. You will now have two small triangles sitting on top of a rectangle.
-
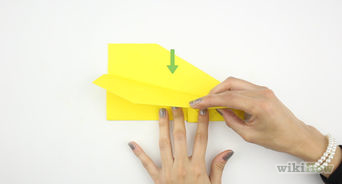
Fold one inch of the top and bottom edges toward the center crease.[5]
The measurement here does not have to be exact, so you can eyeball the fold. Both the top and bottom edges should be folded towards the center, leaving enough room in the center for a letter or card to fit, about one inch.- At this point, the paper should still be lying lengthwise
- The triangular point of the paper should still be facing left.
-
Fold the right edge of the paper along the bottom of the triangle. The edge of the folded triangle on the left-hand side of the paper should be parallel with the edge of the right hand side. The triangle itself will still be visible. Smooth out the fold with your fingers, then unfold it.
-
Fold your message so it fits into the envelope. Large cards may be too big for this method, but regular letter-sized paper will fit if folded in half or in thirds.
-
Insert your message. Your note can go between the horizontal creases of the envelope. Use the bottom flaps of the triangle and the two length-wise flaps at the side to keep the message in the envelope.
-
Close the envelope. Fold the right hand edge of the paper back up to the edge of the triangle, just like did a moment ago. Fold the triangle top towards the center of the rectangle. Now, you will notice the back of your envelope looks like those bought in stores.
-
Tape the edges shut. Use small pieces of tape to secure the sides of the envelope. Tape the flap of the envelope closed as well.
-
Hand-deliver your letter. Unfortunately, postal services often charge more for mailpieces that are not precisely rectangular and those that do not have exact edges. Hand-deliver your homemade envelope if you do not want to pay extra shipping costs.
Method 3
Method 3 of 3:
Making a Square Origami Envelope
-
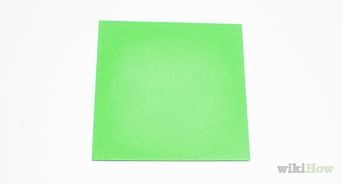
 Get a square sheet of paper larger than your letter or card.[6]
If your letter or card is very large, you may need to go to a craft store to find the right size of paper. For example, if your card is 8.5 x 11 inches, then you will need at least a 12 x 12 inch piece of paper. For a small 4 x 5 inch card, a 7 x 7 inch piece of paper will work. -
 Place the paper so its corners are in a diamond shape. The corners should face up and down, and right and left, like a diamond.[7]
-
Fold the square corner to corner. This will create one crease going from the upper left to the bottom right corner and another crease going from the upper right to the bottom left corner. First, line up two of the opposing edges, crease, and then unfold. Repeat this for both the other corner, then unfold the edges so the paper lies flat in a diamond shape again.
-
Fold the bottom corner up to the middle crease. Touch the bottom corner to the point where both creases intersect in the middle of the paper. Then, crease the edge of the fold so the paper lies flat.
-
Fold the flat bottom of the corner up to the middle crease. Now, the paper will be triangular. The outer edges of the paper should line up almost perfectly. Smooth the fold so the paper lies flat.
-
Fold the left corner towards the center. Fold the left edge of the triangle so the point goes slightly over the middle crease.
-
Fold the right corner towards the center. The right corner of the triangle corner should overlap the crease, too.
-
Fold back the edge of the right corner. The right corner did not line up perfectly with the middle crease, so fold the overlapped point back slightly. The edge of the right corner should line up with the vertical crease. This will make a small triangle.
-
Spread the small triangle open. When you stick your finger into the fold the of the small triangle, you will notice the small triangle naturally opens into a diamond shape. Spread and flatten the small triangle. The tiny diamond will have a crease down the center.
-
Insert the top edge of the envelope into the small opening. Now, the envelope is finished! You can reopen the envelope to insert your card or letter, and close the top edge after it is inserted. You may want to secure any loose edges with tape if you have trouble keeping them shut.
Video
Tips
-
Using colored construction paper can add a fun flair to your homemade envelope, and it will also make the envelope opaque.Thanks
-
Practice with a piece of scrap paper first.Thanks
-
Scissors aren’t compulsory for envelope making.Thanks
Tips from our Readers 
The advice in this section is based on the lived experiences of wikiHow readers like you. If you have a helpful tip you’d like to share on wikiHow, please submit it in the field below.
- Jazz up plain envelopes by lining the inside with decorative paper, using patterned tape for sealing, or tying on ribbons. Customizing with paints, stamps, stickers, or collages also adds personality. Just don’t go overboard to the point where an envelope wouldn’t fold or function properly.
- Feel free to embellish basic envelopes with stamps, stickers, doodles, or any other creative touches. Just allow additional elements like ink stamps plenty of drying time before folding and sealing the envelope.
- Homemade envelopes are perfect for handwritten notes to friends or secret admirers. Plus, a clever DIY envelope disguises the message inside. Personalize your envelope to match the note!
- For a clean, smooth look when folding, use your fingernails to sharpen creases and edges. This makes amateur envelopes resemble professional store-bought ones.
- To ensure privacy, always fold notes small enough to fit entirely within a homemade envelope. Contents tucked inside will stay hidden from prying eyes!
Submit a Tip
All tip submissions are carefully reviewed before being published
Thanks for submitting a tip for review!
Warnings
-
Don’t make your creases until you are sure that they are where you want them to be.Thanks
-
Handle paper with caution, since paper cuts can hurt.Thanks
Things You’ll Need
-
Letter/A4 sized paper
-
Tape
-
Glue
You Might Also Like


[ad_2]
Source link : https://www.wikihow.com/Make-an-Envelope

