

[ad_1]
Things You Should Know
- Heat wax chunks in a double boiler until the wax is completely melted.
- Add essential oils, fragrances, or candle dyes to your wax once it’s completely melted.
- Position a wick in the center of a heat-proof container, then pour the melted wax into the container.
- Cool the candles for 24 hours (or until completely hardened) before use.
Steps
Part 1
Part 1 of 3:
Melting the Wax
-
1Protect your work area with newspaper or wax paper before you begin. Unless you have a dedicated area for crafts like these, lay down newspaper, wax paper, or towels and rags down on the surface you will be working on. Wax is a bit tricky to remove from surfaces, so it’s best to take precautions.[1]
-
 2Cut or shred your preferred wax into chunks or shavings. Use a sharp knife or even a vegetable peeler to carve your wax into flakes, or chunks of about 1 in (2.5 cm) in size. Smaller chunks of wax melt better than larger chunks, and also melt at a more even rate.[2]
There are several different kinds of wax to choose from:-
Paraffin wax is the traditional wax for candle making and is still by far the most popular wax. It is good for beginners because it melts quickly, is cheap and is easily colored or scented. However, note that the chemicals that are emitted when this wax is melted could be irritating to some people.[3]
One pound of paraffin wax by weight will equal approximately 20 oz of liquid melted wax. -
Soy wax is becoming increasingly popular as it is easy to use, made from soybeans and cleans up pretty easily. It is eco-friendly and renewable. Soy wax is also known to burn more slowly than most other waxes.[4]
One pound of soy wax will equal approximately 18 oz of liquid when melted. -
Beeswax is all natural and has air purifying qualities to it; however, it doesn’t retain scent or coloring that well. Essential oils will generally work with beeswax but keep in mind that beeswax has its own lovely scent.[5]
One pound of beeswax by weight will equal approximately 16 oz of liquid when melted. - Or use old candles that have been burned down or are half-used and warped. Using old candles is a great way to recycle wax. Simply melt them just as you would melt other wax.
-
Paraffin wax is the traditional wax for candle making and is still by far the most popular wax. It is good for beginners because it melts quickly, is cheap and is easily colored or scented. However, note that the chemicals that are emitted when this wax is melted could be irritating to some people.[3]
-
3Place the wax chunks into a double-boiler. Put your wax into a small, heat-resistant container. Then place this smaller container inside a larger pot filled about halfway with water, creating a makeshift double boiler. Turn the heat to high so that the water boils. The boiling water will slowly melt the wax.[6]
- Note: You cannot put candle wax directly on heat or it will catch fire or evaporate.
- Keep in mind that wax is sometimes difficult to clean—you may want to purchase a cheap, heat-safe pot that you designate specifically for making candles.
-
 4Heat the wax in the double boiler until it’s completely melted. Use a cooking or candy thermometer to keep an eye on the temperature, and ensure the wax reaches its melting point. If you do not have a candy thermometer, use a meat thermometer. Just remember that wax is sometimes hard to remove from utensils.
Part 2
Part 2 of 3:
Pouring the Wax
-
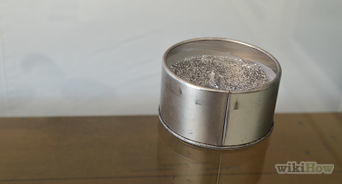
 1Place a wick in the center of the candle mold. Use tins, mason jars, old teacups—any sort of container that can withstand heat. Place your mold on a flat surface and dangle the wick in the center of the mold, with about 2 in (5.1 cm) sticking out of the top. Loop the end that will be exposed around the center of a pen or pencil, and secure it with a piece of tape. Rest the pen across the top of the mold you will be pouring your wax into.[11]
- If you have a particularly wide container, dangle multiple, evenly spaced wicks into the container.
-
2Pour the melted wax into the mold. Pour slowly so that the wax does not spill over, and leave about 0.5 in (1.3 cm) of space at the top of the container. Make sure not to knock the wick out of the mold accidentally. Reserve any leftover wax for future candles.[12]
- Keep in mind that beeswax will shrink a bit after cooling, so you may need to pour more beeswax to account for any gaps in the mold.
-
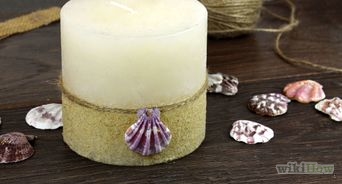
3Cool the candle overnight, then trim the wick. If possible, allow the candle to cool for a full 24 hours. Keep it in a secure space away from small children. Once cooled, use scissors to trim the wick down to about 0.25 in (0.64 cm). A shorter wick helps contain and control the flame.[13]
Part 3
Part 3 of 3:
Making Customized Candles
-
1Add scents to your candles with essential oils. After melting your wax, remove it from heat and mix in a few drops of essential oils like peppermint or eucalyptus to infuse the candle with a natural scent. Alternatively, use candlemaking scents (oils formulated specifically for making candles), and follow the bottle’s instructions on how much to add.
- Add citronella to your wax to make your candle a natural insect repellant.
- Before adding an essential oil to your candle, make sure you double-check that the oil in question is safe to be used in candle-making.
-
2Add color with oil-based dyes or crayons. Use a candle dye specifically made for candle coloring, and add 0.5 oz (~30 mL) to your wax after it’s been fully melted.[14]
Double or triple the amount of dye to achieve a darker color. Alternatively, add a single crayon of your desired color to the wax as you melt it, or add 2 halves of different crayons to mix and match colors.[15]
-
 3Pour the wax into a silicone mold to make a wax melt. Rather than pouring your melted and scented wax into a rigid mold, opt for a silicone mold, and leave out the wick. Then, once it’s cool, pop it out and place it in a wax melter for a charming candle alternative.[16]
Video
Warnings
-
Melting wax can be a fire hazard. Remember to always burn the candle within your sight, and extinguish it when leaving the room. Use extra caution when handling melted wax.⧼thumbs_response⧽
Things You’ll Need
Melting the Wax
-
Candlemaking wax
-
Pen, pencil, or large clip
-
A double boiler (1 large pot and 1 small pot)
-
Water
Pouring the Wax
-
Molds such as jars or tins
Customizing
-
Scents (optional)
-
Coloring agents (optional)
You Might Also Like


[ad_2]
Source link : https://www.wikihow.com/Make-Homemade-Candles


