{“smallUrl”:”https://www.wikihow.com/images/thumb/7/7a/Remove-Old-Caulking-Step-1-Version-5.jpg/v4-460px-Remove-Old-Caulking-Step-1-Version-5.jpg”,”bigUrl”:”/images/thumb/7/7a/Remove-Old-Caulking-Step-1-Version-5.jpg/aid1352289-v4-728px-Remove-Old-Caulking-Step-1-Version-5.jpg”,”smallWidth”:460,”smallHeight”:345,”bigWidth”:728,”bigHeight”:546,”licensing”:”<div class=”mw-parser-output”><p>u00a9 2023 wikiHow, Inc. All rights reserved. wikiHow, Inc. is the copyright holder of this image under U.S. and international copyright laws. This image is <b>not</b> licensed under the Creative Commons license applied to text content and some other images posted to the wikiHow website. This image may not be used by other entities without the express written consent of wikiHow, Inc.<br>n</p><p><br />n</p></div>”}
1
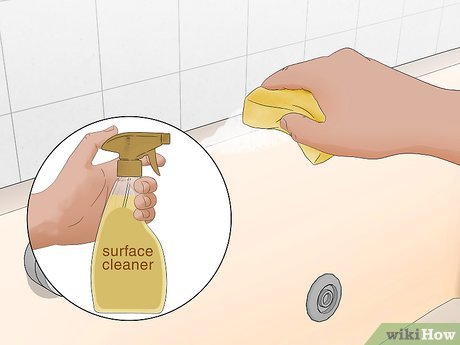
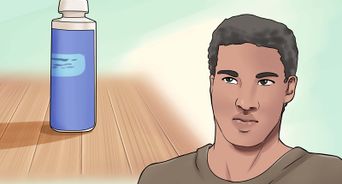
Clean the area with surface cleaner or soap scum remover. This isn’t strictly necessary to get rid of old caulk, but you’re most likely going to be adding new caulk afterward. If so, make life easier by washing the area now with a surface cleaner, soap scum remover, or a combination of the two. You’ll still need to do a little cleanup after removal, but for now, reduce the need to deep-clean the uncaulked area with excessive amounts of liquid.[1] X Research source
This is also a good idea because any buildup of oils or other slippery liquids may cause your hand or tools to slip while removing the old caulking.
{“smallUrl”:”https://www.wikihow.com/images/thumb/b/bd/Remove-Old-Caulking-Step-2-Version-5.jpg/v4-460px-Remove-Old-Caulking-Step-2-Version-5.jpg”,”bigUrl”:”/images/thumb/b/bd/Remove-Old-Caulking-Step-2-Version-5.jpg/aid1352289-v4-728px-Remove-Old-Caulking-Step-2-Version-5.jpg”,”smallWidth”:460,”smallHeight”:345,”bigWidth”:728,”bigHeight”:546,”licensing”:”<div class=”mw-parser-output”><p>u00a9 2023 wikiHow, Inc. All rights reserved. wikiHow, Inc. is the copyright holder of this image under U.S. and international copyright laws. This image is <b>not</b> licensed under the Creative Commons license applied to text content and some other images posted to the wikiHow website. This image may not be used by other entities without the express written consent of wikiHow, Inc.<br>n</p><p><br />n</p></div>”}
2
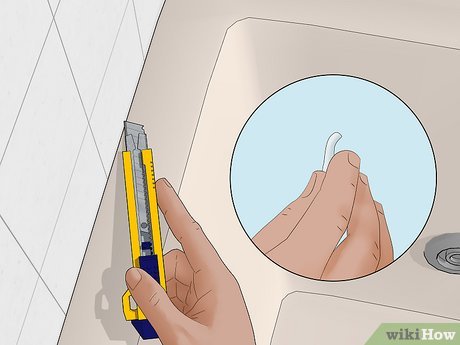
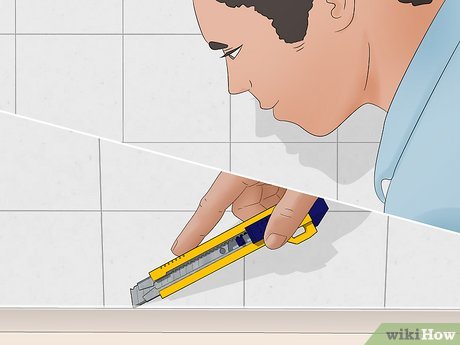
Determine how hard the caulk is. Pick a small area to test with a utility knife. Make a small cut with its tip. Assess the caulk’s texture as you do.[2] X Research source
Water-based, latex, and PVA caulks will most likely feel brittle and hard. These are more prone to chipping during removal.
Silicone caulks should feel much more pliable, like soft rubber. These are usually the easiest to remove.
{“smallUrl”:”https://www.wikihow.com/images/thumb/5/58/Remove-Old-Caulking-Step-3-Version-5.jpg/v4-460px-Remove-Old-Caulking-Step-3-Version-5.jpg”,”bigUrl”:”/images/thumb/5/58/Remove-Old-Caulking-Step-3-Version-5.jpg/aid1352289-v4-728px-Remove-Old-Caulking-Step-3-Version-5.jpg”,”smallWidth”:460,”smallHeight”:345,”bigWidth”:728,”bigHeight”:546,”licensing”:”<div class=”mw-parser-output”><p>u00a9 2023 wikiHow, Inc. All rights reserved. wikiHow, Inc. is the copyright holder of this image under U.S. and international copyright laws. This image is <b>not</b> licensed under the Creative Commons license applied to text content and some other images posted to the wikiHow website. This image may not be used by other entities without the express written consent of wikiHow, Inc.<br>n</p><p><br />n</p></div>”}
3
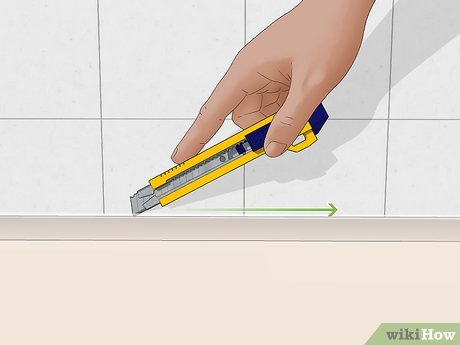
Make starter cuts. Hold your utility knife parallel with either surrounding surface. Insert the tip of your utility blade into the caulk line and slice it open along its edge. Repeat along the other surface.[3] X Research source
Avoid making actual contact with either surface. For now, you just want to weaken the caulk’s bond and allow more access for the next step.
If your caulk is especially hard, try heating it with a heat gun to soften it up.
If the heat gun doesn’t work, skip to the next step rather than risk damaging the surrounding surfaces with nicks and scratches.
{“smallUrl”:”https://www.wikihow.com/images/thumb/f/f5/Remove-Old-Caulking-Step-4-Version-5.jpg/v4-460px-Remove-Old-Caulking-Step-4-Version-5.jpg”,”bigUrl”:”/images/thumb/f/f5/Remove-Old-Caulking-Step-4-Version-5.jpg/aid1352289-v4-728px-Remove-Old-Caulking-Step-4-Version-5.jpg”,”smallWidth”:460,”smallHeight”:345,”bigWidth”:728,”bigHeight”:546,”licensing”:”<div class=”mw-parser-output”><p>u00a9 2023 wikiHow, Inc. All rights reserved. wikiHow, Inc. is the copyright holder of this image under U.S. and international copyright laws. This image is <b>not</b> licensed under the Creative Commons license applied to text content and some other images posted to the wikiHow website. This image may not be used by other entities without the express written consent of wikiHow, Inc.<br>n</p><p><br />n</p></div>”}
4
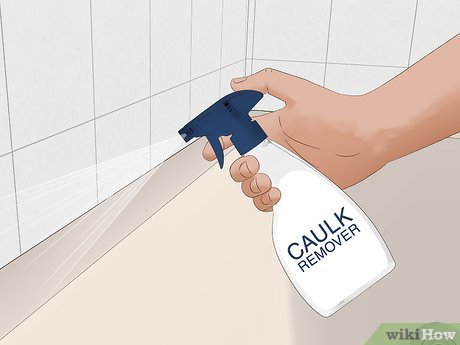
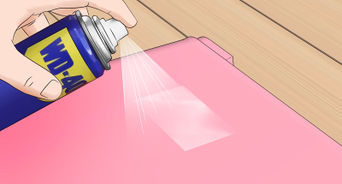
Soften with caulk remover if needed. If your starter cuts were extremely easy to make, feel free to try skipping this step, since the whole caulk line may come off just as easily without any additional treatment.[4] X Research source
Otherwise, apply a bead of caulk remover along the old caulk. Repeat as needed to cover the whole caulk line and spread it out so all of the old caulk is covered.[5] X Research source
Refer to your caulk remover’s directions to find out the minimum amount of time you should allow for it to set before moving on. Generally this is about two to three hours.[6] X Research source
The longer you let it set, the more it should soften the old caulk. So if the old caulk felt extremely hard and brittle when you made your test and starter cuts, allow more time for the caulk remover to be absorbed (as much as 24 hours for very stubborn caulk).
Method 2
Method 2 of 3:
Getting Rid of the Old Caulk
{“smallUrl”:”https://www.wikihow.com/images/thumb/7/72/Remove-Old-Caulking-Step-5-Version-5.jpg/v4-460px-Remove-Old-Caulking-Step-5-Version-5.jpg”,”bigUrl”:”/images/thumb/7/72/Remove-Old-Caulking-Step-5-Version-5.jpg/aid1352289-v4-728px-Remove-Old-Caulking-Step-5-Version-5.jpg”,”smallWidth”:460,”smallHeight”:345,”bigWidth”:728,”bigHeight”:546,”licensing”:”<div class=”mw-parser-output”><p>u00a9 2023 wikiHow, Inc. All rights reserved. wikiHow, Inc. is the copyright holder of this image under U.S. and international copyright laws. This image is <b>not</b> licensed under the Creative Commons license applied to text content and some other images posted to the wikiHow website. This image may not be used by other entities without the express written consent of wikiHow, Inc.<br>n</p><p><br />n</p></div>”}
1
Work slowly. Before you start, take a breath, relax, and prepare to take your time with this project. Expect it to be a relatively easy task, but at the same time, avoid the temptation to rush through it. The more you rush, the more likely you’ll slip along the way and accidentally nick, scratch, or make a deeper cut in the surrounding surfaces.[7] X Research source
{“smallUrl”:”https://www.wikihow.com/images/thumb/a/a9/Remove-Old-Caulking-Step-6-Version-5.jpg/v4-460px-Remove-Old-Caulking-Step-6-Version-5.jpg”,”bigUrl”:”/images/thumb/a/a9/Remove-Old-Caulking-Step-6-Version-5.jpg/aid1352289-v4-728px-Remove-Old-Caulking-Step-6-Version-5.jpg”,”smallWidth”:460,”smallHeight”:345,”bigWidth”:728,”bigHeight”:546,”licensing”:”<div class=”mw-parser-output”><p>u00a9 2023 wikiHow, Inc. All rights reserved. wikiHow, Inc. is the copyright holder of this image under U.S. and international copyright laws. This image is <b>not</b> licensed under the Creative Commons license applied to text content and some other images posted to the wikiHow website. This image may not be used by other entities without the express written consent of wikiHow, Inc.<br>n</p><p><br />n</p></div>”}
2
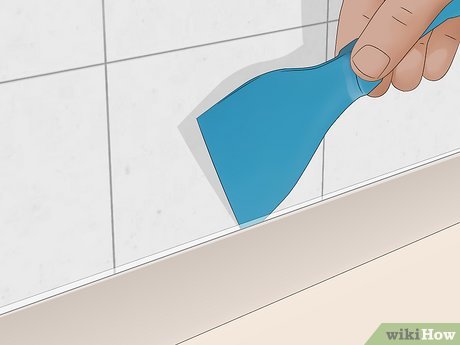
Start with a putty knife. Select an area along the caulk line to start. Hold your putty knife parallel to the caulk line and place the blade flat against either surrounding surface. Favor whichever one is smoothest to start. Edge the corner of the blade into and under the softened caulk, then push the blade along the caulk line to separate it from the surface.[8] X Research source
Ideally, you will be able to pull this loosened strip free of the other surface. If the bond is too strong to do so, repeat this process along the second surface.
{“smallUrl”:”https://www.wikihow.com/images/thumb/6/60/Remove-Old-Caulking-Step-7-Version-5.jpg/v4-460px-Remove-Old-Caulking-Step-7-Version-5.jpg”,”bigUrl”:”/images/thumb/6/60/Remove-Old-Caulking-Step-7-Version-5.jpg/aid1352289-v4-728px-Remove-Old-Caulking-Step-7-Version-5.jpg”,”smallWidth”:460,”smallHeight”:345,”bigWidth”:728,”bigHeight”:546,”licensing”:”<div class=”mw-parser-output”><p>u00a9 2023 wikiHow, Inc. All rights reserved. wikiHow, Inc. is the copyright holder of this image under U.S. and international copyright laws. This image is <b>not</b> licensed under the Creative Commons license applied to text content and some other images posted to the wikiHow website. This image may not be used by other entities without the express written consent of wikiHow, Inc.<br>n</p><p><br />n</p></div>”}
3
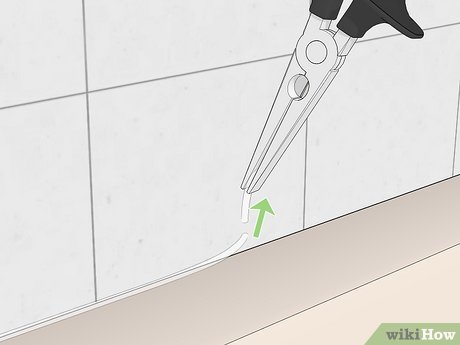
Use pliers to remove broken-off bits. As you push the putty knife along, the caulk should come away in strips. As it does, smaller pieces may break off and lodge in the gap between the two surfaces, so go back over your work as you remove each strip. Pull those smaller bits out with a pair of needle-nose pliers.[9] X Research source
If the gap is very small, use tweezers instead.
{“smallUrl”:”https://www.wikihow.com/images/thumb/7/78/Remove-Old-Caulking-Step-8-Version-2.jpg/v4-460px-Remove-Old-Caulking-Step-8-Version-2.jpg”,”bigUrl”:”/images/thumb/7/78/Remove-Old-Caulking-Step-8-Version-2.jpg/aid1352289-v4-728px-Remove-Old-Caulking-Step-8-Version-2.jpg”,”smallWidth”:460,”smallHeight”:345,”bigWidth”:728,”bigHeight”:546,”licensing”:”<div class=”mw-parser-output”><p>u00a9 2023 wikiHow, Inc. All rights reserved. wikiHow, Inc. is the copyright holder of this image under U.S. and international copyright laws. This image is <b>not</b> licensed under the Creative Commons license applied to text content and some other images posted to the wikiHow website. This image may not be used by other entities without the express written consent of wikiHow, Inc.<br>n</p><p><br />n</p></div>”}
4
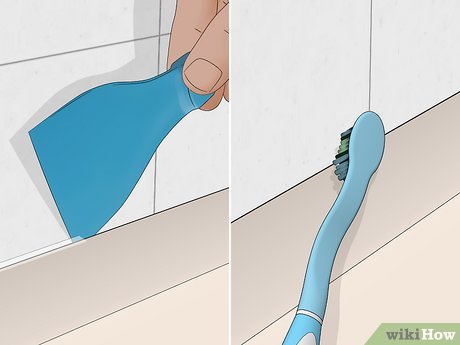
Scrape away whatever’s left. Even if most of the caulk came away in nice, long strips, go back and use your putty knife to remove any lingering lines that stuck to the surfaces along the caulk line’s edges. For extremely tough pieces, switch to a steel brush, toothbrush, or the hook feature in a 5-in-1 painter’s tool. Brush or chip away at any pieces that have hardened into place.[10] X Research source
Remember to do the same with any bits that are deep within the gap.
If needed, use your heat gun again to soften any stubborn bits.[11] X Research source
Method 3
Method 3 of 3:
Finishing Up
{“smallUrl”:”https://www.wikihow.com/images/thumb/a/a3/Remove-Old-Caulking-Step-9-Version-2.jpg/v4-460px-Remove-Old-Caulking-Step-9-Version-2.jpg”,”bigUrl”:”/images/thumb/a/a3/Remove-Old-Caulking-Step-9-Version-2.jpg/aid1352289-v4-728px-Remove-Old-Caulking-Step-9-Version-2.jpg”,”smallWidth”:460,”smallHeight”:345,”bigWidth”:728,”bigHeight”:546,”licensing”:”<div class=”mw-parser-output”><p>u00a9 2023 wikiHow, Inc. All rights reserved. wikiHow, Inc. is the copyright holder of this image under U.S. and international copyright laws. This image is <b>not</b> licensed under the Creative Commons license applied to text content and some other images posted to the wikiHow website. This image may not be used by other entities without the express written consent of wikiHow, Inc.<br>n</p><p><br />n</p></div>”}
1
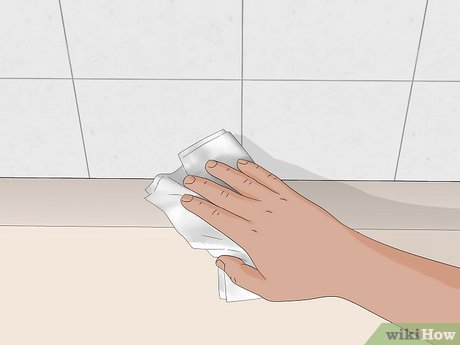
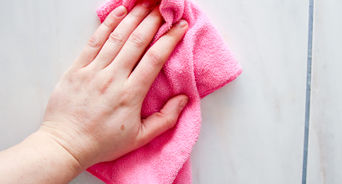
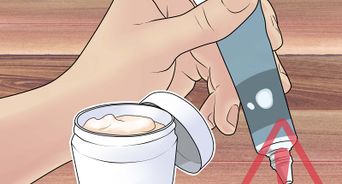
Clean up after removal. Once you’ve removed all the caulk, clean up the mess you’ve made so it doesn’t interfere with the new caulk bonding to the surfaces. Dust the surface with dry paper towels or microfiber clothes so you don’t have to use too much liquid. Then use a light amount of cleaner and/or soap scum remover to clean the surface areas. Wipe the area dry when finished.[12] X Research source
Because the gap between the surfaces is now exposed, you want to expose it to as little moisture as possible. Spray paper towels of cloths with cleaner instead of spraying the surfaces directly.
Avoid using ammonia-based cleaners, since this creates toxic fumes when combined with bleach, which you’ll be using next.
{“smallUrl”:”https://www.wikihow.com/images/thumb/a/a4/Remove-Old-Caulking-Step-10-Version-2.jpg/v4-460px-Remove-Old-Caulking-Step-10-Version-2.jpg”,”bigUrl”:”/images/thumb/a/a4/Remove-Old-Caulking-Step-10-Version-2.jpg/aid1352289-v4-728px-Remove-Old-Caulking-Step-10-Version-2.jpg”,”smallWidth”:460,”smallHeight”:345,”bigWidth”:728,”bigHeight”:546,”licensing”:”<div class=”mw-parser-output”><p>u00a9 2023 wikiHow, Inc. All rights reserved. wikiHow, Inc. is the copyright holder of this image under U.S. and international copyright laws. This image is <b>not</b> licensed under the Creative Commons license applied to text content and some other images posted to the wikiHow website. This image may not be used by other entities without the express written consent of wikiHow, Inc.<br>n</p><p><br />n</p></div>”}
2
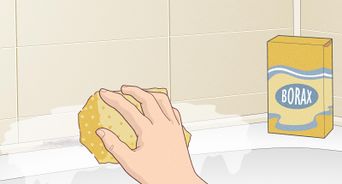
Get rid of mildew. Kill mold by combining ⅓ cup (79 ml) of bleach with 1 gallon (3.75 L) of water. Fill a spray bottle with the solution and spray into and around the gap, or soak a paintbrush or foam brush in it and use that to reach inside the gap. Scrub with a cleaning brush, wipe up any extra debris that may have worked loose, rinse the area with dampened towels, and then wipe it dry.[13] X Research source
Alternately, you can also use a storebought mold-and-mildew killer.[14] X Research source
{“smallUrl”:”https://www.wikihow.com/images/thumb/0/07/Remove-Old-Caulking-Step-11-Version-2.jpg/v4-460px-Remove-Old-Caulking-Step-11-Version-2.jpg”,”bigUrl”:”/images/thumb/0/07/Remove-Old-Caulking-Step-11-Version-2.jpg/aid1352289-v4-728px-Remove-Old-Caulking-Step-11-Version-2.jpg”,”smallWidth”:460,”smallHeight”:345,”bigWidth”:728,”bigHeight”:546,”licensing”:”<div class=”mw-parser-output”><p>u00a9 2023 wikiHow, Inc. All rights reserved. wikiHow, Inc. is the copyright holder of this image under U.S. and international copyright laws. This image is <b>not</b> licensed under the Creative Commons license applied to text content and some other images posted to the wikiHow website. This image may not be used by other entities without the express written consent of wikiHow, Inc.<br>n</p><p><br />n</p></div>”}
3
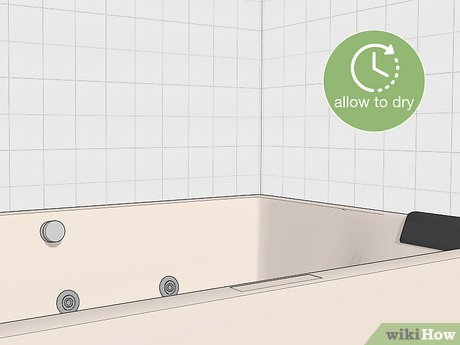
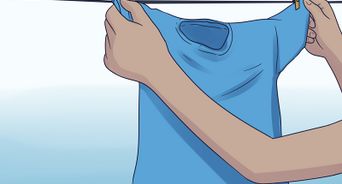
Allow the area to dry before recaulking. To make sure you’re not trapping any moisture behind the surfaces, wait until the next day before covering the gap with new caulk. Give the area behind the surfaces a chance to air-dry. Aim a fan at the gap to improve air circulation. To hurry things up, pass your heat gun up and down along the gap periodically and/or set up a space heater nearby.[15] X Research source
If you’re using silicone caulk for a new caulk line, the area must be completely dry in order for it adhere.
Water-based caulks will adhere to surfaces that are slightly damp, but doing so may increase the risk of mildew growing back.
Keep in mind that since caulk isn’t waterproof, if there’s a leak in your shower, the new caulk is going to eventually show mold and mildew, as well.[16] X
Expert Source
Art Fricke Home Renovation & Repair Specialist
Expert Interview. 14 August 2020.
Video
By using this service, some information may be shared with YouTube.
Warnings
Chemicals that remove or soften caulking are very powerful and may be toxic. Always wear the proper protective gear when using strong chemicals.


