


[ad_1]
Steps
Using a Steamer
-

1Roll your vehicle window down 1⁄4 inch (0.64 cm). Open your vehicle door so you can access the inside of the tinted window. Crack your window just a little so that you are able to reach the very top and see the edge of the tint.[1]
- Do the windows in the doors first and save the rear window for last, especially if it has defrost capabilities. This will give you a chance to practice your technique so you can remove the tint more easily while making sure not to mess up the defrost lines.
- If you’re doing windows in your home, you can skip this step.
-
 2Steam both the outside and the inside of the windows. Any handheld clothing or upholstery steamer will work for this project. Hold the steamer 1–2 inches (2.5–5.1 cm) away from the window and steam the entire outside of the window first. Then, apply steam to the inside of the window. Work in long, sweeping motions from the top to the bottom and try to heat the pane of glass evenly.[2]
- Steaming the outside helps heat up the window enough for the adhesive to dissolve. You don’t need to do this for the rear window of your vehicle or if the windows in your home are on the second level and you can’t access them easily, though.
Variation: If you don’t have a steamer, you can use a hairdryer or heat gun to loosen the adhesive instead. However, this takes longer, isn’t as effective, and will probably leave behind a lot of glue that you’ll need to clean off. Just be sure not to heat the glass so much that it breaks!
-
 3Use a straight razor to lift up the edge of the tint. Carefully place a straight razor underneath the tint at one corner of the inside of the top of the window. Using a razor to loosen the edge of the tint will make it easier to peel off.[3]
- If you can’t get the corner of the tint to come up, apply more steam and try again.
EXPERT TIP
Chad Zani
Auto Detailing Expert
Chad Zani is the Director of Franchising at Detail Garage, an automotive detailing company with locations around the U.S. and Sweden. Chad is based in the Los Angeles, California area and uses his passion for auto detailing to teach others how to do so as he grows his company nationwide.
Chad Zani
Auto Detailing ExpertOur Expert Agrees: Glass is difficult to scratch, so you can run a razor blade across the glass with a lubricant to remove the tint. You can also use a razor blade to remove the sticky residue that is left behind after the tint is gone. Another option to remove the sticky residue is using a citrus-based cleaner.
-
 4Peel the tint off slowly while continuing to apply steam. Work slowly and pull the tint down from the top of the window toward the bottom of the window. Keep applying steam, paying special attention to any particularly stubborn spots.[4]
- If you try to pull the tint too quickly, it will tear and make the job that much harder. If that happens, use the razor to lift the edge of the tint again and continue peeling it off.
Warning: The steam is incredibly hot so be very careful not to burn yourself as you remove the tint!
-
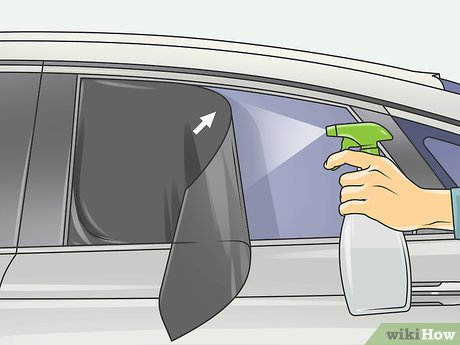
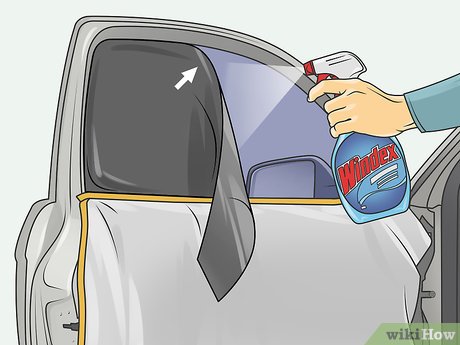
 5Remove any remaining adhesive with a commercial cleaner. Mix 1 part commercial cleaner, like 409, and 1 part water in a spray bottle so you can easily apply it to the window.[5]
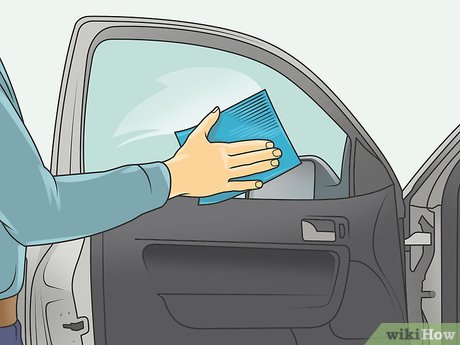
Spray it on and scrub the glue spots with a non-scratch pad, then dry the glass with a paper towel.- Wipe the door panels or window frame with a clean microfiber cloth to remove any water from the steaming process.[6]
- Wipe the door panels or window frame with a clean microfiber cloth to remove any water from the steaming process.[6]
-
 6Repeat the process on each tinted window. You can use the same technique to remove the tint from each of the windows in your vehicle or home. Go slow and take your time so that you can remove all of the tint from each window in a single piece.
 -
 7Steam the back window of your vehicle for 7 minutes before peeling the tint away. If you’re working on a vehicle, position the steamer right up against the interior glass of the back window. Tie something around the trigger to keep it going and prop up the steamer so it stays in place. Close the doors to your vehicle and let the steamer run for 7 or more minutes.[7]

Applying Ammonia
-
 1Mask the door panels of your vehicle or the window frame in your home. To protect them from the ammonia, cover the interior door panels or window frame with tarps or plastic sheeting and tape it in place. Don’t use newspaper or another absorbent material as the ammonia will soak through it.[10]
- Be sure to cover all of the electrical components in your vehicle well, such as switches and speakers.
Tip: This method works best on hot, sunny days as the heat from the sun helps the ammonia break down the adhesive holding the tint to the glass.
-
 2Cut black garbage bags to the size of your windows. Place a black garbage bag over one of the windows and use a metallic marker to trace the outline. Cut it out and separate the bag so you have 2 pieces: 1 for the inside of the window and 1 for the outside. Repeat for each window.[11]
- You only need to cover the inside of the windows with garbage bags if you’re working on windows in your home and can’t easily reach the exterior.
-
 3Apply soapy water to the outside of the windows and put the garbage bags on top. Fill a spray bottle three-quarters full of water and add a squirt of dish soap. Shake up the bottle and spray the outside of each window. Then, place a garbage bag to the glass so it covers it completely.[12]
- The soapy water helps the garbage bag stick to the window.
- Skip this step if you can’t access the outside of the windows in your home.
-
 4Spray ammonia on the inside of the windows and cover them with the garbage bags. Fill another spray bottle with ammonia. Spritz the inside of a window so it’s fully saturated then press the garbage bag into place so it covers the glass. The liquid should hold the plastic in place all on its own, but you could use masking tape to secure the bags if necessary. Repeat for each window.[13]
- If you don’t want to use ammonia or don’t have any on hand, you can use a mixture of water and soap or baby shampoo on the inside of the windows, instead.[14]
Warning: Wear gloves and a mask or respirator when working with ammonia to protect your skin and lungs.
- If you don’t want to use ammonia or don’t have any on hand, you can use a mixture of water and soap or baby shampoo on the inside of the windows, instead.[14]
-
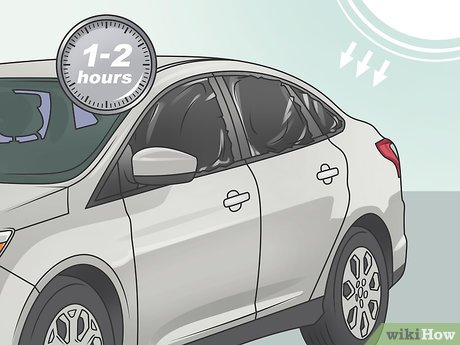 5Let the ammonia soak in for 1-2 hours. Give the sun time to heat up the glass, which will help the ammonia dissolve the adhesive holding the tint to the windows. This is best to do in the middle of summer on a really hot, sunny day.[15]
-
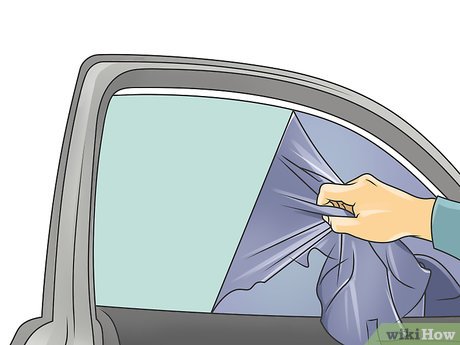 6Remove the bags and peel the tint away. Take off the garbage bags, then use a razor to peel 1 corner of the tint away from the window so you can grip it. Slowly and carefully pull the tint away from the glass from one edge of the window to the other.[16]
- Work slowly so the tint doesn’t rip! If it does, slide the razor underneath the edge of the tint so you can lift it up and continue removing it.
-
 7Use ammonia and steel wool to remove any glue stuck to the windows. Once you’ve gotten all of the tint off, spray the window with ammonia again. Scrub any stuck-on adhesive with fine steel wool. Then, wipe away the debris and liquid with newspaper.[17]
Video
Warnings
-
Never scrape across defroster lines with a razor blade as this can damage them.⧼thumbs_response⧽
-
Be careful not to burn yourself when working with a steamer or heat gun.⧼thumbs_response⧽
Things You’ll Need
Using a Steamer
-
Steamer
-
Straight razor
-
Commercial cleaner
-
Non-scratch pad
-
Paper towels
-
Microfiber cloth
Applying Ammonia
-
Tarp or plastic sheets
-
Masking tape
-
Black trash bags
-
Scissors
-
Soapy water
-
Ammonia
-
Spray bottles
-
Razor blade
-
Very fine steel wool
-
Newspaper
You Might Also Like


[ad_2]
Source link : https://www.wikihow.com/Remove-Window-Tint

