{“smallUrl”:”https://www.wikihow.com/images/thumb/0/0f/Revive-a-Dying-Aloe-Vera-Plant-Step-9-Version-3.jpg/v4-460px-Revive-a-Dying-Aloe-Vera-Plant-Step-9-Version-3.jpg”,”bigUrl”:”/images/thumb/0/0f/Revive-a-Dying-Aloe-Vera-Plant-Step-9-Version-3.jpg/aid43675-v4-728px-Revive-a-Dying-Aloe-Vera-Plant-Step-9-Version-3.jpg”,”smallWidth”:460,”smallHeight”:345,”bigWidth”:728,”bigHeight”:546,”licensing”:”<div class=”mw-parser-output”><p>u00a9 2023 wikiHow, Inc. All rights reserved. wikiHow, Inc. is the copyright holder of this image under U.S. and international copyright laws. This image is <b>not</b> licensed under the Creative Commons license applied to text content and some other images posted to the wikiHow website. This image may not be used by other entities without the express written consent of wikiHow, Inc.<br>n</p><p><br />n</p></div>”}
1
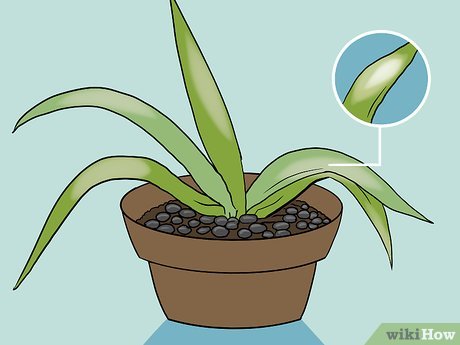
Examine the leaves. As a succulent, Aloe vera plants store water in their leaves. If the leaves are yellow, brown, or swollen, you’re likely dealing with overwatering. If you notice the leaves are puckering, dropping off, or are becoming almost transparent, your plant likely needs water.[1] X Research source
However, wilting leaves or dark watery leaves can also be a sign of root rot.[2] X Research source
When did you last water the plant? If you watered it recently, remove the plant from the pot and check for root rot.
{“smallUrl”:”https://www.wikihow.com/images/thumb/3/35/Revive-a-Dying-Aloe-Vera-Plant-Step-7-Version-3.jpg/v4-460px-Revive-a-Dying-Aloe-Vera-Plant-Step-7-Version-3.jpg”,”bigUrl”:”/images/thumb/3/35/Revive-a-Dying-Aloe-Vera-Plant-Step-7-Version-3.jpg/aid43675-v4-728px-Revive-a-Dying-Aloe-Vera-Plant-Step-7-Version-3.jpg”,”smallWidth”:460,”smallHeight”:345,”bigWidth”:728,”bigHeight”:546,”licensing”:”<div class=”mw-parser-output”><p>u00a9 2023 wikiHow, Inc. All rights reserved. wikiHow, Inc. is the copyright holder of this image under U.S. and international copyright laws. This image is <b>not</b> licensed under the Creative Commons license applied to text content and some other images posted to the wikiHow website. This image may not be used by other entities without the express written consent of wikiHow, Inc.<br>n</p><p><br />n</p></div>”}
2
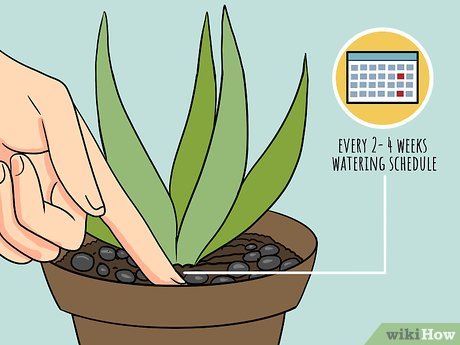
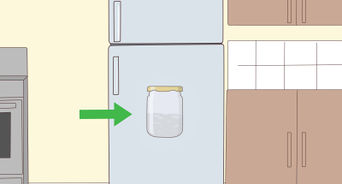
Check the soil moisture. You can tell if your Aloe vera plant needs to be watered by pressing your index finger a few inches down into the soil. If the soil is dry, your plant needs water. Aloe vera plants are succulents and do not need to be watered often. Overwatering can kill your plant![3] X Research source
If you keep your plant outside, watering every two weeks should be sufficient.
If you keep your plant inside, water it every three to four weeks.
{“smallUrl”:”https://www.wikihow.com/images/thumb/f/f4/Revive-a-Dying-Aloe-Vera-Plant-Step-10-Version-3.jpg/v4-460px-Revive-a-Dying-Aloe-Vera-Plant-Step-10-Version-3.jpg”,”bigUrl”:”/images/thumb/f/f4/Revive-a-Dying-Aloe-Vera-Plant-Step-10-Version-3.jpg/aid43675-v4-728px-Revive-a-Dying-Aloe-Vera-Plant-Step-10-Version-3.jpg”,”smallWidth”:460,”smallHeight”:345,”bigWidth”:728,”bigHeight”:546,”licensing”:”<div class=”mw-parser-output”><p>u00a9 2023 wikiHow, Inc. All rights reserved. wikiHow, Inc. is the copyright holder of this image under U.S. and international copyright laws. This image is <b>not</b> licensed under the Creative Commons license applied to text content and some other images posted to the wikiHow website. This image may not be used by other entities without the express written consent of wikiHow, Inc.<br>n</p><p><br />n</p></div>”}
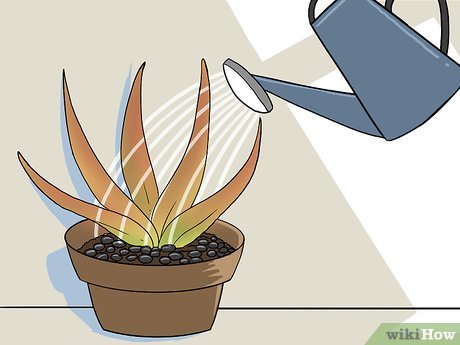
3
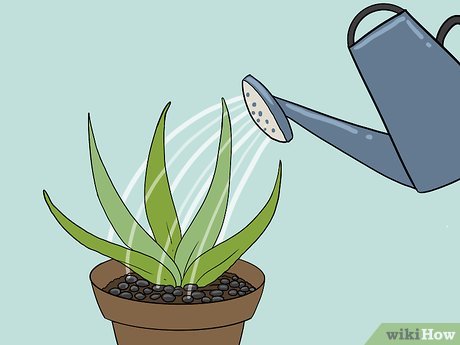
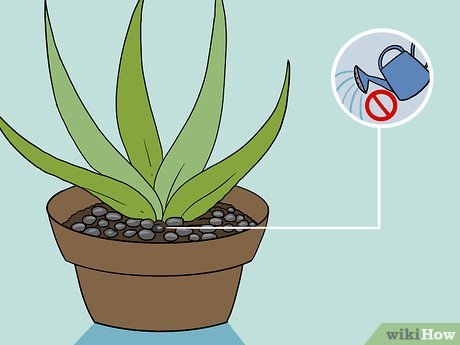
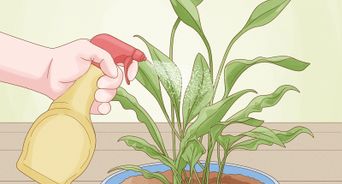
Water until the soil is just moist. Water should never sit on top of the surface of the soil, so water with a light hand.[4] X
Trustworthy Source
Royal Horticultural Society Leading gardening charity in the U.K. providing resources for identifying, growing and caring for flowers and other plants
Continue to check your plant weekly or bi-weekly by testing the soil to see if it needs to be watered. You should let the top third of the soil dry out between waterings.[5] X Research source
{“smallUrl”:”https://www.wikihow.com/images/thumb/c/c7/Revive-a-Dying-Aloe-Vera-Plant-Step-8-Version-3.jpg/v4-460px-Revive-a-Dying-Aloe-Vera-Plant-Step-8-Version-3.jpg”,”bigUrl”:”/images/thumb/c/c7/Revive-a-Dying-Aloe-Vera-Plant-Step-8-Version-3.jpg/aid43675-v4-728px-Revive-a-Dying-Aloe-Vera-Plant-Step-8-Version-3.jpg”,”smallWidth”:460,”smallHeight”:345,”bigWidth”:728,”bigHeight”:546,”licensing”:”<div class=”mw-parser-output”><p>u00a9 2023 wikiHow, Inc. All rights reserved. wikiHow, Inc. is the copyright holder of this image under U.S. and international copyright laws. This image is <b>not</b> licensed under the Creative Commons license applied to text content and some other images posted to the wikiHow website. This image may not be used by other entities without the express written consent of wikiHow, Inc.<br>n</p><p><br />n</p></div>”}
4
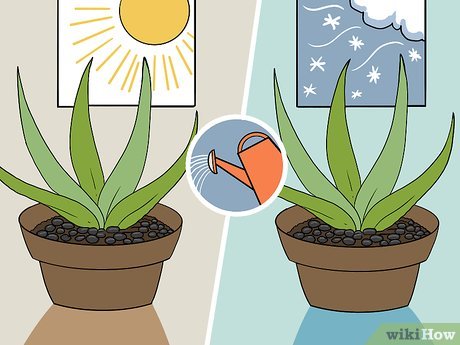
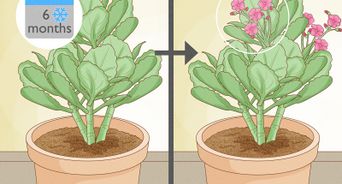
Modify watering according to the season. Aloe vera plants need more water in the warmer months, but less in the cooler months. Water less often in fall and winter, especially if your plant lives in a cool space.[6] X Research source
Method 2
Method 2 of 3:
Repotting Due to Root Rot
{“smallUrl”:”https://www.wikihow.com/images/thumb/4/41/Revive-a-Dying-Aloe-Vera-Plant-Step-1-Version-5.jpg/v4-460px-Revive-a-Dying-Aloe-Vera-Plant-Step-1-Version-5.jpg”,”bigUrl”:”/images/thumb/4/41/Revive-a-Dying-Aloe-Vera-Plant-Step-1-Version-5.jpg/aid43675-v4-728px-Revive-a-Dying-Aloe-Vera-Plant-Step-1-Version-5.jpg”,”smallWidth”:460,”smallHeight”:345,”bigWidth”:728,”bigHeight”:546,”licensing”:”<div class=”mw-parser-output”><p>u00a9 2023 wikiHow, Inc. All rights reserved. wikiHow, Inc. is the copyright holder of this image under U.S. and international copyright laws. This image is <b>not</b> licensed under the Creative Commons license applied to text content and some other images posted to the wikiHow website. This image may not be used by other entities without the express written consent of wikiHow, Inc.<br>n</p><p><br />n</p></div>”}
1
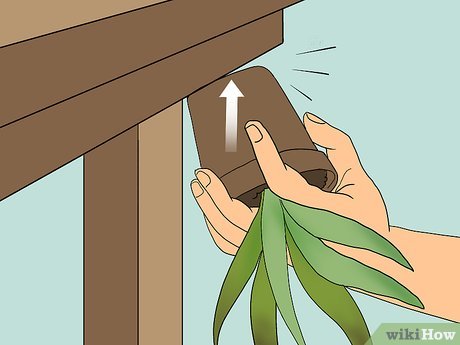
Remove the Aloe vera plant from its current pot. One of the typical reasons for Aloe vera plant death is root rot. If you see mushy brown leaves but don’t suspect overwatering, you need to take the plant out of its pot.[7] X Research source
Loosely hold the base of the plant and the bottom of your pot. Tip the pot upside down, and continue holding the plant with your other hand. Hit the bottom of the pot with your hand or knock it against a table ledge (or other hard surface).
Depending on the size of your plant, you may need another person to help you. One person should hold the plant base with both hands, while the other person tips the pot upside down and hits the bottom. Jostle the pot back and forth until the plant comes loose.
If you still have trouble removing your plant with two sets of hands, run a trowel or knife around the interior of the pot and try releasing it again, or push some of the soil out through the drainage holes in the bottom of the pot.
If your plant still does not come out of the pot, you may need to break your pot.
While releasing the Aloe vera plant from its pot, hold (don’t pull) the plant gently. Hitting the bottom of the pot will keep your roots intact, and gravity will push the plant downward.
{“smallUrl”:”https://www.wikihow.com/images/thumb/9/9e/Revive-a-Dying-Aloe-Vera-Plant-Step-2-Version-4.jpg/v4-460px-Revive-a-Dying-Aloe-Vera-Plant-Step-2-Version-4.jpg”,”bigUrl”:”/images/thumb/9/9e/Revive-a-Dying-Aloe-Vera-Plant-Step-2-Version-4.jpg/aid43675-v4-728px-Revive-a-Dying-Aloe-Vera-Plant-Step-2-Version-4.jpg”,”smallWidth”:460,”smallHeight”:345,”bigWidth”:728,”bigHeight”:546,”licensing”:”<div class=”mw-parser-output”><p>u00a9 2023 wikiHow, Inc. All rights reserved. wikiHow, Inc. is the copyright holder of this image under U.S. and international copyright laws. This image is <b>not</b> licensed under the Creative Commons license applied to text content and some other images posted to the wikiHow website. This image may not be used by other entities without the express written consent of wikiHow, Inc.<br>n</p><p><br />n</p></div>”}
2
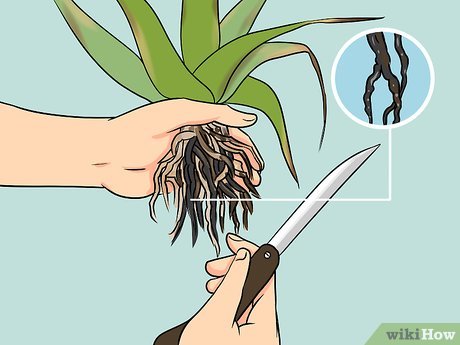
Remove unhealthy roots with a sharp, sterilized knife. Examine the roots and determine how many of them are still healthy. Mushy roots are characteristic of root rot. Any roots that aren’t black or mushy are good and can be kept.[8] X Research source
If you see a lot of healthy roots and only a section of dead or mushy roots, you can likely save your plant without too much trouble.
If you notice that the majority of your plant has damaged roots, it will take a little more effort to save the plant, and it may be beyond saving. In this case, you can try to save the plant by removing the largest leaves (with a knife). Cut away about half of the plant. This method is risky. However, with fewer leaves to nourish, the small amount of undamaged roots can better direct nutrients throughout the plant.[9] X Research source
{“smallUrl”:”https://www.wikihow.com/images/thumb/a/aa/Revive-a-Dying-Aloe-Vera-Plant-Step-3-Version-4.jpg/v4-460px-Revive-a-Dying-Aloe-Vera-Plant-Step-3-Version-4.jpg”,”bigUrl”:”/images/thumb/a/aa/Revive-a-Dying-Aloe-Vera-Plant-Step-3-Version-4.jpg/aid43675-v4-728px-Revive-a-Dying-Aloe-Vera-Plant-Step-3-Version-4.jpg”,”smallWidth”:460,”smallHeight”:345,”bigWidth”:728,”bigHeight”:546,”licensing”:”<div class=”mw-parser-output”><p>u00a9 2023 wikiHow, Inc. All rights reserved. wikiHow, Inc. is the copyright holder of this image under U.S. and international copyright laws. This image is <b>not</b> licensed under the Creative Commons license applied to text content and some other images posted to the wikiHow website. This image may not be used by other entities without the express written consent of wikiHow, Inc.<br>n</p><p><br />n</p></div>”}
3
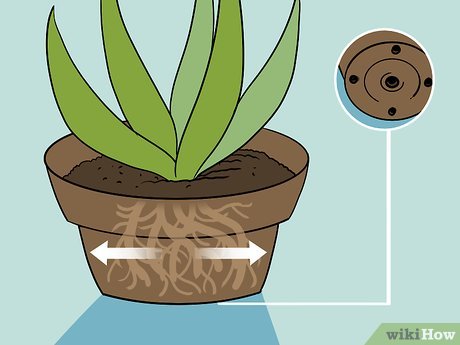
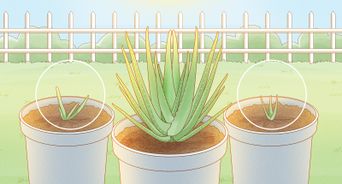
Choose a pot that is one-third larger than the root system. Any excess soil will hold water and could cause root rot in the future, so a smaller pot is better than a larger one.[10] X Research source
The roots of Aloe vera plants grow horizontally, rather than vertically. [11] X Research source
Aloe vera plants can also become quite heavy, and the weight of the plant can cause a narrow pot to tip over. Thus, select a wide pot, rather than a deep or narrow pot.[12] X Research source
The pot you choose should also have plenty of drainage holes on the bottom so that excess water does not sit in the soil.[13] X Research source
A plastic pot is best if you live in a dryer climate, while a pot made from terracotta or clay is best for cooler or humid areas.[14] X Research source
{“smallUrl”:”https://www.wikihow.com/images/thumb/3/38/Revive-a-Dying-Aloe-Vera-Plant-Step-4-Version-4.jpg/v4-460px-Revive-a-Dying-Aloe-Vera-Plant-Step-4-Version-4.jpg”,”bigUrl”:”/images/thumb/3/38/Revive-a-Dying-Aloe-Vera-Plant-Step-4-Version-4.jpg/aid43675-v4-728px-Revive-a-Dying-Aloe-Vera-Plant-Step-4-Version-4.jpg”,”smallWidth”:460,”smallHeight”:345,”bigWidth”:728,”bigHeight”:546,”licensing”:”<div class=”mw-parser-output”><p>u00a9 2023 wikiHow, Inc. All rights reserved. wikiHow, Inc. is the copyright holder of this image under U.S. and international copyright laws. This image is <b>not</b> licensed under the Creative Commons license applied to text content and some other images posted to the wikiHow website. This image may not be used by other entities without the express written consent of wikiHow, Inc.<br>n</p><p><br />n</p></div>”}
4
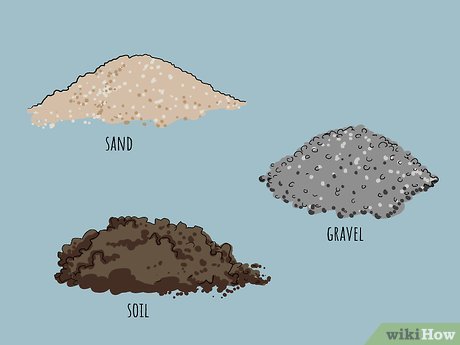
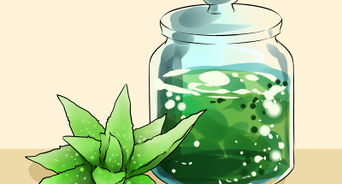
Use potting soil suitable for cactus or succulents. This type of soil has a higher sand content and produces a well-draining environment for your plant. You can find this type of soil easily at your local garden center.[15] X Research source
You can also create your own soil mix for your Aloe vera plant by mixing equal parts of sand, gravel or perlite, and soil.[16] X Research source
Be sure to use a coarse sand (like builder’s sand), rather than a fine sand. Fine sand can clump and hold water, rather than allowing it to drain down and through the pot.[17] X Research source
Although you can use potting soil for Aloe vera plants, they will thrive better in a mixed soil. Potting soil is more likely to hold moisture and could therefore cause root rot.
{“smallUrl”:”https://www.wikihow.com/images/thumb/b/b4/Revive-a-Dying-Aloe-Vera-Plant-Step-5-Version-3.jpg/v4-460px-Revive-a-Dying-Aloe-Vera-Plant-Step-5-Version-3.jpg”,”bigUrl”:”/images/thumb/b/b4/Revive-a-Dying-Aloe-Vera-Plant-Step-5-Version-3.jpg/aid43675-v4-728px-Revive-a-Dying-Aloe-Vera-Plant-Step-5-Version-3.jpg”,”smallWidth”:460,”smallHeight”:345,”bigWidth”:728,”bigHeight”:546,”licensing”:”<div class=”mw-parser-output”><p>u00a9 2023 wikiHow, Inc. All rights reserved. wikiHow, Inc. is the copyright holder of this image under U.S. and international copyright laws. This image is <b>not</b> licensed under the Creative Commons license applied to text content and some other images posted to the wikiHow website. This image may not be used by other entities without the express written consent of wikiHow, Inc.<br>n</p><p><br />n</p></div>”}
5
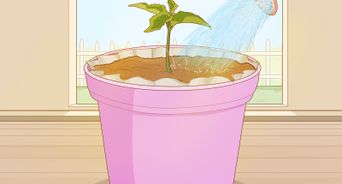
Replant your Aloe vera. Prepare the pot by filling it with the potting soil mixture, and shake your Aloe vera plant gently to remove about a third of the soil that has attached itself to the root ball.[18] X Research source
Place your plant in the newly prepared pot and cover the top with more of the potting soil mixture. Be sure that the entire root ball is covered with the soil mixture, but don’t bury the plant deeper than it was in the first pot.
You can also layer small rocks or gravel on the top of the soil, which helps reduce the evaporation of water.
{“smallUrl”:”https://www.wikihow.com/images/thumb/0/05/Revive-a-Dying-Aloe-Vera-Plant-Step-6-Version-3.jpg/v4-460px-Revive-a-Dying-Aloe-Vera-Plant-Step-6-Version-3.jpg”,”bigUrl”:”/images/thumb/0/05/Revive-a-Dying-Aloe-Vera-Plant-Step-6-Version-3.jpg/aid43675-v4-728px-Revive-a-Dying-Aloe-Vera-Plant-Step-6-Version-3.jpg”,”smallWidth”:460,”smallHeight”:345,”bigWidth”:728,”bigHeight”:546,”licensing”:”<div class=”mw-parser-output”><p>u00a9 2023 wikiHow, Inc. All rights reserved. wikiHow, Inc. is the copyright holder of this image under U.S. and international copyright laws. This image is <b>not</b> licensed under the Creative Commons license applied to text content and some other images posted to the wikiHow website. This image may not be used by other entities without the express written consent of wikiHow, Inc.<br>n</p><p><br />n</p></div>”}
6
Do not water immediately after repotting. Your Aloe vera plant needs a few days to readjust to its new pot and to repair any broken roots.
Method 3
Method 3 of 3:
Caring for a Sunburnt Aloe Vera Plant
{“smallUrl”:”https://www.wikihow.com/images/thumb/6/64/Revive-a-Dying-Aloe-Vera-Plant-Step-11-Version-3.jpg/v4-460px-Revive-a-Dying-Aloe-Vera-Plant-Step-11-Version-3.jpg”,”bigUrl”:”/images/thumb/6/64/Revive-a-Dying-Aloe-Vera-Plant-Step-11-Version-3.jpg/aid43675-v4-728px-Revive-a-Dying-Aloe-Vera-Plant-Step-11-Version-3.jpg”,”smallWidth”:460,”smallHeight”:345,”bigWidth”:728,”bigHeight”:546,”licensing”:”<div class=”mw-parser-output”><p>u00a9 2023 wikiHow, Inc. All rights reserved. wikiHow, Inc. is the copyright holder of this image under U.S. and international copyright laws. This image is <b>not</b> licensed under the Creative Commons license applied to text content and some other images posted to the wikiHow website. This image may not be used by other entities without the express written consent of wikiHow, Inc.<br>n</p><p><br />n</p></div>”}
1
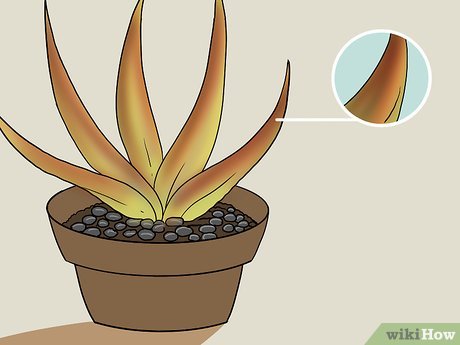
Check the leaves for symptoms of sunburn. If the leaves of your Aloe vera plant are turning brown or red, your plant may be sunburned.[19] X Research source
{“smallUrl”:”https://www.wikihow.com/images/thumb/f/f4/Revive-a-Dying-Aloe-Vera-Plant-Step-14-Version-3.jpg/v4-460px-Revive-a-Dying-Aloe-Vera-Plant-Step-14-Version-3.jpg”,”bigUrl”:”/images/thumb/f/f4/Revive-a-Dying-Aloe-Vera-Plant-Step-14-Version-3.jpg/aid43675-v4-728px-Revive-a-Dying-Aloe-Vera-Plant-Step-14-Version-3.jpg”,”smallWidth”:460,”smallHeight”:345,”bigWidth”:728,”bigHeight”:546,”licensing”:”<div class=”mw-parser-output”><p>u00a9 2023 wikiHow, Inc. All rights reserved. wikiHow, Inc. is the copyright holder of this image under U.S. and international copyright laws. This image is <b>not</b> licensed under the Creative Commons license applied to text content and some other images posted to the wikiHow website. This image may not be used by other entities without the express written consent of wikiHow, Inc.<br>n</p><p><br />n</p></div>”}
2
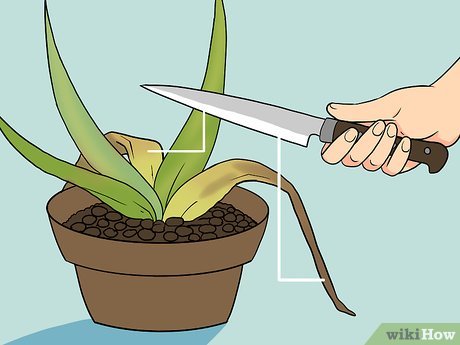
Remove dead leaves. With a sharp, sterilized knife, cut the leaf away from the plant at the base. Any leaves that are dead take nutrients from other parts of the plant, so be sure to remove them so that the rest of your plant doesn’t suffer.[20] X Research source
{“smallUrl”:”https://www.wikihow.com/images/thumb/0/00/Revive-a-Dying-Aloe-Vera-Plant-Step-12-Version-3.jpg/v4-460px-Revive-a-Dying-Aloe-Vera-Plant-Step-12-Version-3.jpg”,”bigUrl”:”/images/thumb/0/00/Revive-a-Dying-Aloe-Vera-Plant-Step-12-Version-3.jpg/aid43675-v4-728px-Revive-a-Dying-Aloe-Vera-Plant-Step-12-Version-3.jpg”,”smallWidth”:460,”smallHeight”:345,”bigWidth”:728,”bigHeight”:546,”licensing”:”<div class=”mw-parser-output”><p>u00a9 2023 wikiHow, Inc. All rights reserved. wikiHow, Inc. is the copyright holder of this image under U.S. and international copyright laws. This image is <b>not</b> licensed under the Creative Commons license applied to text content and some other images posted to the wikiHow website. This image may not be used by other entities without the express written consent of wikiHow, Inc.<br>n</p><p><br />n</p></div>”}
3
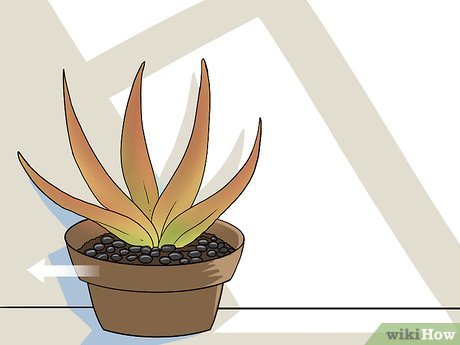
Reposition your plant. Move your plant to a place where it receives indirect, rather than direct, sunlight. If you’d like to transition your plant to an outdoor location, expose it to more and more sunlight gradually.[21] X Research source
If your plant is typically in a position to receive artificial light rather than sunlight, reposition the plant so that there is a greater distance between it and the light source. You can also try moving it outside so that it is getting some indirect natural light, rather than artificial light.
{“smallUrl”:”https://www.wikihow.com/images/thumb/7/77/Revive-a-Dying-Aloe-Vera-Plant-Step-13-Version-3.jpg/v4-460px-Revive-a-Dying-Aloe-Vera-Plant-Step-13-Version-3.jpg”,”bigUrl”:”/images/thumb/7/77/Revive-a-Dying-Aloe-Vera-Plant-Step-13-Version-3.jpg/aid43675-v4-728px-Revive-a-Dying-Aloe-Vera-Plant-Step-13-Version-3.jpg”,”smallWidth”:460,”smallHeight”:345,”bigWidth”:728,”bigHeight”:546,”licensing”:”<div class=”mw-parser-output”><p>u00a9 2023 wikiHow, Inc. All rights reserved. wikiHow, Inc. is the copyright holder of this image under U.S. and international copyright laws. This image is <b>not</b> licensed under the Creative Commons license applied to text content and some other images posted to the wikiHow website. This image may not be used by other entities without the express written consent of wikiHow, Inc.<br>n</p><p><br />n</p></div>”}
4
Water your plant. Check the soil and determine if your plant needs to be watered. The soil is likely dry if your plant has been getting too much sunlight, since the water would be evaporating more quickly and the plant may be suffering from heat stress.[22] X Research source
Video
By using this service, some information may be shared with YouTube.
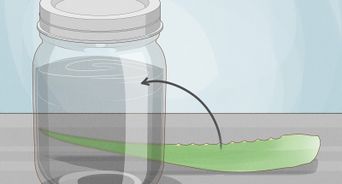
Instead of snapping off leaves when you want to use the aloe, cut the leaves at the base with a sharp knife where the leaf meets the soil. The plant will heal itself better from a more precise cut.
You Might Also Like
How to
Grow Kalanchoe
How to
Make Pot Liners for Plants
How to
Plant Aloe Vera
Aloe Vera Plant Care: How to Help Your Plant Thrive
How to
Revive a Plant
How to
Grow an Aloe Plant With Just an Aloe Leaf
How to
Use Aloe Vera Gel on Your Face
How to
Extract Aloe Vera
How to
Trim an Aloe Vera Plant
How to
Eat Aloe Vera
How to
Use Aloe Vera Gel on Your Hair
How to
Transplant Aloe Vera
How to
Use Aloe Vera to Treat Acid Reflux
How to
Store Aloe Leaves
[ad_2]
Source link : https://www.wikihow.com/Revive-a-Dying-Aloe-Vera-Plant


