


[ad_1]
Things You Should Know
- Practice making a straight stitch to learn the basics of sewing by hand.
- Try other beginner stitches like the basting, zig-zag, and slip stitch for specific sewing or project needs.
- Create decorative details on fabric with simple stitches like the backstitch or blanket stitch.
Steps
Method 1
Method 1 of 2:
Sewing a Straight Stitch
-
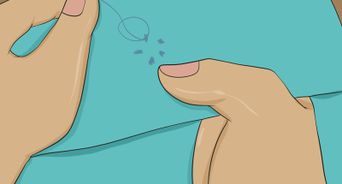
 1Thread your sewing needle and tie the ends of the thread together. When it comes to thread, more is better. Cut at least two times the amount of thread you think you’ll need just to be safe. Then, take one end of the thread between your thumb and forefinger and glide it through the eye of the needle. Guide the thread through the needle until the thread is even on both sides. Pinch the ends of the thread together and tie a small overhand knot at the end.[1]
- If you have trouble threading the needle, no worries! Look for sewing needles with larger eyes. These will make threading easier but leave bigger puncture holes.
- Sewing needles come in a variety of sizes, ranging from 8 to 19 to represent the needle’s gauge. The smaller the number, the larger the gauge and thicker the needle will be.[2]
- Cut the thread with sharp scissors to keep the ends from fraying.
- Lick the end of the thread, so it’s easier to glide through the needle’s eye.
-
2Pierce the needle through the side of the fabric people won’t see. This side of the fabric is often referred to as the “wrong side,” and is typically the inside part of a piece of clothing or stuffed toy.[3]
For example, if you’re sewing a seam, turn the garment inside out so the “wrong side” is facing out. Poke the needle into the fabric on the far edge of where your stitch will start. Then, pull the needle and thread through until the thread’s knot hits the fabric.[4]
- Use gentle pressure when poking and pulling the needle to avoid yanking the thread through the fabric.
- If your knot goes through the fabric, simply make a bigger knot and try again.
-
3Guide the needle through the other side of the fabric. Flip your fabric over and pierce the needle through about a 1⁄4 in (0.64 cm) from where you poked the first hole, following a straight line. Pull the entire length of the thread through the fabric until you feel resistance—this is your first stitch.[5]
- Draw a line on your fabric with a pencil or fabric chalk or marker to use as a guide while you sew.[6]
- Pull the thread tight enough for the stitch to lay flat on the fabric but not so tight that it bunches the fabric underneath.
- The bigger the space between your needle pokes, the longer your stitches will be.
- Draw a line on your fabric with a pencil or fabric chalk or marker to use as a guide while you sew.[6]
-
4Continue stitching until you reach the end of the fabric. With each poke of the needle, turn the fabric over. Keep the same distance between stitches by poking the needle in and out with an equal space between each hole. Continue sewing till the end of the fabric or pattern.[7]
- A straight stitch is often called a running stitch because it continues in a straight line following a dashed-line pattern, similar to a running path.
-
5Finish the stitching with a knot. Poke the needle through the wrong side of the fabric, but only pull the thread halfway through (this creates a loop of thread). Weave the needle up into the loop and pull snugly until the thread is flat against the fabric—you’ve successfully made a knot! Repeat this 2 to 3 times to ensure the knot stays in place.[8]

Method 2
Method 2 of 2:
Other Basic Stitches for Beginners
-
1Hold two layers of fabric together temporarily with a basting stitch. Fold a piece of fabric to create two folds, or lay two pieces of fabric on top of each other. Pinch together the layers of fabric and insert the needle horizontally. Keeping the needle parallel, drive it into the fabric about 1⁄4 in (0.64 cm) away from your first hole. Pull the needle through to make your first stitch. Repeat this process until you reach the end of your pattern or fabric.[9]
- This type of stitch can be used to replace sewing pins as it can be easily removed.
-
2Use a zig-zag or catch stitch to help fabric stretch. Pierce the needle through the wrong side of the fabric where you’d like the stitch to start. Pull the thread through, then bring the needle down into the fabric at a diagonal about 1⁄4 in (0.64 cm) from your first hole. Push the needle back up through the first hole to create a point—this is your first stitch. Repeat this process going left to right until, creating points by sliding the needle through the first hole of the stitch.[10]
- This stitch is most commonly used to sew in elastic waistbands.[11]
- This stitch is most commonly used to sew in elastic waistbands.[11]
-
3Create an invisible stitch with a slip stitch. Also known as a ladder stitch, a slip stitch binds and closes two pieces of fabric together. To make a slip stitch, pierce the needle on the inside fold of the fabric, so the knot is hidden inside the folded gap or seam. Make a 1⁄4 inch (0.64 cm) horizontal stitch on top of the opposite fold across from where you first pierced the needle. Pull the thread through to create a stitch. Continue sewing until you reach the end of the seam or gap.[12]
- This stitch is often used to close stuffed animals after they’re stuffed.
-
4Sew two pieces of fabric tightly together with a backstitch. Backstitching is basically a straight stitch without any gaps. Push a threaded needle through the underside of 2 pieces of fabric about 1⁄4 in (0.64 cm) away from the fabric’s edge. Bring the needle down through the fabric at the edge, moving back from the hole you previously made. Drive the needle horizontally underneath the fabric so that it’s parallel to your body. Note that if the tail end of your thread is bisecting where the needle is going in and out of the fabric, your stitches will be even. Pull the needle through to create your stitch.[13]
- This stitch is often used to embroider letters and sew pieces of clothing together.
-
5Make a bound seam with a whipstitch. Also known as the overcast stitch, a whipstitch connects 2 pieces of fabric. Sew a whipstitch by bringing 2 edges of fabric together (in this case, these edges are referred to as flaps). Stab a threaded needle through the corner of one flap individually, as this hides the thread’s knot. Pinch the flaps together, and push the needle through both layers from front to back. Pull the thread until it’s flush with the fabric to make your first stitch. Bring the needle back to the front and repeat.[14]
- This stitch can be used to hem jeans and close the sides of pillows, cushions, and stuffed animals.
-
6Create a decorative border using a blanket stitch. To sew a blanket stitch, put 2 pieces of fabric together or fold a piece of fabric in half. Pierce the edge of one of the fabric flaps with a threaded needle and pull. Hold the fabric flaps together and bring the needle through both of them. Weave the needle up into the loop of thread at the top of the fabric, and pull tightly until the thread is flush with the fabric. Create your next stitch about 1⁄4 in (0.64 cm) away from the first, piercing the same side of fabric as the first stitch.[15]
- This stitch is commonly used to make napkins, stuffed animals, and blankets.
Video
Tips
-
Always prewash a piece of fabric or clothing before sewing. This way, it won’t change size after you’ve finished sewing. Simply read the label on your fabric and follow the washing instructions.[16]
⧼thumbs_response⧽ -
If you’re right-handed, stitch from right to left. If you’re left-handed, stitch from left to right.[17]
⧼thumbs_response⧽ -
Cotton, linen, and flannel are great beginner fabrics to work with because they’re easy to hold, bend, and pierce a needle through.⧼thumbs_response⧽

Things You’ll Need
-
Fabric (preferably cotton, linen, or flannel)
-
Thimble (optional)
You Might Also Like


[ad_2]
Source link : https://www.wikihow.com/Sew

