: Product Review")
[ad_1]
Ease of Use:
Quality:
Cutting Performance:
A lightweight, versatile, powerful, and highly maneuverable string trimmer.
5
Available on Amazon
The Craftsman 60V Max Quickwind String Trimmer is part of Craftsman’s new lineup of 60 volt outdoor power equipment.
Sears first introduced the Craftsman brand of tools to the public in 1927. In my experience, Craftsman tools are the very standard of a great value (competitive price, excellent warranty, and outstanding performance). So when I got the opportunity to test the Craftsman V60 Max String Trimmer, I jumped at it because of its iconic name in tools. But part of me wondered if the well-known Craftsman quality would remain strong after its acquisition by Bond Mfg. (which also owns the Stanley and Black + Decker brands). Turns out, I had nothing to worry about.
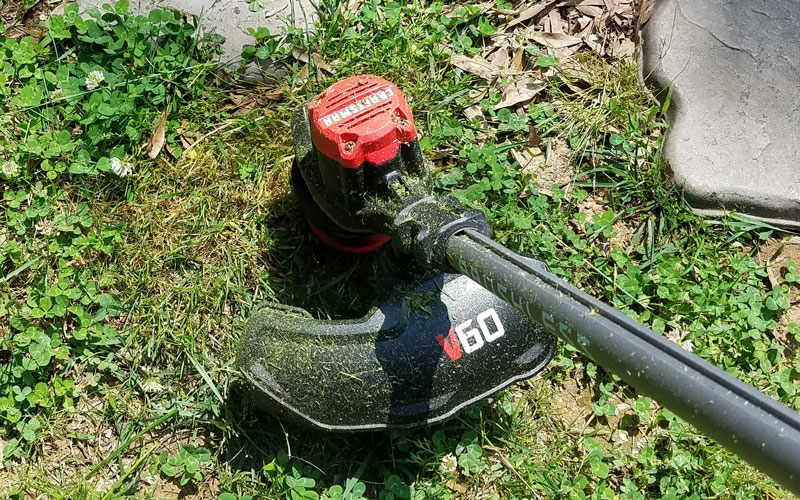
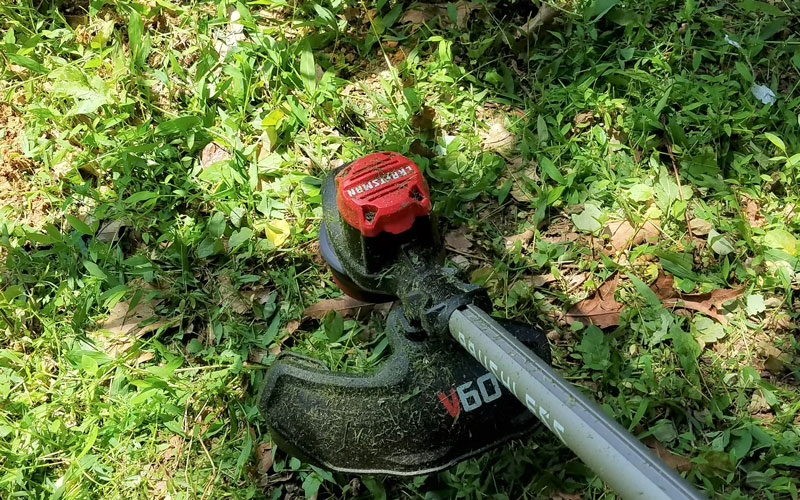
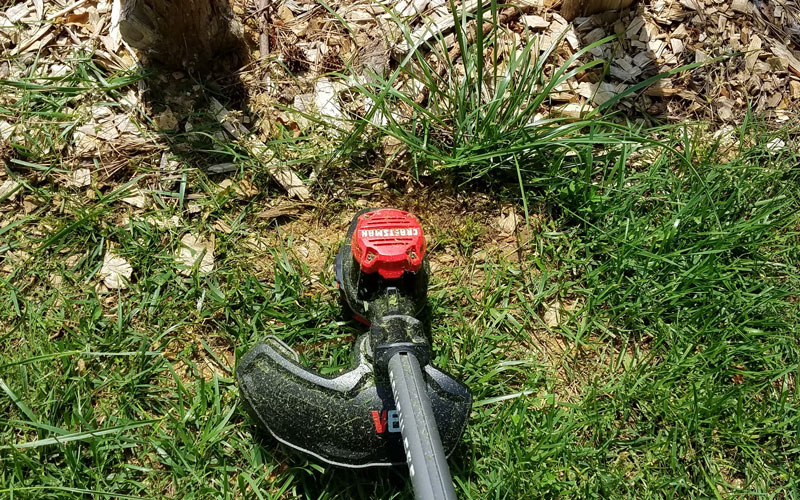
The Craftsman trimmer in its natural habitat
SPECIFICATIONS
- Unit Weight: Approximately 10.2 lbs. with battery
- Cutting Width: 15 inches
- Trimming Line Diameter: .08″
- Cutting Lines: 2 (dual line feed)
- Line Feed Type: Bump feed
- Battery Type: V60 MAX (60 volt) 2.5 Ah lithium ion battery
- Battery Charger: V60 MAX fast-charge charger included
- Charging Time: Approximately 75 minutes
- Motor: Brushless
- Multiple Speeds: Yes – HI and LO
- Shaft Length: 50 inches
- Shaft Style: Straight, telescoping (adjustable length)
- Edging Capability: No
- Additional Features: adjustable handle; Quickwind Spool; part of the VersaTrack Organization system (tested in a later review)
GETTING STARTED
The tool arrived quickly and in great shape, thanks to the fitted cardboard box holding parts securely in place. Included were the trimmer (in pieces), battery and charger, and instructions.

Inside the box you will find the ready-to-assemble trimmer, battery, battery charger, guard, and instructions
Charging the Battery
I wasted no time getting the battery charged. It’s a simple operation. Plug the unit into the wall socket. Then slide the battery into place.

Slide the battery charger over the grooves in the battery
The light will flash green while charging. To fully charge the battery takes about 75 minutes (less for the first charge since the battery comes partially charged already). When the battery shows a solid green light, it’s fully charged and ready to go!

When the battery shows solid green, it’s fully charged.
The instructions state that the battery should be charged in temperatures ranging from 65-750 F for the best battery life.
See our FAQs about Li-Ion Batteries here >>
Assembling the Trimmer
Once I got the battery charging, I turned to assemble the tool. As a formality, I scanned the instructions. I’m glad I did. It states “Do not remove the zip tie until the pole is assembled.” Ironically, I had a knife in hand ready to cut the tie when I read this. So I slowed down and read how to do it properly, which was incredibly easy.
First, release the latch on the trimmer to extend the pole to its full length.

Release the latch on the pole and extend it to its full length
Then remove the tab that says REMOVE and slide the upper section of the pole into the lower section until you hear it “click” into place.

Remove the tab that says REMOVE and slide the upper section of the pole into the lower section until it clicks
Then tighten the screw to secure the pole.

Use a Phillips head screw driver to tighten the screw to secure the pole in place
Easy Adjustment for Custom Fit
Next, I checked the handle length to see if it fit my arm length. It did. But if it didn’t, there’s a simple adjustment for that. Additionally, the pole length is adjustable so you can create your own perfect fit. Nice touch.
The tool’s overall balance will change slightly as the shaft length is changed; shorter people may find that the battery feels a bit heavier and lifts the trimmer head off the ground.
To adjust the handle (the same process is used for the pole adjustment), release the latch on the handle, slide it to move the handle closer or further from your body, secure the latch, and gently tighten the screws to make certain it won’t move when the tool is in use.

Release the latch on the handle to create a custom fit for the length that works best for you
Lastly, secure the guard to the trimmer end of the tool. A small bag of screws and washers are taped to the bottom of the guard. Use a screw with the washer, and then tighten into the notch. You’ll know it’s facing the right direction if you can read the print on the top of the guard when the trimmer is in use.
As with many newer string trimmers, the guard is relatively small and doesn’t do much to protect you (see Safety First below). There’s also no “flower guard” on the front of the trimmer head to warn you when you get too close to plants that you don’t want to cut down.

Use the provided screws and washers to secure the guard to the trimmer end of the tool
That’s it. You’re done. It took me longer to break down the packing material and put it in the recycling bin than it did to assemble the unit. I call that a victory in my book!
SAFETY FIRST
I couldn’t find RPM specs for the Craftsman trimmer, so let me use an estimate: it spins really fast! So use caution and common sense when using the tool. Wear closed-toed shoes and eye protection at the very minimum. I’d also suggest gloves and pants as debris will hit your shins when whacking those weeds.
You should never make any adjustments to the tool with the battery attached. Pop out the battery before adjusting the handle length, clearing any debris that may clog the trimmer, or replacing the line.
START YOUR BRUSHLESS MOTOR!
Well-Balanced & Not Too Heavy
When I first picked up the trimmer, I noticed that something seemed to be missing: a shoulder sling. Most units come with a clip-on sling to shift the weight off the arms and hands to the shoulder muscles. But alas, no shoulder harness.
The second thing I noticed is that the Craftsman trimmer didn’t really need a shoulder sling. It weighs only 10.2 pounds, about the weight of a large watermelon. But unlike the watermelon that carries its weight in its dense middle, the balance of the trimmer made the unit feel lighter. I won’t be twirling it like a baton any time soon, but it wasn’t so heavy that I felt the need to take breaks.
3 Switches: Safety, Trigger, Power Mode
The unit has three main switches: a safety, a trigger, and a power mode. To start the unit, push in the safety (which is ambidextrous, by the way, as a nice touch to lefties) and squeeze the trigger.

Note the safety within easy reach of a thumb
You can’t really hold the unit without squeezing the trigger. I liked that it felt natural.
On the top of the handle area is a power mode that allows you to use either LO or HI power. For almost all of my testing, I found that the LO setting worked just great. And, as an added bonus, running the unit on LO conserves your battery, meaning you can run it much longer without needing to recharge.

LO works great for all except the thickest, tallest grass and weeds
Simple Trimmer Line Replacement
Replacing the trimmer line or head is straightforward. To remove the head, align the spool housing eyelets with the arrow. Depress the sides of the bump feed housing and pull straight up. You now have access to the spool line for replacing the entire housing or adding new line to the unit.
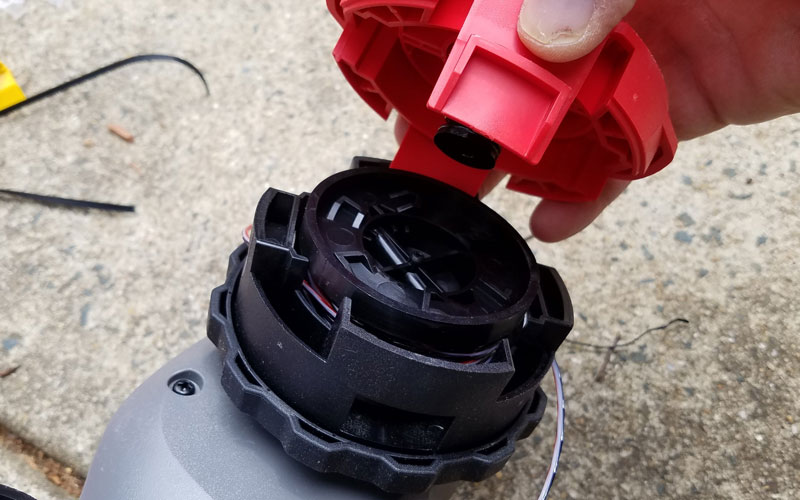
Depress the sides of the bump feed housing and lift straight up
Running the Craftsman Trimmer through the Paces
I tested the Craftsman Trimmer on three applications: trimming grass abutting the road, tall weeds, and around trees and landscaping.
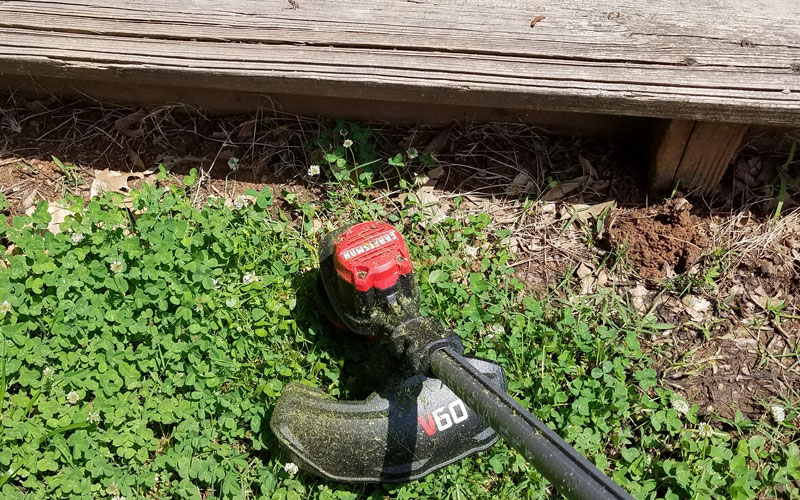
Trimming grass against a paved walkway
I have no sidewalks, but I do have lots of street frontage. The instructions clearly state that “the trimmer is not an edger.” And my street doesn’t have an edge in the traditional sense. If it did, I would have been tempted to try changing the angle to create a nice, clean edge. But I did use it to clean up the overhanging grass and weeds that reached the street.
Resting the bottom of the unit on the pavement, I turned the unit on and slid it parallel to the lawn from left-to-right. Since I read the instructions, I learned that going from left-to-right reduces the amount of flying debris (such as little rocks) that will kick back at me. Once the nylon string made contact with the grass, I continued sliding it down the street until I cut back the grass.
I was pleased with the results. I kept the unit on LO, and it pushed back the grass and weeds that my mower can’t reach.
Trimming long grass and weeds
The instructions suggest working tall grass and weeds starting from the top and working your way down so as not to strain the motor or clog the line. Since the weed season is just starting, I don’t have the tall stalks that will come in a couple of more months. But I used it in a couple of patches of mixed weeds and saplings.

Using against tall weeds, the Craftsman cordless string trimmer had no problem reducing the stalks to nothing in seconds
I wanted to see the difference between LO and HI, so I ran it for a few minutes at higher RPMs. The motor never hesitated. The pitch changed to a slightly higher whining sound, and the weeds came down in a blink of an eye.
For fun, I ran the tool on HI for a few moments. I heard the RPMs whine at a higher pitch, and the performance was superb
Trimming grass around landscaping features and trees
To test the ease of maneuverability, I used the Craftsman trimmer around some landscaping in my yard like trees, bushes, fences, and rock walls.
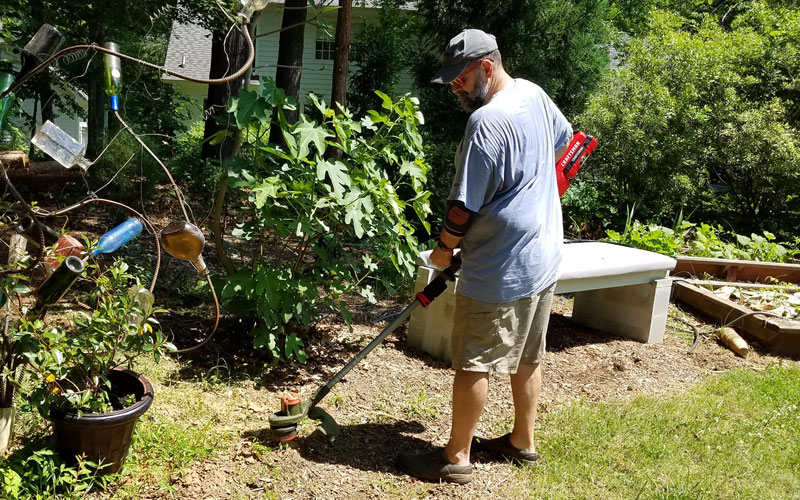
Using the trimmer on weeds. Editor’s Note: Scott isn’t wearing long pants in this photo but he should be! Please protect your legs when using a string trimmer.
This is where the light weight and balance of the unit made a nice difference in the outcome. Since it weighs so little, I could easily maneuver the trimmer in and out of tight areas, as well as getting close to sensitive plants.

It was light and maneuverable enough for me to get under bushes without shredding them
I could get in between landscaping without damaging the poles or ripping up the trimmer line
It allowed me to clean out the underside of my raised garden beds
It also came in handy for clearing weeds and grass away from garden stones along my pathways. I could get a similar look by mowing were I to take the time to move each stone, mow, and then return the stones. But this was much easier. In less than a minute, the raised stones popped out from their weed coffins.
Good Battery Life
I ran the unit for two full battery cycles. I’m not complaining, but the battery took too long to drain! I wanted to be done working, but the battery still had juice. I ended up clearing off a couple of neighbors’ walkways and street frontage. Then I went out back in search of weeds that I could whack!
I have just over an acre, and I had 2 of 3 bars left when I was done working. So I waited for weeds to grow back or pop up in other places so I could start over again. I know that the long-lasting battery will come in handy when I’m in the thick of the weediest season to come.
As far as run-time, I don’t have a good handle on a specific number. I tend to start and stop a lot, moving from one place to another, and clearing the path of newly-fallen sticks and branches. But I worked outside for over an hour, and most of that time, I had the trimmer in my hands.
The Craftsman trimmer battery has a built-in power indicator to tell you how much more juice you have before you need to recharge. Push the button, and on the battery and you’ll get immediate feedback.
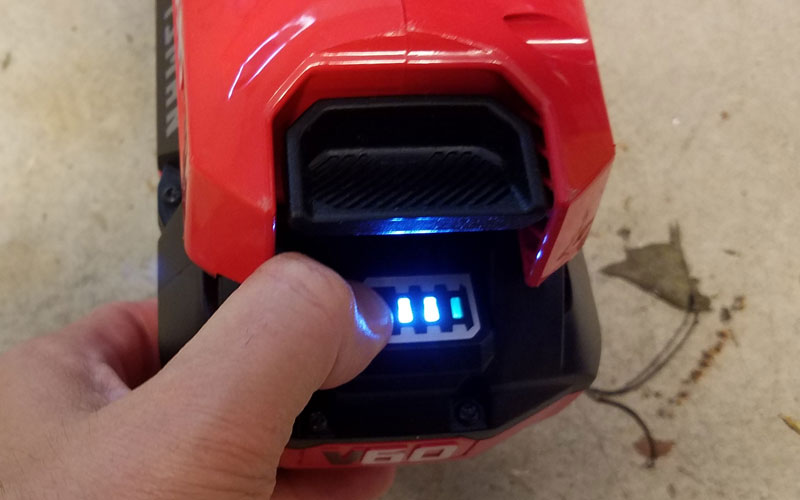
To check how much power you have remaining, push the button on the battery
Do You Need the Craftsman Trimmer?
If I have to choose one string trimmer in my collection, this is the one I’m keeping. Here’s why:
- Ease of assembly and use. I put the tool together in less than 5 minutes…and I’m not mechanically savvy. The manual is a nice thing to peruse, but putting the tool together, charging it, and using it are very intuitive. I’ve tested many units that have more bells and whistles, and most of the time those extras don’t make my yard look better or make the product easier to use. With just a safety, trigger, and power mode switch, there are few things to fuss with. And the Quickwind spool system makes replacing the head or trimming lines a very simple process.
- Power. I had no problem cutting anything I needed to whack using the LO setting. And if the weeds get more monstrous, the HI setting works great. I’ve tested 40V and 120V units in the past, and while it’s easy to make the assumption that “more is better,” this unit had plenty of guts using 60V power.
- Battery run-time. I’m not kidding when I say that the battery outlasted me!
- Lightweight and maneuverable. An added bonus of the 60V battery is its light weight. When you use a 120V tool, it comes at the price of heft. I have a couple of 120V trimmers that I can’t use without the shoulder harness. And then I can’t run it for long because that weight takes its toll after 30 minutes. This unit is light, making it easy to get in and around even tight spots in your yard.
- Green. No gasoline, pre-mix ratios, fumes, or intolerably loud noise. It’s quieter than any gas-powered alternative, and it doesn’t use fossil fuels.
- Full line of 60V tools to mix and match. Most people who use power tools want batteries and accessories that are compatible. Craftsman has a complete line of tools (lawn mower, blower, hedge trimmer, and even a chainsaw) that use the same battery. That means no more trying to find the right one for your tools. They all work!
- VersaTrack system compatible. As I’ll cover in another review, all of Craftsman’s new outdoor power tools work with the VersaTrack system, a wall mounted storage system that keeps your tools handy, organized, and ready when the urge to get some yard work done hits!
If I were to complain, I would go back to the beginning:
- Shoulder harness. I’m a big guy, and this is a lightweight tool. And while I’m sure that almost every user will be able to use the Craftsman trimmer with ease, I would add a shoulder harness so that the smallest framed folks can use this without any strain or difficulties.
WARRANTY
The Craftsman trimmer comes with a 90-day money-back guarantee. If you buy it and don’t like it, return it to get your money back. On top of that, the Craftsman trimmer (not the battery) carries a 4 year limited warranty against defects in materials and workmanship.
RECOMMENDATION
If you’re looking to manage weeds and tall grass without using toxic chemicals or fire—and if you want power in a small, competitively-priced trimmer—check out the new Craftsman 60V Max Quickwind String Trimmer with the lightweight 60V battery. If you’re used to using a gas trimmer, you won’t miss the vapors; if you’re used to using a corded electric trimmer, you will enjoy the freedom of taking the tool with you wherever weeds grow!
Note that this is not an edger and shouldn’t be used for that purpose.
WHERE TO BUY
Craftsman tools are available online from two sources: Amazon and Lowe’s. The 60V string trimmer may also be found in some Lowe’s stores; call before you go to check on availability. Prices are usually comparable so buy from whichever source is most convenient for you.

CRAFTSMAN V60* WEEDWACKER String Trimmer & Edger (CMCST960E1)
You can also find it on the Lowe’s website.
Extra 2.5 Ah batteries (model number CMCB6025) can be purchased separately. You can also buy the trimmer as a package with an extra battery included. It’s always a good idea to have a spare battery (although the run time on this trimmer was easily enough to manage a large yard with just one battery).

CRAFTSMAN V60* Battery, 2.5 Ah Lithium Ion (CMCB6025)
[ad_2]
Source link : https://gardeningproductsreview.com/craftsman-v60-max-60-volt-cordless-string-trimmer-cmcst960-review/