[ad_1]
If you qualify, start an Uber Eats order. Tap “View Cart”, then tap your current payment method. Select “Cash”.
To use PayPal, go to “Account” → “Wallet” → “Add Payment Method” → “PayPal”.
To add Uber Cash, go to “Account” → “Wallet” → “Add Funds” → “One-time Purchase”.
Steps
{“smallUrl”:”https://www.wikihow.com/images/thumb/e/ec/Pay-with-Cash-on-Uber-Eats-Step-1.jpg/v4-460px-Pay-with-Cash-on-Uber-Eats-Step-1.jpg”,”bigUrl”:”/images/thumb/e/ec/Pay-with-Cash-on-Uber-Eats-Step-1.jpg/v4-728px-Pay-with-Cash-on-Uber-Eats-Step-1.jpg”,”smallWidth”:460,”smallHeight”:345,”bigWidth”:728,”bigHeight”:546,”licensing”:”<div class=”mw-parser-output”><p>License: <a target=”_blank” rel=”nofollow noreferrer noopener” class=”external text” href=”https://en.wikipedia.org/wiki/Fair_use”>Fair Use</a> (screenshot)<br>n</p></div>”}
1
Open Uber Eats on your phone or tablet. This looks like the
Uber Eats logo with a green background.
You’ll be able to use cash to pay for Uber Eats in: Brazil, Egypt, India, Indonesia, Malaysia, Peru, and South Africa.[1]
Uber Eats may roll out this feature in other locations. To check if your location is available, follow the steps below.
If you haven’t logged in already, you’ll be prompted to either register or log in with your Uber account.
{“smallUrl”:”https://www.wikihow.com/images/thumb/1/1f/Pay-with-Cash-on-Uber-Eats-Step-2.jpg/v4-460px-Pay-with-Cash-on-Uber-Eats-Step-2.jpg”,”bigUrl”:”/images/thumb/1/1f/Pay-with-Cash-on-Uber-Eats-Step-2.jpg/v4-728px-Pay-with-Cash-on-Uber-Eats-Step-2.jpg”,”smallWidth”:460,”smallHeight”:345,”bigWidth”:728,”bigHeight”:546,”licensing”:”<div class=”mw-parser-output”><p>License: <a target=”_blank” rel=”nofollow noreferrer noopener” class=”external text” href=”https://en.wikipedia.org/wiki/Fair_use”>Fair Use</a> (screenshot)<br>n</p></div>”}
2
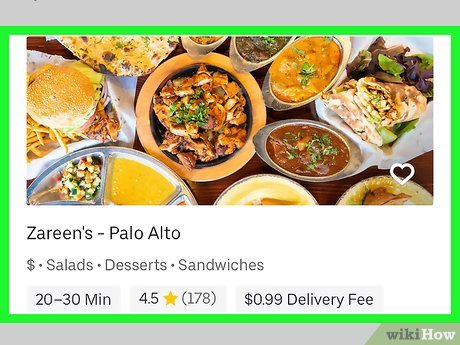
Tap a restaurant you want to order from. When you open the app, you’ll be presented with thumbnails of the restaurants near you that offer Uber Eats delivery. You can browse the separate areas here, such as “$0 Delivery Fee” or “Special Offers.”
You can change the delivery address if it’s different than what is displayed by tapping the arrow next to the address at the top of the screen.
You can also opt for Pickup by tapping Pickup at the top of the screen. If you choose this, you will not accrue delivery fees, but you’ll still be charged a service fee by Uber Eats.
{“smallUrl”:”https://www.wikihow.com/images/thumb/b/b5/Pay-with-Cash-on-Uber-Eats-Step-3.jpg/v4-460px-Pay-with-Cash-on-Uber-Eats-Step-3.jpg”,”bigUrl”:”/images/thumb/b/b5/Pay-with-Cash-on-Uber-Eats-Step-3.jpg/v4-728px-Pay-with-Cash-on-Uber-Eats-Step-3.jpg”,”smallWidth”:460,”smallHeight”:345,”bigWidth”:728,”bigHeight”:546,”licensing”:”<div class=”mw-parser-output”><p>License: <a target=”_blank” rel=”nofollow noreferrer noopener” class=”external text” href=”https://en.wikipedia.org/wiki/Fair_use”>Fair Use</a> (screenshot)<br>n</p></div>”}
3
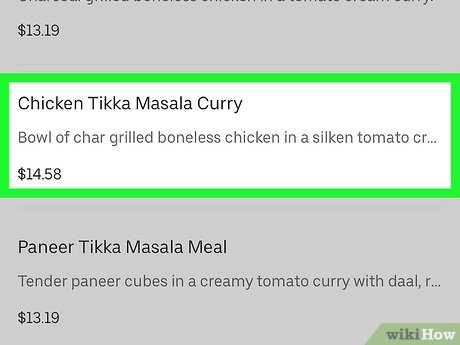
Add food to your order. Once you select a restaurant, you’ll see their menu. You can browse through their food selections (for example
Chicken or
Breakfast ), then tap a menu item (for example
Chicken and Bacon Ranch Melt 6 ).
After you tap a menu item, you might have to make a few more choices (such as toppings or sides) before you can tap the plus icon (+) at the bottom of the page to add the item to your cart.
You can only have items from one restaurant in your cart at a time. For example, you cannot have an order from Burger King and an order from McDonald’s in the same cart.
{“smallUrl”:”https://www.wikihow.com/images/thumb/c/cd/Pay-with-Cash-on-Uber-Eats-Step-4.jpg/v4-460px-Pay-with-Cash-on-Uber-Eats-Step-4.jpg”,”bigUrl”:”/images/thumb/c/cd/Pay-with-Cash-on-Uber-Eats-Step-4.jpg/v4-728px-Pay-with-Cash-on-Uber-Eats-Step-4.jpg”,”smallWidth”:460,”smallHeight”:345,”bigWidth”:728,”bigHeight”:546,”licensing”:”<div class=”mw-parser-output”><p>License: <a target=”_blank” rel=”nofollow noreferrer noopener” class=”external text” href=”https://en.wikipedia.org/wiki/Fair_use”>Fair Use</a> (screenshot)<br>n</p></div>”}
4
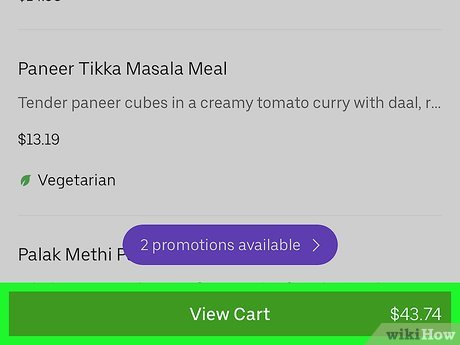
Tap View Cart You’ll see this pop up at the bottom of the screen when you have something in your cart.
{“smallUrl”:”https://www.wikihow.com/images/thumb/5/5f/Pay-with-Cash-on-Uber-Eats-Step-5.jpg/v4-460px-Pay-with-Cash-on-Uber-Eats-Step-5.jpg”,”bigUrl”:”/images/thumb/5/5f/Pay-with-Cash-on-Uber-Eats-Step-5.jpg/v4-728px-Pay-with-Cash-on-Uber-Eats-Step-5.jpg”,”smallWidth”:460,”smallHeight”:345,”bigWidth”:728,”bigHeight”:546,”licensing”:”<div class=”mw-parser-output”><p>License: <a target=”_blank” rel=”nofollow noreferrer noopener” class=”external text” href=”https://en.wikipedia.org/wiki/Fair_use”>Fair Use</a> (screenshot)<br>n</p></div>”}
5
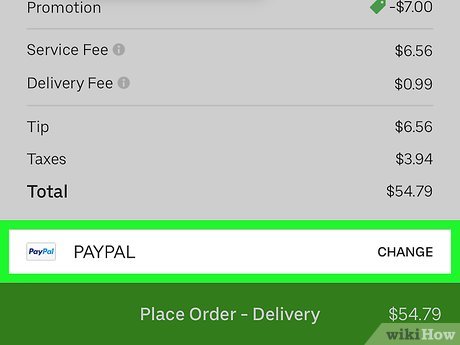
Tap your current payment method at the bottom of the screen. The card you initially added to Uber will be selected as the default payment method unless you change it. You can choose to pay Cash if it is available in your area.
{“smallUrl”:”https://www.wikihow.com/images/thumb/c/c8/Pay-with-Cash-on-Uber-Eats-Step-6.jpg/v4-460px-Pay-with-Cash-on-Uber-Eats-Step-6.jpg”,”bigUrl”:”/images/thumb/c/c8/Pay-with-Cash-on-Uber-Eats-Step-6.jpg/v4-728px-Pay-with-Cash-on-Uber-Eats-Step-6.jpg”,”smallWidth”:460,”smallHeight”:345,”bigWidth”:728,”bigHeight”:546,”licensing”:”<div class=”mw-parser-output”><p>License: <a target=”_blank” rel=”nofollow noreferrer noopener” class=”external text” href=”https://en.wikipedia.org/wiki/Fair_use”>Fair Use</a> (screenshot)<br>n</p></div>”}
6
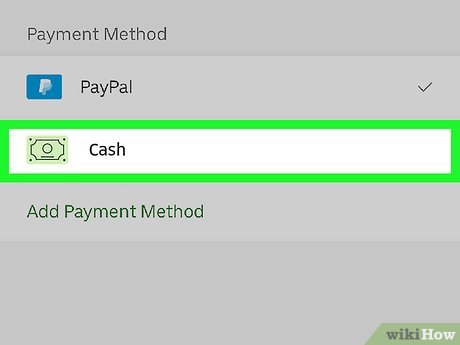
Tap Cash If cash is not an option for payment when ordering from your current address, this option will not appear.
{“smallUrl”:”https://www.wikihow.com/images/thumb/d/d3/Pay-with-Cash-on-Uber-Eats-Step-7.jpg/v4-460px-Pay-with-Cash-on-Uber-Eats-Step-7.jpg”,”bigUrl”:”/images/thumb/d/d3/Pay-with-Cash-on-Uber-Eats-Step-7.jpg/v4-728px-Pay-with-Cash-on-Uber-Eats-Step-7.jpg”,”smallWidth”:460,”smallHeight”:345,”bigWidth”:728,”bigHeight”:546,”licensing”:”<div class=”mw-parser-output”><p>License: <a target=”_blank” rel=”nofollow noreferrer noopener” class=”external text” href=”https://en.wikipedia.org/wiki/Fair_use”>Fair Use</a> (screenshot)<br>n</p></div>”}
7
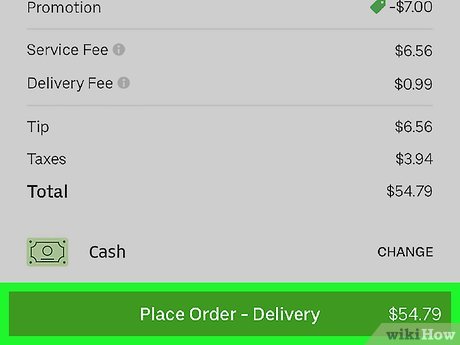
Tap Place Order You’ll get a confirmation email that the order has been placed and you’ll be able to track your food’s delivery progress every time you check the app.
When the driver arrives, you pay them with cash. You can tip in cash as well.
{“smallUrl”:”https://www.wikihow.com/images/thumb/2/2f/Pay-with-Cash-on-Uber-Eats-Step-8.jpg/v4-460px-Pay-with-Cash-on-Uber-Eats-Step-8.jpg”,”bigUrl”:”/images/thumb/2/2f/Pay-with-Cash-on-Uber-Eats-Step-8.jpg/v4-728px-Pay-with-Cash-on-Uber-Eats-Step-8.jpg”,”smallWidth”:460,”smallHeight”:345,”bigWidth”:728,”bigHeight”:546,”licensing”:”<div class=”mw-parser-output”><p>License: <a target=”_blank” rel=”nofollow noreferrer noopener” class=”external text” href=”https://en.wikipedia.org/wiki/Fair_use”>Fair Use</a> (screenshot)<br>n</p></div>”}
1
Open Uber Eats on your phone or tablet. This looks like the
Uber Eats logo with a green background.
[2]
You must be logged in to use Uber Eats.
If you don’t have the option to pay with cash, you can use PayPal instead.
{“smallUrl”:”https://www.wikihow.com/images/thumb/d/d1/Pay-with-Cash-on-Uber-Eats-Step-9.jpg/v4-460px-Pay-with-Cash-on-Uber-Eats-Step-9.jpg”,”bigUrl”:”/images/thumb/d/d1/Pay-with-Cash-on-Uber-Eats-Step-9.jpg/v4-728px-Pay-with-Cash-on-Uber-Eats-Step-9.jpg”,”smallWidth”:460,”smallHeight”:345,”bigWidth”:728,”bigHeight”:546,”licensing”:”<div class=”mw-parser-output”><p>License: <a target=”_blank” rel=”nofollow noreferrer noopener” class=”external text” href=”https://en.wikipedia.org/wiki/Fair_use”>Fair Use</a> (screenshot)<br>n</p></div>”}
2
Tap Account This will be at the bottom-right corner.
{“smallUrl”:”https://www.wikihow.com/images/thumb/f/fa/Pay-with-Cash-on-Uber-Eats-Step-10.jpg/v4-460px-Pay-with-Cash-on-Uber-Eats-Step-10.jpg”,”bigUrl”:”/images/thumb/f/fa/Pay-with-Cash-on-Uber-Eats-Step-10.jpg/v4-728px-Pay-with-Cash-on-Uber-Eats-Step-10.jpg”,”smallWidth”:460,”smallHeight”:345,”bigWidth”:728,”bigHeight”:546,”licensing”:”<div class=”mw-parser-output”><p>License: <a target=”_blank” rel=”nofollow noreferrer noopener” class=”external text” href=”https://en.wikipedia.org/wiki/Fair_use”>Fair Use</a> (screenshot)<br>n</p></div>”}
3
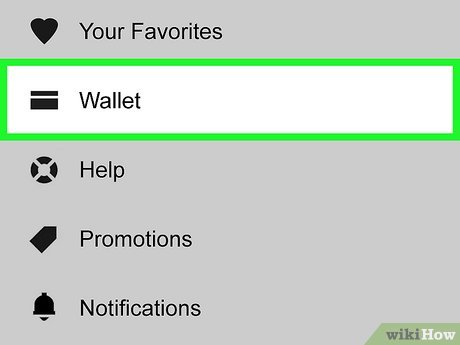
Tap Wallet You can find this at the top of the page, between Favorites and Orders .
{“smallUrl”:”https://www.wikihow.com/images/thumb/d/de/Pay-with-Cash-on-Uber-Eats-Step-11.jpg/v4-460px-Pay-with-Cash-on-Uber-Eats-Step-11.jpg”,”bigUrl”:”/images/thumb/d/de/Pay-with-Cash-on-Uber-Eats-Step-11.jpg/v4-728px-Pay-with-Cash-on-Uber-Eats-Step-11.jpg”,”smallWidth”:460,”smallHeight”:345,”bigWidth”:728,”bigHeight”:546,”licensing”:”<div class=”mw-parser-output”><p>License: <a target=”_blank” rel=”nofollow noreferrer noopener” class=”external text” href=”https://en.wikipedia.org/wiki/Fair_use”>Fair Use</a> (screenshot)<br>n</p></div>”}
4
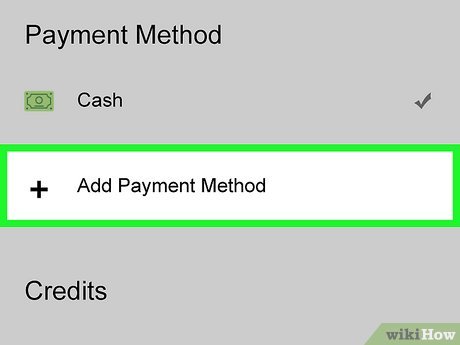
Tap + Add Payment Method This will be below any existing payment methods you have linked to your account.
{“smallUrl”:”https://www.wikihow.com/images/thumb/a/a7/Pay-with-Cash-on-Uber-Eats-Step-12.jpg/v4-460px-Pay-with-Cash-on-Uber-Eats-Step-12.jpg”,”bigUrl”:”/images/thumb/a/a7/Pay-with-Cash-on-Uber-Eats-Step-12.jpg/v4-728px-Pay-with-Cash-on-Uber-Eats-Step-12.jpg”,”smallWidth”:460,”smallHeight”:345,”bigWidth”:728,”bigHeight”:546,”licensing”:”<div class=”mw-parser-output”><p>License: <a target=”_blank” rel=”nofollow noreferrer noopener” class=”external text” href=”https://en.wikipedia.org/wiki/Fair_use”>Fair Use</a> (screenshot)<br>n</p></div>”}
5
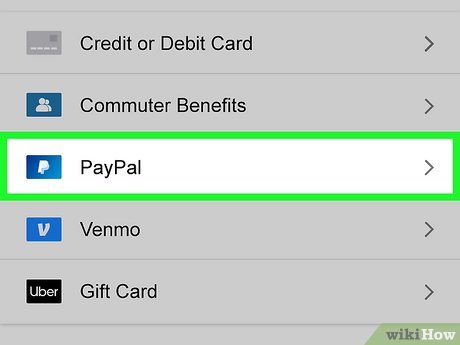
Tap PayPal The PayPal login will launch.
If a pop-up message opens, tap Continue .
{“smallUrl”:”https://www.wikihow.com/images/thumb/7/7c/Pay-with-Cash-on-Uber-Eats-Step-13.jpg/v4-460px-Pay-with-Cash-on-Uber-Eats-Step-13.jpg”,”bigUrl”:”/images/thumb/7/7c/Pay-with-Cash-on-Uber-Eats-Step-13.jpg/v4-728px-Pay-with-Cash-on-Uber-Eats-Step-13.jpg”,”smallWidth”:460,”smallHeight”:345,”bigWidth”:728,”bigHeight”:546,”licensing”:”<div class=”mw-parser-output”><p>License: <a target=”_blank” rel=”nofollow noreferrer noopener” class=”external text” href=”https://en.wikipedia.org/wiki/Fair_use”>Fair Use</a> (screenshot)<br>n</p></div>”}
6
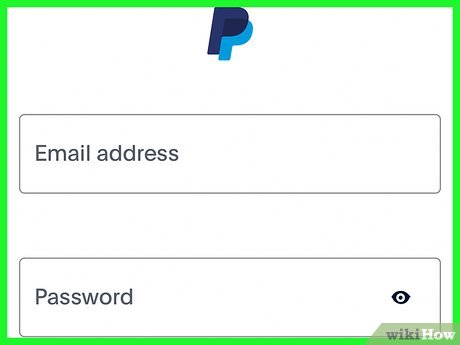
Sign into your PayPal account. Use your email and password to login.
If you don’t remember your PayPal password, you can reset it.
{“smallUrl”:”https://www.wikihow.com/images/thumb/9/96/Pay-with-Cash-on-Uber-Eats-Step-14.jpg/v4-460px-Pay-with-Cash-on-Uber-Eats-Step-14.jpg”,”bigUrl”:”/images/thumb/9/96/Pay-with-Cash-on-Uber-Eats-Step-14.jpg/v4-728px-Pay-with-Cash-on-Uber-Eats-Step-14.jpg”,”smallWidth”:460,”smallHeight”:345,”bigWidth”:728,”bigHeight”:546,”licensing”:”<div class=”mw-parser-output”><p>License: <a target=”_blank” rel=”nofollow noreferrer noopener” class=”external text” href=”https://en.wikipedia.org/wiki/Fair_use”>Fair Use</a> (screenshot)<br>n</p></div>”}
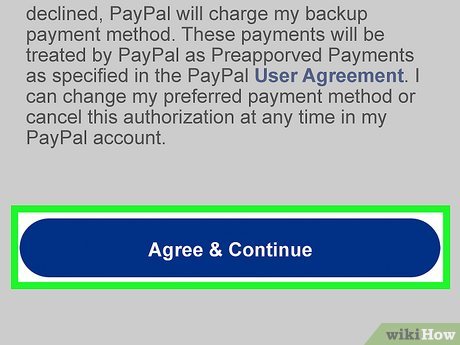
7
Tap Agree & Continue If you have multiple cards connected to your PayPal account, you may need to specify which card you want as the default payment option.
Your PayPal will be linked to your Uber Eats account.
When placing an order, select PayPal as the payment method.
{“smallUrl”:”https://www.wikihow.com/images/thumb/f/f2/Pay-with-Cash-on-Uber-Eats-Step-15.jpg/v4-460px-Pay-with-Cash-on-Uber-Eats-Step-15.jpg”,”bigUrl”:”/images/thumb/f/f2/Pay-with-Cash-on-Uber-Eats-Step-15.jpg/v4-728px-Pay-with-Cash-on-Uber-Eats-Step-15.jpg”,”smallWidth”:460,”smallHeight”:345,”bigWidth”:728,”bigHeight”:546,”licensing”:”<div class=”mw-parser-output”><p>License: <a target=”_blank” rel=”nofollow noreferrer noopener” class=”external text” href=”https://en.wikipedia.org/wiki/Fair_use”>Fair Use</a> (screenshot)<br>n</p></div>”}
1
Open Uber Eats on your phone or tablet. This looks like the
Uber Eats logo with a green background.
[3]
Uber Cash can be credited to your account via promotions, gift cards, and purchased with a credit or debit card.
{“smallUrl”:”https://www.wikihow.com/images/thumb/2/22/Pay-with-Cash-on-Uber-Eats-Step-16.jpg/v4-460px-Pay-with-Cash-on-Uber-Eats-Step-16.jpg”,”bigUrl”:”/images/thumb/2/22/Pay-with-Cash-on-Uber-Eats-Step-16.jpg/v4-728px-Pay-with-Cash-on-Uber-Eats-Step-16.jpg”,”smallWidth”:460,”smallHeight”:345,”bigWidth”:728,”bigHeight”:546,”licensing”:”<div class=”mw-parser-output”><p>License: <a target=”_blank” rel=”nofollow noreferrer noopener” class=”external text” href=”https://en.wikipedia.org/wiki/Fair_use”>Fair Use</a> (screenshot)<br>n</p></div>”}
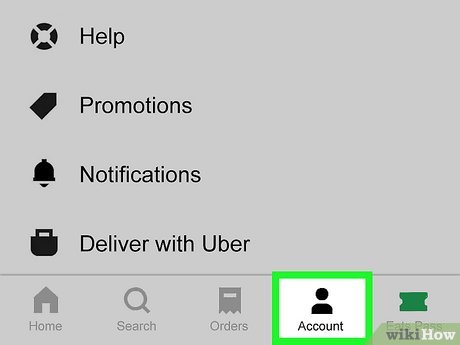
2
Tap Account This will be at the bottom-right corner.
{“smallUrl”:”https://www.wikihow.com/images/thumb/b/be/Pay-with-Cash-on-Uber-Eats-Step-17.jpg/v4-460px-Pay-with-Cash-on-Uber-Eats-Step-17.jpg”,”bigUrl”:”/images/thumb/b/be/Pay-with-Cash-on-Uber-Eats-Step-17.jpg/v4-728px-Pay-with-Cash-on-Uber-Eats-Step-17.jpg”,”smallWidth”:460,”smallHeight”:345,”bigWidth”:728,”bigHeight”:546,”licensing”:”<div class=”mw-parser-output”><p>License: <a target=”_blank” rel=”nofollow noreferrer noopener” class=”external text” href=”https://en.wikipedia.org/wiki/Fair_use”>Fair Use</a> (screenshot)<br>n</p></div>”}
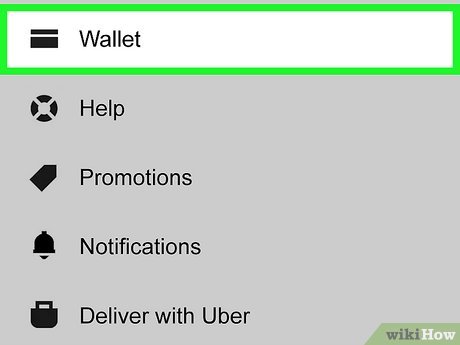
3
Tap Wallet You can find this at the top of the page, between Favorites and Orders .
{“smallUrl”:”https://www.wikihow.com/images/thumb/5/5f/Pay-with-Cash-on-Uber-Eats-Step-18.jpg/v4-460px-Pay-with-Cash-on-Uber-Eats-Step-18.jpg”,”bigUrl”:”/images/thumb/5/5f/Pay-with-Cash-on-Uber-Eats-Step-18.jpg/v4-728px-Pay-with-Cash-on-Uber-Eats-Step-18.jpg”,”smallWidth”:460,”smallHeight”:345,”bigWidth”:728,”bigHeight”:546,”licensing”:”<div class=”mw-parser-output”><p>License: <a target=”_blank” rel=”nofollow noreferrer noopener” class=”external text” href=”https://en.wikipedia.org/wiki/Fair_use”>Fair Use</a> (screenshot)<br>n</p></div>”}
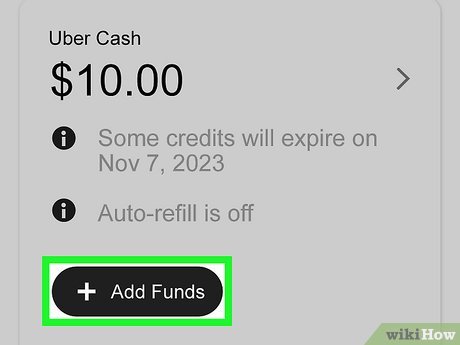
4
Tap Add Funds This will be the black button under the Uber Cash header.
{“smallUrl”:”https://www.wikihow.com/images/thumb/8/87/Pay-with-Cash-on-Uber-Eats-Step-19.jpg/v4-460px-Pay-with-Cash-on-Uber-Eats-Step-19.jpg”,”bigUrl”:”/images/thumb/8/87/Pay-with-Cash-on-Uber-Eats-Step-19.jpg/v4-728px-Pay-with-Cash-on-Uber-Eats-Step-19.jpg”,”smallWidth”:460,”smallHeight”:345,”bigWidth”:728,”bigHeight”:546,”licensing”:”<div class=”mw-parser-output”><p>License: <a target=”_blank” rel=”nofollow noreferrer noopener” class=”external text” href=”https://en.wikipedia.org/wiki/Fair_use”>Fair Use</a> (screenshot)<br>n</p></div>”}
5
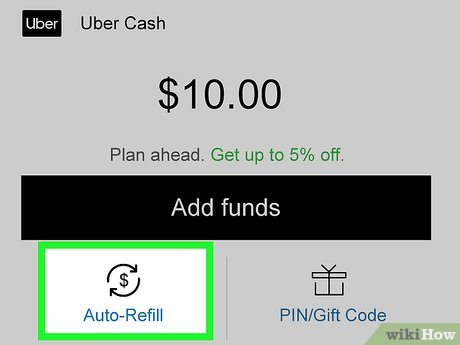
Tap One-time purchase If desired, you can tap Auto-refill to ensure you always have Uber Cash on hand.
{“smallUrl”:”https://www.wikihow.com/images/thumb/e/e8/Pay-with-Cash-on-Uber-Eats-Step-20.jpg/v4-460px-Pay-with-Cash-on-Uber-Eats-Step-20.jpg”,”bigUrl”:”/images/thumb/e/e8/Pay-with-Cash-on-Uber-Eats-Step-20.jpg/v4-728px-Pay-with-Cash-on-Uber-Eats-Step-20.jpg”,”smallWidth”:460,”smallHeight”:345,”bigWidth”:728,”bigHeight”:546,”licensing”:”<div class=”mw-parser-output”><p>License: <a target=”_blank” rel=”nofollow noreferrer noopener” class=”external text” href=”https://en.wikipedia.org/wiki/Fair_use”>Fair Use</a> (screenshot)<br>n</p></div>”}
6
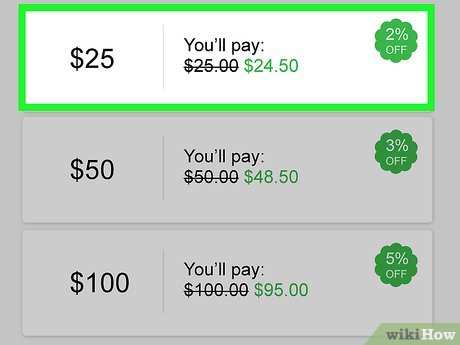
Select the amount. This can depend on your region, but you will need to purchase Uber Cash in increments.
{“smallUrl”:”https://www.wikihow.com/images/thumb/7/76/Pay-with-Cash-on-Uber-Eats-Step-21.jpg/v4-460px-Pay-with-Cash-on-Uber-Eats-Step-21.jpg”,”bigUrl”:”/images/thumb/7/76/Pay-with-Cash-on-Uber-Eats-Step-21.jpg/v4-728px-Pay-with-Cash-on-Uber-Eats-Step-21.jpg”,”smallWidth”:460,”smallHeight”:345,”bigWidth”:728,”bigHeight”:546,”licensing”:”<div class=”mw-parser-output”><p>License: <a target=”_blank” rel=”nofollow noreferrer noopener” class=”external text” href=”https://en.wikipedia.org/wiki/Fair_use”>Fair Use</a> (screenshot)<br>n</p></div>”}
7
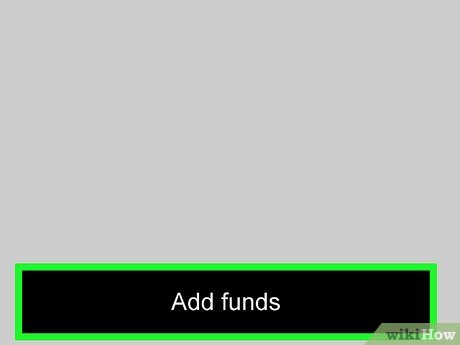
Tap Add funds This is the button located at the bottom of the screen.
Uber Cash will be added to your account.
When placing an order, select Uber Cash as the payment.
If you have any issues, you can always contact Uber Eats.
Thanks for submitting a tip for review!
[ad_2]


