


[ad_1]
Things You Should Know
- A bootable USB drive is useful if you want to install a new operating system or repair an existing operating system.
- Windows has its own recovery drive tool you can use to create a bootable Windows USB.
- You can use Rufus on Windows or Balena Etcher on Mac to create a bootable USB drive.
Steps
Method 1
Method 1 of 4:
Using Windows
-
1Download or create an image file. If you have an image file (such as a “.iso,” “.img,” “.usb,” or “.vhd” file) that you want to turn into a bootable USB drive, great! If not, you can create a disk image file from an existing CD/DVD/Blu-ray or from existing files and folders.- For example, if you want to make a bootable Ubuntu drive, you can download the ISO of Ubuntu at https://ubuntu.com/download/desktop.
-
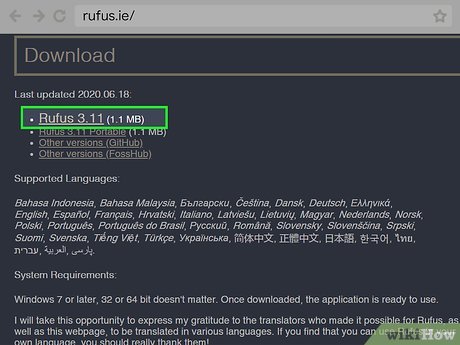 2Download Rufus. Rufus is a free, lightweight tool that comes widely recommended by developers and product specialists across the internet.[1]
To download Rufus, go to https://rufus.ie in a web browser. Scroll down the page and click the first link under the “Download” header. It’ll be the latest version of the tool (version 3.21 as of November 2022).[2]
- If the download doesn’t start automatically, right-click the link and click Save link as…. Select a location you want to save the file to and click Save.
- If you see an ad when you click the link, simply click Close to close the ad and start the file download.
-
 3Double-click the downloaded file. It’s the file called rufus-3.21.exe (the version number may vary). By default, downloaded files can be found in your Downloads folder. Double-click the file in your Downloads folder or within your web browser to run Rufus.
- If prompted, click Yes to allow Rufus to make changes to your system.
-
 4Insert your USB flash drive. Make sure to use a drive that’s large enough to accommodate the size of your image file.
- Warning: Creating a bootable disk will overwrite and erase any data that is already on the USB drive. If there are any files on the USB drive that you don’t want to lose, be sure to back them up before you start. You will also not be able to use the USB drive to store files or data after it is made into a bootable disk.
-
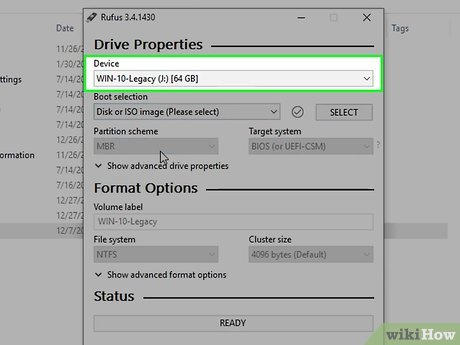 5Select your USB drive from the “Device” menu. It’s at the top of the Rufus window.
 -
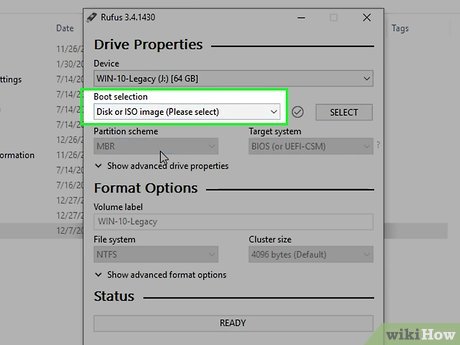 6Select ISO Image. Use the drop-down menu next to the “File name” bar to select “ISO image.” ISO image files include, “.iso,” “.img”, “.vhd,” “.usb,” and more.
 -
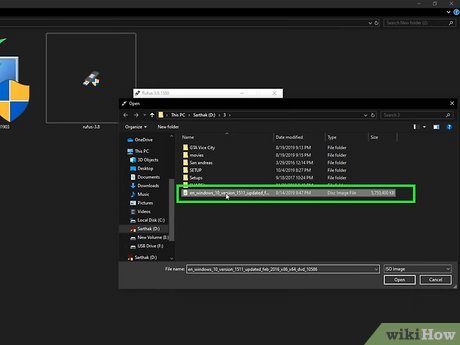 7Select your image file. To do so, click the image file you want to select, and then click Open in the lower-right corner.
- This updates the “Volume label” field to match what’s in the ISO. If you want to give the drive another name, you can replace that text with anything you wish.
- The remaining settings should be fine in their default state, but feel free to change any parameters if you need to.
-
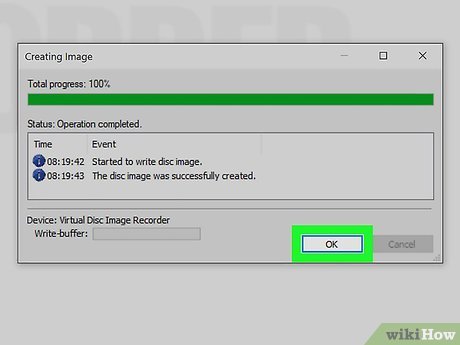
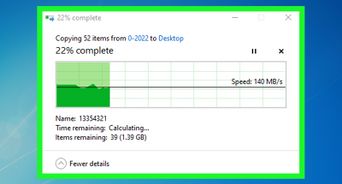
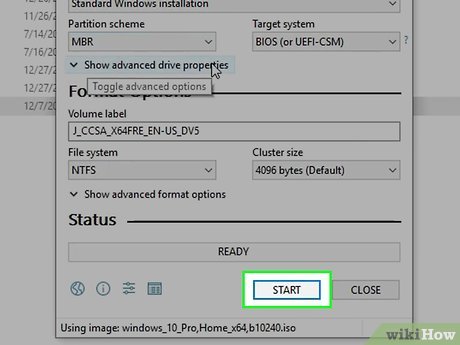 8Click Start to create the drive. Rufus will now copy the image file to the drive, which will make the drive bootable upon completion. This may take several minutes. When the drive is ready, click Close at the bottom-right to exit Rufus.
Method 2
Method 2 of 4:
Using Mac
-
 1Download or create an image file. To create a bootable USB flash drive, you’ll need a bootable image. Image files usually end with “.iso,” “.img,” or “.dmg.” If you already have an image file you want to turn into a bootable USB drive, you’re good to go!
- For example, if you want to create a bootable Ubuntu installation drive, download the Ubuntu ISO from https://ubuntu.com/download/desktop.
-
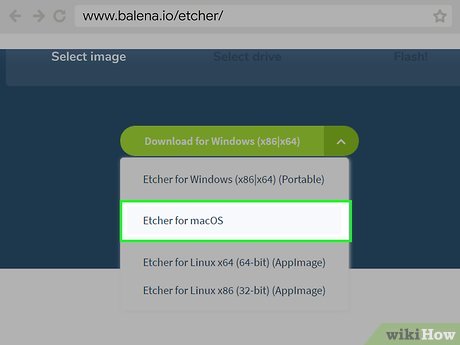 2Download Etcher. Etcher is a free, widely-recommended tool that allows you to create bootable USB flash drives from image files on your Mac.[3]
To download the installer, go to https://www.balena.io/etcher and click the Download for macOS option below the animation. -
 3Insert a USB flash drive. Your USB flash drive should plug into one of the rectangular or oval USB or USB-C ports on your computer’s housing. Traditional flash drives only fit one way, so don’t force the drive if it doesn’t fit!
- Warning: Creating a bootable disk will overwrite and erase any data that is already on the USB drive. If there are any files on the USB drive that you don’t want to lose, be sure to back them up before you start. You will also not be able to use the USB drive to store files or data after it is made into a bootable disk.
- The flash drive should be at least 16 GB to accommodate most operating system files.
-
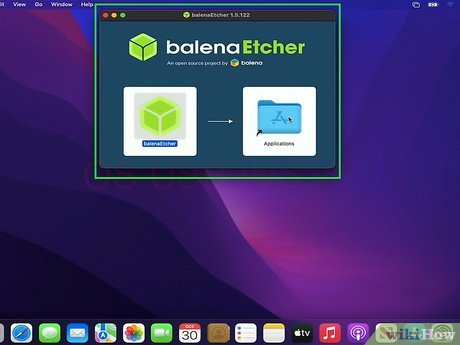 4Install Etcher. By default, your downloaded files can be found in your Downloads folder. Double-click the balenaEtcher-1.10.2.dmgfile (version number may vary) in your Downloads folder or web browser. Then drag the Etcher icon into your Applications folder.
 -
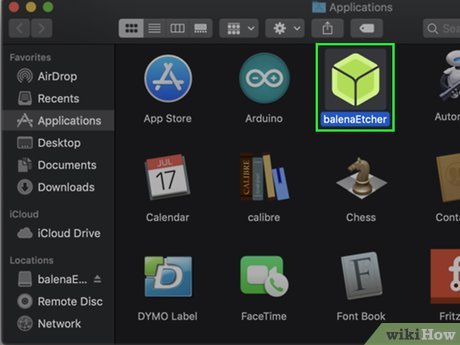 5Open Etcher To do so, open your Applications folder in Finder and double-click the Etcher.app file.
 -
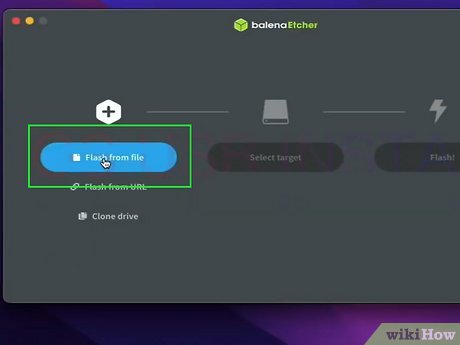 6Select Flash from file. It’s the blue button on the left that is highlighted when you open Etcher.
 -
 7Select the image file. This is the “.iso,” or “.img,” file you’re using to create the bootable USB drive. If you just downloaded the image file, it’ll probably be in your Downloads folder. Select the image file and click Open.
 -
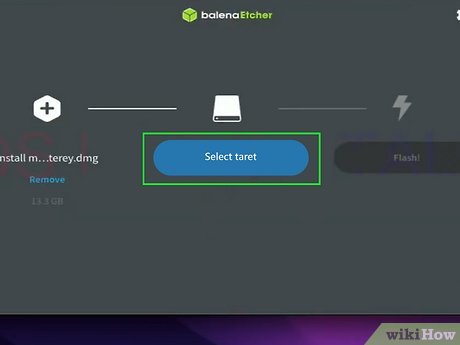 8Click Select taret. It’s the blue button below the icon that resembles a hard drive. Click this button.
 -
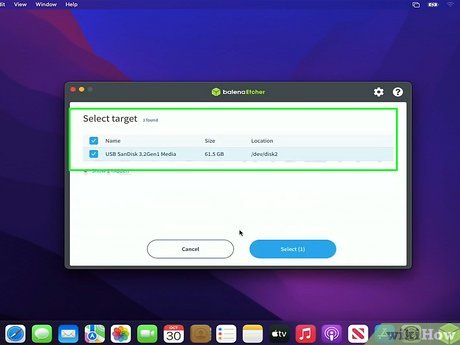 9Select your flash drive. To do so, click the checkbox next to your flash drive and then click Select in the lower-right corner.
- If the flash drive is already displayed below the icon that resembles a hard drive, go ahead and skip this stop. If a flash drive is already displayed but it is not the correct drive, click Change below the drive. Then click the checkbox next to the correct drive and click Select.
-
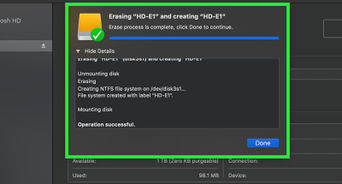
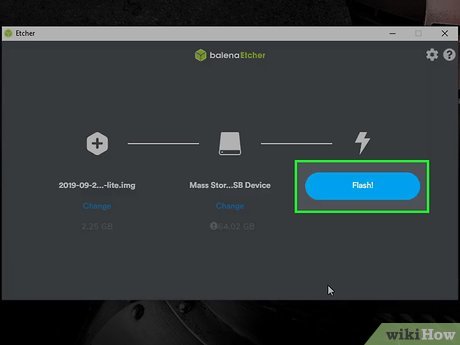 10Click Flash to create the bootable USB drive. Etcher will now copy the image file to your flash drive, which makes it bootable. When the process is complete, you’ll see a success message.
 -
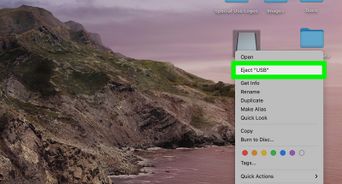
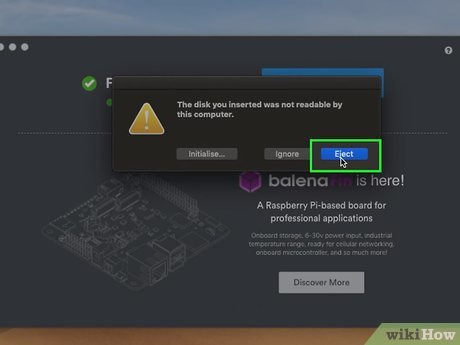 11Click Eject if you see a disk error. If you see an error that says “The disk you inserted was not readable by this computer,” don’t worry—just click Eject instead of “Initialize,” and then unplug the drive. You can then use the drive to boot when you wish.
Method 3
Method 3 of 4:
Creating a Windows Recovery Drive
-
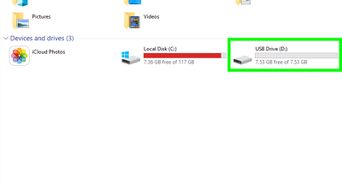
 1Insert a USB drive that’s 16 GB or larger. If you ever experience problems booting into Windows 10, having a bootable Windows recovery drive gives you access to troubleshooting tools and, if worse comes to worse, allows you to reinstall Windows. You can create a recovery drive in both Windows 10 and Windows 11.
- Warning: Creating a recovery drive will delete any files that were on the drive already. If there are files on the USB drive that you don’t want to lose, be sure to back them up before you start.
- Warning: You won’t be able to use your recovery drive for other things, such as file storage, once you make it a bootable recovery drive.
-
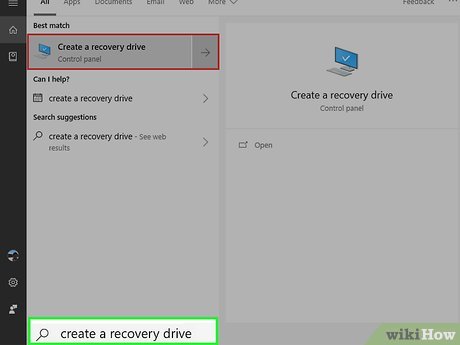 2Open the Windows Start menu and type create a recovery drive. This will display a list of search results. The Windows Start menu is the button with the Windows logo in the taskbar at the bottom of the screen.[4]
- If you don’t see the search bar after clicking the Start menu, click the circle or magnifying glass to its right.
-
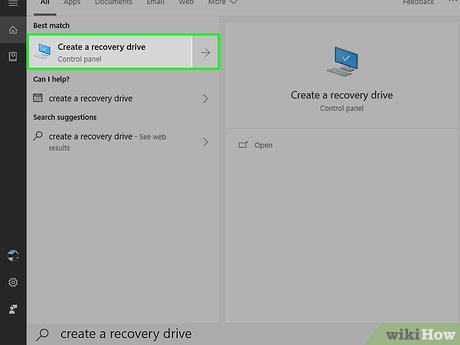 3Click Create a recovery drive in the search results. It has an icon that resembles a computer screen with a checkmark over it. This opens the Recovery Drive creation tool.
- You may have to click Yes to start the application.
-
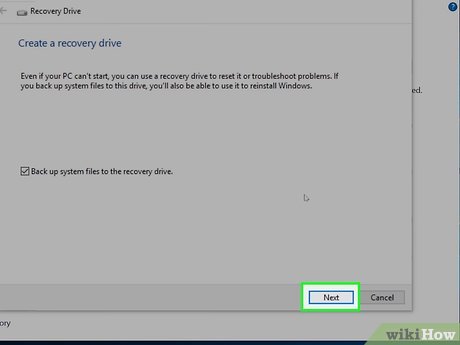 4Check the box beside “Back up system files to the recovery drive” and click Next. This option should be selected by default, but it’s a good idea to make sure. Windows will then scan for your USB drive. This may take a few minutes.
 -
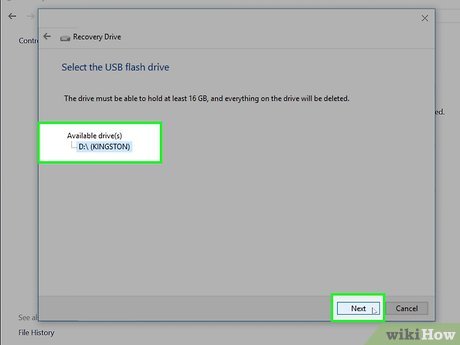 5Select your USB drive and click Next. A warning message will appear, letting you know that everything will be erased if you continue.
 -
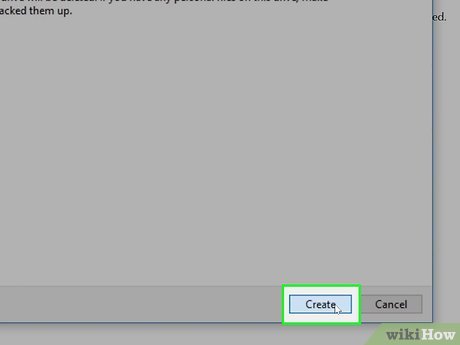 6Review the warning message and click Create. This reformats the USB drive and installs the Windows recovery media. This process may take several minutes.
 -
 7Click Finish to close the window. Your bootable Windows 10 recovery drive is now ready for use.
Method 4
Method 4 of 4:
Creating a Bootable Installer for a Mac
-
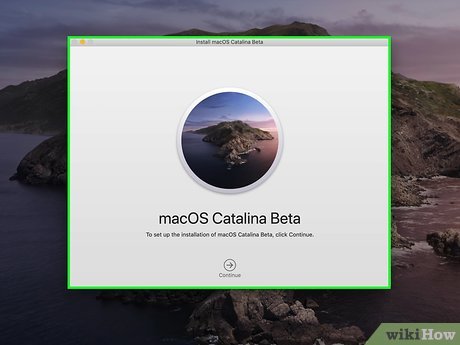 1Download macOS. If you need to be able to install macOS from a USB drive, you can use this method to create the drive. In general, there’s no need for the average user to do this—everything you need to upgrade or reinstall macOS is built into the computer already. But if you need to install macOS on multiple computers, or {{Build-a-Hackintosh|make a Hackintosh]], a USB drive will be helpful. MacOS Catalina, Mojave, High Sierra, Big Sur, and Monterey can all be downloaded from the Mac App Store.[5]
- For example, if you want to create a bootable Catalina disk, click this link to go to the Catalina page on the Mac App Store, click GET, and download the installers. Just don’t click Install—you just need the files.
- If you already have the version you’re trying to download, you’ll see a warning message—just click Continue to save the installer to your Applications folder.[6]
- If the installer runs automatically, close the window.
-
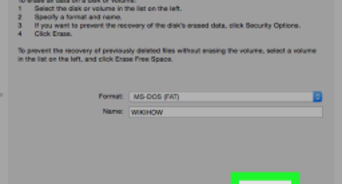
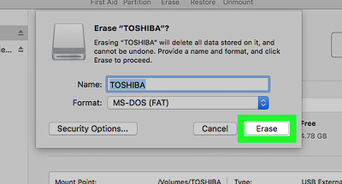
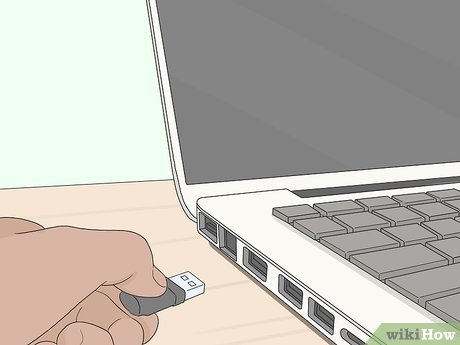 2Insert a USB flash drive. Your flash drive should plug into one of the rectangular or oval USB or USB-C ports on your Mac’s housing. Traditional flash drives only fit one way, so don’t force the drive if it doesn’t fit. The drive should be at least 12 GB and formatted as Mac OS Extended.
- All of the data on your drive will be deleted during this process. If there’s anything you want to keep, back up your files now.
-
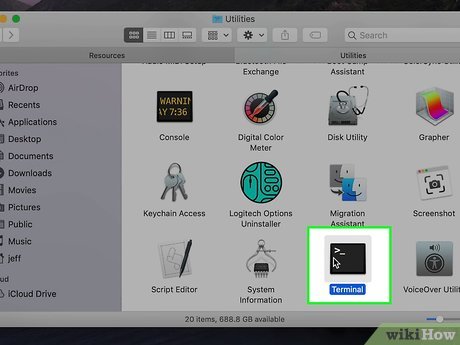 3Open a Terminal window. To open the Terminal, click the magnifying glass icon in the upper-right corner and type “Terminal.” Then click the Terminal app, which has an icon that resembles a black screen with a white cursor. Alternatively, you can find the Terminal app in the Applications folder under “Utilities.”
 -
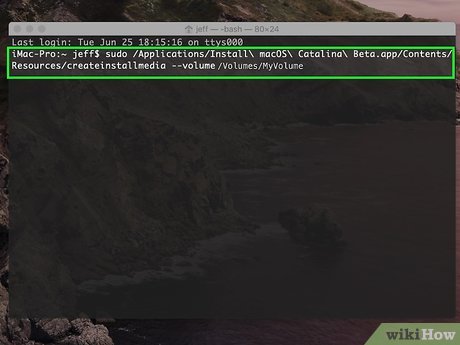 4Enter the command for your version of macOS. Type or paste the appropriate command for your operating system, and then press the Return key to run it The commands are as follows:
- El Capitan: sudo /Applications/Install OS X El Capitan.app/Contents/Resources/createinstallmedia --volume /Volumes/MyVolume --applicationpath /Applications/Install OS X El Capitan.app
- Catalina: sudo /Applications/Install macOS Catalina.app/Contents/Resources/createinstallmedia --volume /Volumes/MyVolume
- Mojave: sudo /Applications/Install macOS Mojave.app/Contents/Resources/createinstallmedia --volume /Volumes/MyVolume
- High Sierra: sudo /Applications/Install macOS High Sierra.app/Contents/Resources/createinstallmedia --volume /Volumes/MyVolume
- Big Sur: sudo /Applications/Install macOS Big Sur.app/Contents/Resources/createinstallmedia --volume /Volumes/MyVolume
- Monterey: sudo /Applications/Install macOS Monterey.app/Contents/Resources/createinstallmedia --volume /Volumes/MyVolume
- Ventura: sudo /Applications/Install macOS Ventura.app/Contents/Resources/createinstallmedia --volume /Volumes/MyVolume
-
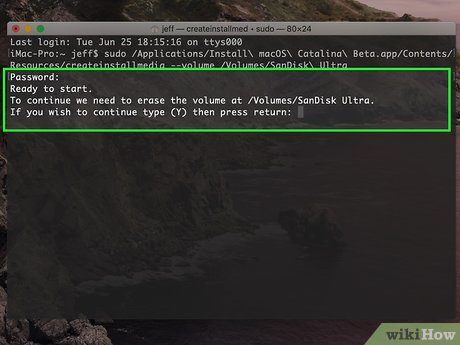 5Enter your administrator password and press ⏎ Return. This runs the command and prompts you to confirm.
 -
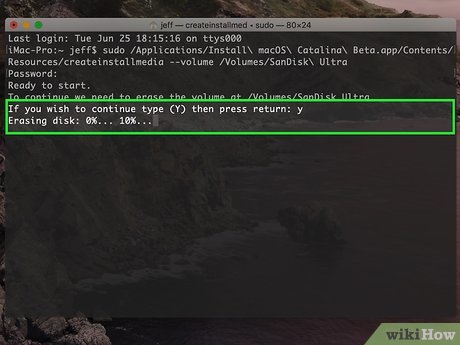 6Press the y key to confirm and then press ⏎ Return. This creates an image of the installation files on the USB drive. When the process is complete, you’ll see the word “Done” and return to the prompt. This means you can eject the drive and use it to boot this or another Mac.
Tips
Submit a Tip
All tip submissions are carefully reviewed before being published
Thanks for submitting a tip for review!
You Might Also Like
[ad_2]
Source link : https://www.wikihow.com/Make-a-USB-Bootable

